당신은 주제를 찾고 있습니까 “아두 이노 esp8266 데이터 전송 – Arduino esp8266 adapter – 아두이노 esp8266 전용 어댑터 사용하여 wifi 연결 후 공공 데이터 가져오기 – 날씨,교통,질병등 통계데이터“? 다음 카테고리의 웹사이트 https://kk.taphoamini.com 에서 귀하의 모든 질문에 답변해 드립니다: https://kk.taphoamini.com/wiki. 바로 아래에서 답을 찾을 수 있습니다. 작성자 쪼이 이(가) 작성한 기사에는 조회수 4,606회 및 좋아요 61개 개의 좋아요가 있습니다.
- ESP-01 모듈 및 온습도 센서 연결 ESP-01(ESP8266) 모듈은 기존대로 연결하고 온습도 센서(DHT11) 모듈의 Data output pin을 아두이노 pin 4번과 연결합니다. …
- 프로그램 코딩 스케치를 통해 프로그램을 코딩합니다. …
- 데이터 전송 확인
Table of Contents
아두 이노 esp8266 데이터 전송 주제에 대한 동영상 보기
여기에서 이 주제에 대한 비디오를 시청하십시오. 주의 깊게 살펴보고 읽고 있는 내용에 대한 피드백을 제공하세요!
d여기에서 Arduino esp8266 adapter – 아두이노 esp8266 전용 어댑터 사용하여 wifi 연결 후 공공 데이터 가져오기 – 날씨,교통,질병등 통계데이터 – 아두 이노 esp8266 데이터 전송 주제에 대한 세부정보를 참조하세요
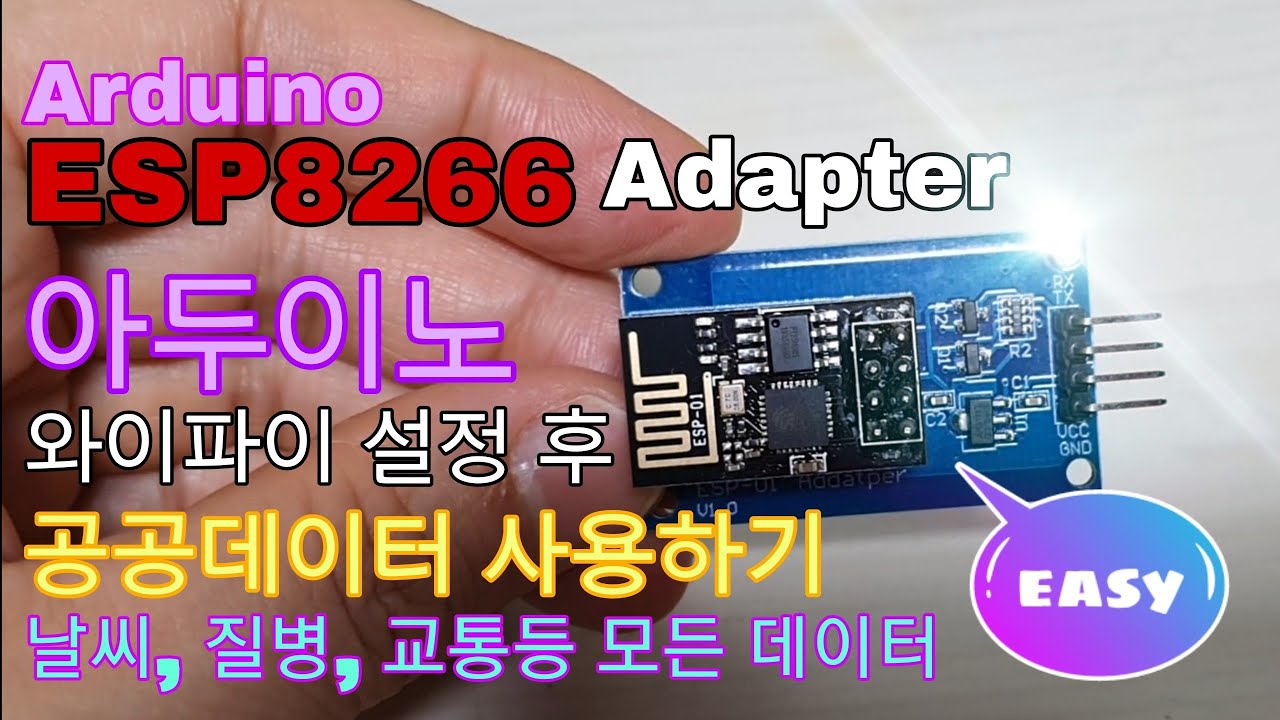
esp8266 어뎁터를 사용하여 안정적이고 깔끔한 회로구성이 가능합니다.
공공 데이터(미세먼지, 날씨, 코로나 수치, 교통등)를 활용하는 방법을 소개합니다.
펌웨어 업데이트 이유
ESP8266은 기본적으로 115200 보드레이트를 갖음.
아두이노 우노의 SoftwareSerial는 115200 보드레이트를 지원하지 않는다.
ESP8266의 보드레이트를 낮추기 위해서는 펌웨어 업데이트가 필요함.
공공데이터 포털
www.data.go.kr
ㄴ 한국환경공단_대기오염정보 사용
******************************************************************************************
펌웨어 업데이트 프로그램 다운로드
https://docs.google.com/file/d/0B3dUKfqzZnlwVGc1YnFyUjgxelE/edit
펌웨어 다운로드
https://docs.google.com/file/d/0B3dUKfqzZnlwdUJUc2hkZDUyVjA/edit
한글 폴더명에 저장하지 않는다.
ESP8266 개발 라이브러리
https://github.com/Diaoul/arduino-ESP8266
영상내 사용한 아두이노 코드 및 회로도
https://github.com/faith79/down/tree/master/arduino_code — esp8266_test.zip
******************************************************************************************
******************************************************************************************
AT커맨드 시작
AT
펌웨어 버전 확인
AT+GMR
로컬 아이피 주소 가져오기
AT+CIFSR
mode를 client로 변경
AT+CWMODE=1
mode 확인
AT+CWMODE?
AP 목록 조회
AT+CWLAP
AP 연결
AT+CWJAP=\”와이파이아이디\
아두 이노 esp8266 데이터 전송 주제에 대한 자세한 내용은 여기를 참조하세요.
MFK_075 : 아두이노 WiFi 통신하기 1 (서버와 데이터 주고받기)
그리고 모듈에서는 0~30까지의 숫자를 반복적으로 1초마다 전송하게 … 해당 제품은 NodeMCU LUA 개발 환경과 아두이노 스케치 개발 환경을 지원하며.
Source: m.blog.naver.com
Date Published: 9/25/2021
View: 5481
아두이노와 ESP8266으로 wifi에 연결해서 웹서버 만드고, 센서 …
아두이노에 ESP8266 모듈을 장착하면 아두이노로 wifi연결을 통해 인터넷에 접속할. … 웹서버에 올라와있는 데이터 값을 불러와서 사용할 수 있다.
Source: diyver.tistory.com
Date Published: 12/26/2022
View: 1871
ESP8266 – ARDUINO IDE 예제 (WiFi 통신) | Hard Copy World
본 문서는 아두이노 개발환경(IDE)를 이용해서 ESP8266 모듈을 다루는 예제들을 … 바를 움직이면 웹 소켓으로 ESP8266 모듈에 데이터를 전송합니다.
Source: www.hardcopyworld.com
Date Published: 1/13/2022
View: 2150
[Esp8266] 드디어!! Esp8266을 인터넷에 접속 시켜보자!
이에 대한 추가 정보 아두 이노 와이파이 데이터 전송 주제에 대해서는 다음 문서를 참조하십시오. 아이디어가 있으면 기사 아래에 댓글을 달거나 주제에 …
Source: ko.nataviguides.com
Date Published: 3/29/2022
View: 6371
이노 아두 esp8266 데이터 전송 [G0E864] – mapro-spb.ru
아두 이노 esp8266 데이터 전송. 펌웨어를 바꿀 필요는 없지만 아래 방법으로 속도를 낮추어 사용하자 011] 앱과 Firebase로 스마트홈 제어하기 아두 …
Source: 76.mapro-spb.ru
Date Published: 3/2/2021
View: 7476
아두 이노 와이파이 데이터 전송 | [Esp8266] 드디어!! Esp8266 …
d여기에서 [ESP8266] 드디어!! ESP8266을 인터넷에 접속 시켜보자! – 아두 이노 와이파이 데이터 전송 주제에 대한 세부정보를 참조하세요.
Source: you.xosotanphat.com
Date Published: 11/23/2022
View: 9833
아두이노와 ESP8266을 활용하여 센싱한 데이터의 …
본 문서에서는 아두이노 보드와 ESP8266 WiFi모듈, 그리고 DHT11 온습도센서를 이용, 센싱한 온도와 습도를 네트워크로 전송하면 Bitnami WordPress가 …
Source: horae.tistory.com
Date Published: 7/23/2021
View: 4389
nodemcu esp8266 예제 | ceskycestovatel.cz
지금은 일부 데이터 또는 문자열을 저장하는 TCP 서버를 만들고 싶어하고 그 … 아두 이노 IDE에 ESP8266 추가 기능을 설치한 다음 코드를 업로드하기만 하면 됩니다.
Source: www.ceskycestovatel.cz
Date Published: 6/12/2021
View: 1987
주제와 관련된 이미지 아두 이노 esp8266 데이터 전송
주제와 관련된 더 많은 사진을 참조하십시오 Arduino esp8266 adapter – 아두이노 esp8266 전용 어댑터 사용하여 wifi 연결 후 공공 데이터 가져오기 – 날씨,교통,질병등 통계데이터. 댓글에서 더 많은 관련 이미지를 보거나 필요한 경우 더 많은 관련 기사를 볼 수 있습니다.
주제에 대한 기사 평가 아두 이노 esp8266 데이터 전송
- Author: 쪼이
- Views: 조회수 4,606회
- Likes: 좋아요 61개
- Date Published: 2021. 2. 3.
- Video Url link: https://www.youtube.com/watch?v=7RgDLzgJBzI
아두이노 홈IoT 서버 활용 3: ESP8266(ESP-01) 이용하여 MySQL에 데이터 저장하는 프로그램 코딩
반응형
드디어 아두이노(Arduino) 홈IoT 서버 활용 세 번째 포스팅으로 아두이노에서 온습도 센서(Temperature and Humidity sensor)로 측정된 데이터를 Wifi(ESP-01: ESP8266) 모듈을 사용해서 MySQL (DB서버)에 저장하는 내용이 되겠습니다. 다들 아시겠만 서버를 만든 궁극적인 목적은 아두이노를 이용하여 홈IoT를 구축하는 것이고 그 과정 중 가장 핵심이 될 것 같습니다.
A.P.M (Apache, PMP, MySQL)으로 만든 서버를 홈IoT를 위해 사용하려면 센서에서 측정된 데이터가 DB서버에 수집이 되어야 하고 이는 무선 통신으로 이루어져야 IoT 구축의 의미가 있습니다. 그래서 우선 가장 기본적인 온습도 센서를 활용하여 Wifi를 통해 데이터를 송신하여 MySQL의 데이터테이블(Datatable)에 저장되는 방법에 대해 알아보겠습니다.
우선 온습도 센서 사용법과 Wifi를 사용하기 위해 ESP-01(ESP8266) 모듈 사용법을 알고 있어야 하고, APM 서버가 구축이 사전에 진행되어야 합니다. 혹시 준비가 필요하시면 내용이 정리된 포스팅을 링크 걸어두니 참조 하셔서 3가지 모두 준비된 상태에서 계속 진행 부탁드립니다.
준비가 다 되셨으면 진행해보겠습니다. 다음 순서로 진행하겠습니다.
1. ESP-01 모듈 및 온습도 센서 연결
2. 프로그램 코딩
3. 데이터 전송 확인
1. ESP-01 모듈 및 온습도 센서 연결
ESP-01(ESP8266) 모듈은 기존대로 연결하고 온습도 센서(DHT11) 모듈의 Data output pin을 아두이노 pin 4번과 연결합니다. 그리고 DHT11은 구동 전압이 3~5V로 3.3V로 구동 가능하기 때문에 VCC pin과 GND pin은 아두이노의 3.3V Pin 및 GND pin에 각각 연결합니다. 미리 양해 부탁드렸지만 각각 모듈의 자세한 내용과 사용방법은 앞서 링크드린 포스팅에서 참조 부탁드립니다.
아두이노(Arduino)와 Wifi (ESP-01: ESP8266)모듈 및 온습도 센서(DHT11) 모듈 연결하기
2. 프로그램 코딩
스케치를 통해 프로그램을 코딩합니다. 프로그램 로직(logic) 순서는 void setup전에 Wifi 접속 명령어 ‘connetWifi()’및 데이터를 전송하는 명령어 ‘httpclient()’, 온습도 센서(DHT11)를 설정합니다. 그리고 void setup에서 AT command를 통해 Wifi에 접속하고 void loop에서 온습도를 측정한 후 AT command를 통해 사전에 만들어둔 process.php 프로그램을 통해 MySQL에 온습도 데이터를 저장하는 순서로 이루어집니다.
프로그램 코딩 내용은 바로 앞 포스팅인 “아두이노 홈IoT 서버 활용2″에서 사용했던 명령어들과 방법을 기반으로 하고 있습니다. 코딩이 어려우신 분들은 반드시 앞의 포스팅을 참조 부탁드립니다.
#include
#include dht DHT; #define DHT11_PIN 4 float humi; //Stores humidity value float temp; //Stores temperature value SoftwareSerial mySerial(2,3); //RX,TX String ssid = “WIFI 아이디”; String PASSWORD = “비밀번호”; String host = “내 컴퓨터 아이피”; void connectWifi(){ String join =”AT+CWJAP=\””+ssid+”\”,\””+PASSWORD+”\””; Serial.println(“Connect Wifi…”); mySerial.println(join); delay(10000); if(mySerial.find(“OK”)) { Serial.print(“WIFI connect “); }else { Serial.println(“connect timeout
“); } delay(1000); } void httpclient(String char_input){ delay(100); Serial.println(“connect TCP…”); mySerial.println(“AT+CIPSTART=\”TCP\”,\””+host+”\”,8787″); delay(500); if(Serial.find(“ERROR”)) return; Serial.println(“Send data…”); String url=char_input; String cmd=”GET /process.php?temp=”+url+” HTTP/1.0\r
\r
“; mySerial.print(“AT+CIPSEND=”); mySerial.println(cmd.length()); Serial.print(“AT+CIPSEND=”); Serial.println(cmd.length()); if(mySerial.find(“>”)) { Serial.print(“>”); }else { mySerial.println(“AT+CIPCLOSE”); Serial.println(“connect timeout”); delay(1000); return; } delay(500); mySerial.println(cmd); Serial.println(cmd); delay(100); if(Serial.find(“ERROR”)) return; mySerial.println(“AT+CIPCLOSE”); delay(100); } void setup() { Serial.begin(9600); mySerial.begin(9600); connectWifi(); delay(500); } void loop() { DHT.read11(DHT11_PIN); humi = DHT.humidity; temp = DHT.temperature; String str_output = String(temp)+”&humi=”+String(humi); delay(1000); httpclient(str_output); delay(1000); //Serial.find(“+IPD”); while (mySerial.available()) { char response = mySerial.read(); Serial.write(response); if(response==’\r’) Serial.print(‘
‘); } Serial.println(”
==================================
“); delay(2000); }
3. 데이터 전송 확인
우선 시리얼모니터(Serial Monitor)를 실행하여 프로그램이 정상적으로 동작하는지 확인합니다. 프로그램 코딩 시 출력 명령을 내린 문자가 아래와 같이 나오는지 확인할 수 있습니다. 프로그램 코딩에서도 알 수 있었듯이 AT Command로 먼저 Wifi를 접속 후 AT_CIPSEND 명령어를 통해 이전 포스팅에서 실행했던 거와 동일하게 process.php 프로그램을 통해 temp=30.5, humi=41.1 로 전송하는 것을 확인할 수 있습니다. 그리고 반복으로 다음 측정 데이터인 temp=31.2, humi=40.1 을 또 전송합니다. 이렇게 측정하고 송신하기를 계속 반복하여 동작합니다.
그럼 MySQL에 접속하여 데이터가 저장되었는지 확인해 보겠습니다. 앞서 APMSetup으로 웹서버와 DB서버 구성할 때 만들었던 데이터베이스 tempnhumi 안의 테이블에 측정된 데이터가 지속적으로 저장되는 것을 확인할 수 있습니다. 저는 여러 번 시험하느라 앞에 많은 데이터가 있는데요 ㅎㅎ 시리얼 모니터에서 확인한 온습도 데이터 temp=30.5, humi=41.1 와 다음 측정 데이터 temp=31.2, humi=40.1 가 네모 박스로 표시한 곳에 순서대로 저장된 것을 확인할 수 있습니다. 와~~ 우!! 놀랍죠? (제가 너무 놀라워서 ㅎㅎ) 그 뒤로도 계속 데이터가 들어오고 있습니다.
여기까지 아두이노(Arduino) 홈IoT 서버 활용으로 온습도 센서(Temperature and Humidity sensor)로 측정한 데이터를 DB서버 MySQL에 전송하여 저장하는 방법을 알아보았습니다.
이제 모든 것이 준비되었습니다 ㅎㅎ 이때까지 알아본 것들을 활용하여 집안의 온도나 습도에 따라 선풍기나 가습기를 동작되게 하거나 집의 밝기에 따라 전등을 켜거나 이런 식으로 집안의 각종 환경 상태에 따라 가전기기들을 동작할 수 있는 홈IoT를 구축할 수 있습니다. 이 모든 것은 사용하는 센서들이 달라지거나 프로그램들이 조금 더 스마트하게 복잡할 뿐 기본은 앞서 알아본 내용들을 기반으로 합니다.
다음 포스팅부터는 조금 더 단계를 넘어가서 활용하는 내용을 다뤄보겠습니다. 오늘도 긴 글 읽어 주셔서 감사합니다 ^^
075 : 아두이노 WiFi 통신하기 1 (서버와 데이터 주고받기) : 네이버 블로그
3. 설명 :
이번 키트의 경우에는 본격적인 IoT가 들어갑니다.
IoT의 기본인 서버와 데이터를 주고받는 것을 구현한 키트입니다.
서버에서 데이터를 보내면 해당 데이터를 시리얼 모니터에 보여줍니다.
그리고 모듈에서는 0~30까지의 숫자를 반복적으로 1초마다 전송하게 되어있습니다.
이렇게 데이터를 주고받는 것에 대한 기능이 구현되어 있습니다.
잘 따라 해 보아요!
시작합니다~
4. 제작 사진 :
아두이노와 ESP8266으로 wifi에 연결해서 웹서버 만드고, 센서값 출력하기
<목표>
– 몇년 전부터 아두이노를 통한 IoT 개발이 정말 많이 이루어지고 있다.
자료가 많이 없어서 이렇게 글을 써보려 한다.
아두이노에 ESP8266 모듈을 장착하면 아두이노로 wifi연결을 통해 인터넷에 접속할 수 있다.
그리고 웹 서버도 만들 수 있는데, 이 웹서버를 통해서 센서값 등을 표현시킬 수도 있다.
그 방법을 한번 알아보자.
<준비물>
아두이노, ESP8266 모듈,
또는 아두이노 NodeMCU 같은 ESP8266이 포함된 개발보드,
CDS센서
LED
<회로도>
아날로그 0번에서 CDS 센서값을 읽어오고,
주변이 밝으면 LED를 끄고,
어두우면 LED를 키는 회로를 구성하였다.
필자는 NODE MCU를 이용해서 회로를 구성하였다.
아두이노에 ESP8266 wifi 모듈을 연결하면 똑같이 사용 가능하다.
<코드>
코드 작성에 앞서서
일단 아두이노(프로그램) 세팅을 해주어야 한다.
아두이노 환경설정에서
추가적인 보드 맨니저 URL 을 추가해주어야 한다.
http://arduino.esp8266.com/stable/package_esp8266com_index.json
위의 주소를 추가하면 된다.
그리고 툴>보드>보드매니저 에 들어가서
위의 최신 버전을 설치해주면 된다.
#include
const char* ssid = ” “; // 사용 중 인 와이파이 이름 const char* password = ” “; // 와이파이 패스워드 WiFiServer server(80); void setup() { pinMode(A0,INPUT); pinMode(LED_BUILTIN, OUTPUT); pinMode(12, OUTPUT); Serial.begin(115200); // 시리얼 통신, 속도 115200 delay(10); Serial.println(); // Connect to WiFi network WiFi.mode(WIFI_STA); Serial.println(); Serial.println(); Serial.print(“Connecting to “); Serial.println(ssid); WiFi.begin(ssid, password); while (WiFi.status() != WL_CONNECTED) { delay(100); Serial.print(“.”); } Serial.println(“”); Serial.println(“WiFi connected”); // Start the server server.begin(); Serial.println(“Server started”); // Print the IP address Serial.println(WiFi.localIP()); } void loop() { int val = analogRead(A0); // cds 센서값 저장 delay(50); Serial.println(val); WiFiClient client = server.available(); client.println(“HTTP/1.1 200 OK”); client.println(“Content-Type: text/html”); client.println(“Connection: close”); client.println(“Refresh: 1”); // 자동으로 웹페이지 새로고침 (1초 설정) client.println(); client.println(““); client.println(““); client.println(“ “); //client.println(““); //client.println(“
“); client.println(“
DIYver tistory blog test “); // 웹 서버 페이지 제목 설정 client.println(“ “); client.println(““); client.println(“ Node MCU Sensor Test
“); // 페이지 내용 설정 if (val < 250 ) { client.print("DARK !
“); client.println(“
“); client.println(“LED ON
“); client.println(“
“); client.println(“Sensor Value
“); client.println(val); digitalWrite(LED_BUILTIN, LOW); // LED ON digitalWrite(12, HIGH); // LED ON } else { client.print(“BRIGHT
“); client.println(“
“); client.print(“LED OFF
“); client.println(“
“); client.println(“Sensor Value
“); client.println(val); digitalWrite(LED_BUILTIN, HIGH); // LED OFF digitalWrite(12, LOW); // LED OFF } client.println(“
“); client.println(“
“); client.println(“블로그 주소 https://diyver.tistory.com
“); // 페이지 내용 설정 client.println(“"); client.print(""); }
제일 중요한 것은 윗 줄에 쓴
wifi ssid와 password 를 잘 적어주어야 하다는 것이다.
큰 따옴표 안에 직접 입력해두면 된다.
<실행 결과>
코드 실행은 위의 시연 영상을 확인하면 된다.
아두이노로 wifi에 접속해서 웹서버를 만들었고,
자신이 원하는 제목과 글을 출력할 수 있으며,
실시간으로 센서값을 출력할 수 있는 것을 확인할 수 있다.
참고로 만들어진 웹서버 주소는 공유기를 통해서 알아도 되지만,
코드를 업로드 할 때, 시리얼 모니터를 켜놓고 하면 만들어진 웹서버 주소가 뜨게 된다.
이처럼 아두이노와 ESP8266 모듈만 있더라도 간단한 웹서버를 만들어서 시제품 테스트를 진행할 수 있다.
또한 안드로이드와 IOS 어플을 개발하고,
웹서버에 올라와있는 데이터 값을 불러와서 사용할 수 있다.
웹서버 내용은 HTML 을 따른는데,
우리가 컴퓨터로 다루는 HTML에 비하면 사용할 수 있는 것이 제한적이다.
일단 이미지를 올리지 못한다는 것이 좀 단점이다.
다른 방법이 있겠지만, 쉽지가 않다는 뜻이다.
아두이노 코딩 다루기도 벅찬데 HTML 까지 알아야 하다니;;
아무튼 이정도만 알아도 어지간한 상황에서 구현하고 싶은 것들은 다 구현할 수 있다.
※ 궁금하시거나 질문사항이 있으시면 댓글로 작성해주시면 답변해 드릴 수 있는 부분에서 친절히 답변드리겠습니다!
ESP8266 – ARDUINO IDE 예제 (WiFi 통신)
본 문서는 아두이노 개발환경(IDE)를 이용해서 ESP8266 모듈을 다루는 예제들을 포함하고 있습니다.
.
ESP8266을 위한 다양한 예제가 이미 갖추어져 있습니다. [Arduino IDE – File – Examples – ESP8266xxx] 예제들을 보면 다양한 기능들을 구현하는 방법이 나옵니다. 여기서 소개하는 예제는 NodeMCU V1 (ESP12E 기반) 보드에서 동작 테스트를 한 예제들입니다. 그리고 소개를 위해 예제 코드에 약간의 변형이 가해졌습니다.
NodeMCU 보드는 아래와 같이 핀이 배치되어 있으며, 펌웨어 업로드를 위해 필요한 FTDI 모듈을 내장하고 있어서 PC에 USB 연결만 하면 사용할 수 있습니다.
.
WiFi 통신 기본
WiFi 통신을 위한 기초 예제입니다. 아래에서 소스코드를 구하실 수 있습니다.
이 소스코드는 단순히 ESP8266 모듈을 공유기에 연결만 시킵니다. 그리고 그 과정에서 발생되는 WiFi 이벤트를 받아서 처리하는 방법을 설명합니다.
테스트를 위해서는 파일 상단에 공유기(AP)의 SSID, 비밀번호를 지정해줘야 합니다.
const char *ssid = "your_ssid"; const char *password = "your_pass";
소스코드의 setup() 초기화 함수를 보겠습니다.
void setup() { Serial.begin(115200); // delete old config WiFi.disconnect(true); delay(1000); WiFi.onEvent(WiFiEvent); WiFi.begin(ssid, password); Serial.println("Wait for WiFi... "); }
WiFi 가 ESP8266 core에서 제공하는 통신 기능들에 접근할 수 있는 인스턴스입니다. WiFi.onEvent() 함수를 이용해 이벤트가 발생했을 때 실행될 콜백함수를 지정할 수 있습니다.
WiFi.onEvent(WiFiEvent);
위 처럼 지정되어 있으므로 이벤트가 발생하면 WiFiEvent() 함수가 호출됩니다. 이벤트가 발생했을 때 하고 싶은 작업을 WiFiEvent() 함수에 구현하면 됩니다.
사용가능한 함수는 ESP8266WiFiType.h 에서 확인하실 수 있습니다.
typedef enum { WIFI_EVENT_STAMODE_CONNECTED = 0, WIFI_EVENT_STAMODE_DISCONNECTED, WIFI_EVENT_STAMODE_AUTHMODE_CHANGE, WIFI_EVENT_STAMODE_GOT_IP, WIFI_EVENT_STAMODE_DHCP_TIMEOUT, WIFI_EVENT_SOFTAPMODE_STACONNECTED, WIFI_EVENT_SOFTAPMODE_STADISCONNECTED, WIFI_EVENT_SOFTAPMODE_PROBEREQRECVED, WIFI_EVENT_MAX } WiFiEvent_t;
보시다시피 AP에 연결된 후 IP를 받아오는 과정까지 이벤트를 발생합니다.
SSID, 패스워드를 이용해 AP에 연결하는 함수는 setup() 안에 있는 WiFi.begin() 입니다.
WiFi. begin (ssid, password);
.
WiFi Client (HTTP Request)
이번 예제는 ESP8266 모듈을 공유기에 연결하고, 외부의 HTTP 서버에 요청을 보내서 결과(HTML 또는 파일)를 받아오는 예제입니다.
이 문서의 예제들은 모두 아래 SSID, 패스워드를 자신의 환경에 맞게 지정해줘야 동작합니다.
const char *ssid = "your_ssid"; const char *password = "your_pass";
이번 예제에서 HTTP 통신을 통해 받아올 서버도 미리 지정해주세요.
const char* host = "hardcopyworld.com";
먼저 setup() 함수의 내용부터 보겠습니다. 주요 내용만 뽑아내면 아래와 같습니다.
void setup() { ...... WiFi.begin(ssid, password); while (WiFi.status() != WL_CONNECTED) { delay(500); Serial.print("."); } ...... Serial.println("IP address: "); Serial.println(WiFi.localIP()); }
WiFi.begin(ssid, password) 함수를 이용해서 공유기에 연결합니다. 이후 이어지는 while() 반복문은 공유기에 접속할 때까지 기다리기 위해 사용했습니다.
공유기에 접속되면 아래 코드처럼 Serial 통신으로 할당받은 IP를 출력해 주는 것이 편리합니다.
Serial. println (WiFi. localIP ());
loop() 반복함수에서 주기적으로(약 5초 간격) HTTP 요청을 서버로 보냅니다. 그리고 받은 결과를 Serial 통신으로 출력해줍니다. 주요 코드만 발췌하면 아래와 같습니다.
void loop() { delay(5000); ...... // Use WiFiClient class to create TCP connections WiFiClient client; const int httpPort = 80; if (!client.connect(host, httpPort)) { Serial.println("connection failed"); return; } // We now create a URI for the request String url = "/"; // This will send the request to the server client.print(String("GET ") + url + " HTTP/1.1\r
" + "Host: " + host + "\r
" + "Connection: close\r
\r
"); int timeout = millis() + 5000; while (client.available() == 0) { if (timeout - millis() < 0) { Serial.println(">>> Client Timeout !"); client.stop(); return; } } // Read all the lines of the reply from server and print them to Serial while(client.available()){ String line = client.readStringUntil('\r'); Serial.print(line); } }
가장 먼저 나오는 WiFiClient 클래스는 TCP 연결을 만들기 위해 사용합니다. host와 port 를 지정하면 해당 서버에 TCP 연결을 만듭니다. 이때 사용되는 host 변수에는 도메인 이름 [hardcopyworld.com] 이 사용되어야 합니다.
WiFiClient client; const int httpPort = 80; if (!client.connect(host, httpPort)) { Serial.println("connection failed"); return; }
TCP 연결이 성공하면 HTTP Request 형식에 맞게 내용을 작성해서 전송하면 됩니다.
client.print(String("GET ") + url + " HTTP/1.1\r
" + "Host: " + host + "\r
" + "Connection: close\r
\r
");
여기서 url 변수는 host 도메인 내부에서 내가 원하는 리소스까지의 경로입니다. 만약 [http://www.google.com/my/resource.html] 에 요청을 보내고 싶다면 host는 [http://www.google.com] 이 됩니다. url 은 [/my/resource.html] 로 지정해줘야 합니다.
만약 http://google.com 메인 페이지의 내용을 얻고 싶다면 host는 [http://google.com], url은 [/] 로 지정해주면 됩니다.
client.print() 함수를 이용해서 요청이 전송되면 일정 시간 후 응답이 옵니다.
while (client.available() == 0) { if (timeout - millis() < 0) { Serial.println(">>> Client Timeout !"); client.stop(); return; } }
client 의 상태를 체크해서 응답이 왔는지 확인한 코드입니다.
HTTP Response가 도착하면 아래 코드로 한 라인씩 읽어 Serial 통신으로 출력할 수 있습니다. 특별한 기능을 만들고 싶을 때 이 부분을 적절히 수정하면 됩니다.
while(client.available()){ String line = client.readStringUntil('\r'); Serial.print(line); }
.
Web server
이번에는 ESP8266 모듈을 웹 서버로 만드는 방법입니다. 이 방법을 사용하면 외부 장치에서 브라우저로 ESP8266 모듈에 접속해서 HTML 페이지를 볼 수 있습니다. 소스코드는 아래에서…
테스트 전 GPIO13 (D7) 핀에 LED를 하나 연결해두세요. 외부에서 접속 요청이 오면 LED가 켜지도록 만들겁니다.
파일 상단에서 공유기 설정을 해줘야 합니다.
const char *ssid = "your_ssid"; const char *password = "your_pass"; ESP8266WebServer server ( 80 ); const int led = 13;
ESP8266WebServer 클래스에 웹 서버로 동작하기 위한 기능들이 들어 있습니다. 80번 포트로 HTTP 통신을 하도록 지정되어 있습니다. 일반적인 웹 서버의 통신 포트로 브라우저에서 특별히 지정하지 않으면 80번 포트를 사용합니다.
setup 함수의 주요 코드부터 보겠습니다.
void setup ( void ) { ...... WiFi.begin ( ssid, password ); ...... server.on ( "/", handleRoot ); server.on ( "/test.svg", drawGraph ); server.on ( "/inline", []() { server.send ( 200, "text/plain", "this works as well" ); } ); server.onNotFound ( handleNotFound ); ...... server.begin(); ...... }
WiFi.begin() 함수로 공유기에 접속합니다. 이후 공유기 접속을 기다리고 할당받은 IP 주소를 Serial 통신으로 출력해줍니다.
sever.on() 함수부터 본격적인 서버설정 코드입니다. 코드에서는 3개의 URL에 대한 콜백함수를 지정해 줬습니다.
http://192.168.x.x/ : 서버의 루트[/] 경로에 대한 요청은 handleRoot() 콜백함수가 처리
http://192.168.x.x/inline : [/inline] 경로에 대한 요청은 인라인 함수가 처리 – [this works as well] 메시지를 전달
http://192.168.x.x/test.svg : [/test.svg] 경로에 대한 접근은 drawGraph 콜백함수가 처리
만약 위 경로에 해당되지 않는 요청이 올 경우는 handleNotFound() 콜백함수가 처리하도록 지정되어 있습니다.
이상 서버 설정이 끝나면 아래 코드로 서버를 시작합니다.
server. begin ();
loop() 함수에서는 외부에서 접속 요청이 오는지 모니터링 하는 코드가 들어 있을 뿐입니다.
void loop ( void ) { server.handleClient(); }
요청이 들어오면 해당되는 콜백함수가 실행됩니다. handleRoot() 함수를 보시면 HTML 문자열을 client에게 전송하는 방법을 알 수 있습니다.
조금 특이한게 drawGraph() 콜백함수인데, [/test.svg] 파일에 대한 요청이 오면 처리해주는 함수입니다. svg 는 벡터 이미지를 생성하기 위한 XML 파일입니다. svg 파일은 이미지 파일이 아니라 벡터 이미지를 그리기 위한 정보를 XML 텍스트로 담고 있습니다. 이 파일을 브라우저가 받으면 해당 정보대로 이미지를 그려 보여주기 때문에 마치 이미지 파일처럼 쓸 수 있습니다.
그래서 drawGraph() 콜백함수는 일련의 XML 데이터를 문자열로 만들어 전송해줍니다. 브라우저에서 [http://x.x.x.x/test.svg] 경로에 접속해보면 이미지가 보일껍니다.
앞서 handleRoot() 콜백함수가 생성하는 HTML 코드에도 [/test.svg] 이미지가 포함되어 있습니다. 따라서 브라우저는 [/test.svg] 에 대한 요청도 추가로 해서 벡터 이미지가 포함된 화면을 그려줍니다.
.
Web Socket (server)
앞선 예제처럼 웹 서버는 외부에서의 요청이 있을때마다 HTML 페이지를 응답으로 보내줍니다. 그럼 브라우저는 HTML 페이지를 화면에 그려줍니다. 이 방식은 전통적인 웹의 동작 방식이지만 화면 혹은 서버에 데이터 변화가 있는지 확인하기 위해 주기적으로 웹 서버에 (같은 URL 주소에) 요청을 다시 보내고 화면을 다시 그려야 합니다. 그보다는 백그라운드로 서버와 브라우저가 연결되어 양방향으로 통신을 할 수 있다면 불필요한 HTTP 요청을 없애고 화면 일부만 업데이트가 가능할 것입니다.
Web Socket 이 이런 자유로운 통신 방식을 제공해줍니다. HTML5에 포함된 Web Socket은 웹 서버와 클라이언트(브라우저의 JavaScript) 간 TCP/IP 연결을 유지하게 해 줌으로써 양방향 데이터 전송도 지원합니다. 브라우저가 업데이트를 확인하기위해 계속 서버를 체크하지 않고도 서버에서 오는 알림에 반응할 수 있는 push가 가능합니다.
다만, 이 기능을 사용하기 위해서는 비교적 최신의 브라우저를 사용해야 하는 제약이 있습니다. 그리고 당연히 서버에는 WebSocket 통신을 위한 준비가 되어 있어야 합니다. 이번 예제는 ESP8266 모듈에 웹 서버 + 웹 소켓 기능을 심을겁니다.
웹 소켓 사용을 위해서는 라이브러리를 추가로 설치해줘야 합니다.
그리고 불행히도, 현재(2016, 01 기준) 아두이노 IDE – 패키지 매니저로 배포되는 ESP8266 core 에는 라이브러리 지원에 필요한 코드가 일부 빠져있어서 에러가 발생합니다. 따라서 이번 예제를 테스트하기 위해서는 최신 ESP8266 core for Arduino 코드를 받아 수동으로 업데이트 해줘야 합니다.
웹 소켓 테스트 예제는 아래 링크에 있습니다.
ino 스케치 파일의 상단에 보면 웹 서버, 웹 소켓을 위한 인스턴스가 선언되어 있습니다. 코드를 보면 아실 수 있듯 웹 서버와 웹소켓은 각각 80번, 81번 포트를 사용합니다.
ESP8266WebServer server = ESP8266WebServer(80); WebSocketsServer webSocket = WebSocketsServer(81);
setup() 함수부터 보겠습니다.
void setup() { ...... WiFiMulti.addAP("your_ssid", "your_pass"); ...... webSocket.begin(); webSocket.onEvent(webSocketEvent); ...... // handle index server.on("/", []() { // send index.html server.send(200, "text/html", html_string); }); server.begin(); ...... }
앞선 예제와는 조금 다르게 WiFiMulti.addAP() 함수로 공유기엔 연결 했습니다. 별 차이 없습니다만, 여러개의 AP를 등록해서 자동 연결되도록 관리해주는 방법입니다.
이어서 웹 소켓을 초기화하고 웹 소켓 관련 이벤트(연결, 데이터수신, 종료)가 발생하면 처래해 줄 콜백 함수 webSocketEvent()를 등록 했습니다.
웹 서버는 [http://192.168.x.x] 처럼 루트[/] 경로에 대한 요청이 올 때 html_string 텍스트를 전달하도록 해뒀습니다. html_string은 html.h 파일에 들어있는 HTML 코드입니다.
HTML 코드에는 같은 서버의 81번 포트에 웹 소켓으로 연결하도록 자바스크립트 코드가 들어가 있습니다. 그리고 웹 소켓으로 RGB LED 밝기를 조절하기 위한 코드가 들어가 있습니다.
즉, 브라우저로 ESP8266 모듈에 [http://192.168.x.x] 경로로 접속하면 HTML 코드를 다운로드 받아 브라우저가 화면을 그려줍니다. 그리고 백그라운드로 웹 소켓을 ESP8266 모듈과 연결해둡니다. 브라우저 화면에는 3개의 슬라이드 바가 있는데, 바를 움직이면 웹 소켓으로 ESP8266 모듈에 데이터를 전송합니다. 그럼 ESP8266 모듈이 데이터를 받아 RGB LED 색상을 조절합니다.
ESP8266 모듈이 데이터를 받으면 앞서 등록한 webSocketEvent() 콜백 함수가 호출됩니다.
void webSocketEvent(uint8_t num, WStype_t type, uint8_t * payload, size_t lenght) { switch(type) { case WStype_DISCONNECTED: break; case WStype_CONNECTED: { ...... webSocket.sendTXT(num, "Connected"); } break; case WStype_TEXT: USE_SERIAL.printf("[%u] get Text: %s
", num, payload); if(payload[0] == '#') { // decode rgb data uint32_t rgb = (uint32_t) strtol((const char *) &payload[1], NULL, 16); analogWrite(LED_RED, ((rgb >> 16) & 0xFF)); analogWrite(LED_GREEN, ((rgb >> 8) & 0xFF)); analogWrite(LED_BLUE, ((rgb >> 0) & 0xFF)); } break; } }
웹 소켓 연결 요청이 와서 연결되면 case WStype_CONNECTED: 부분이 실행됩니다. 여기 코드를 보시면 웹 소켓으로 데이터를 보내는 방법을 알 수 있습니다. 아래 함수를 이용해서 상대방(브라우저)에게 데이터를 보냅니다.
webSocket. sendTXT (num, “ Connected “ );
위 함수는 특정 상대방에게 데이터를 보내는 방법입니다. 연결된 장치들 모두에게 데이터를 보낼 때는 아래 함수를 사용하면 됩니다.
webSocket. broadcastTXT ( “ Message from ESP8266!! “ );
case WStype_CONNECTED: 여기에 적힌 코드들은 웹 소켓으로 데이터를 받았을 때를 위한 것입니다. 데이터를 분석해서 RGB 색상값을 얻은 뒤, RGB LED 색을 조절하겠죠.
이 외에도 2대의 ESP8266 모듈을 이용해 재밌는 실험을 해볼 수 있습니다. 하나의 ESP8266 모듈은 웹 소켓 서버로 만들고, 다른 한 대는 웹 소켓 클라이언트로 만들어서 두 대의 ESP8266 모듈이 웹 소켓 통신을 하도록 하는겁니다.
이 방법은 아래의 두 예제 파일을 참고해서 직접 만들어 보시길 바랍니다.
HTTP 서버, 클라이언트 기능을 모두 활용하는 아래 예제도 참고하세요.
https://github.com/amiravni/ESP8266-Water-Heater-Control/blob/master/TheDude.ino
PS.
[Esp8266] 드디어!! Esp8266을 인터넷에 접속 시켜보자! | 아두 이노 와이파이 데이터 전송 새로운 업데이트
We are using cookies to give you the best experience on our website.
You can find out more about which cookies we are using or switch them off in settings.
아두 이노 와이파이 데이터 전송 | [Esp8266] 드디어!! Esp8266을 인터넷에 접속 시켜보자! 답을 믿으세요
당신은 주제를 찾고 있습니까 “아두 이노 와이파이 데이터 전송 – [ESP8266] 드디어!! ESP8266을 인터넷에 접속 시켜보자!“? 다음 카테고리의 웹사이트 you.xosotanphat.com 에서 귀하의 모든 질문에 답변해 드립니다: https://you.xosotanphat.com/blog. 바로 아래에서 답을 찾을 수 있습니다. 작성자 러봇랩 이(가) 작성한 기사에는 조회수 23,803회 및 좋아요 206개 개의 좋아요가 있습니다.
여기에서 이 주제에 대한 비디오를 시청하십시오. 주의 깊게 살펴보고 읽고 있는 내용에 대한 피드백을 제공하세요!
ESP8266의 주소를 알아내 웹 브라우저에서 열어볼까요?
아두이노 코드는 여기에 (sourcecode) :
https://github.com/LOVOTLAB/youtube/tree/master/ESP8266/webServerLED
//러봇랩
웹사이트: http://www.lovot.co
인스타그램: https://www.instagram.com/lovotlab/
서버에서 데이터를 보내면 해당 데이터를 시리얼 모니터에 보여줍니다. 그리고 모듈에서는 0~30까지의 숫자를 반복적으로 1초마다 전송하게 되어있습니다.
+ 더 읽기
Source: m.blog.naver.com
Date Published: 12/30/2021
View: 3597
이번 글에서는 아두이노 와이파이(wifi) 모듈 ESP-01을 이용하여 wifi AP를 설정하고 스마트폰과 wifi AP 연결을 통한 데이터 전송과 와이파이로 수신 …
+ 여기에 자세히 보기
Source: postpop.tistory.com
Date Published: 6/22/2021
View: 1131
아두이노에 ESP8266 모듈을 장착하면 아두이노로 wifi연결을 통해 인터넷에 접속할. … 웹서버에 올라와있는 데이터 값을 불러와서 사용할 수 있다.
+ 자세한 내용은 여기를 클릭하십시오
Source: diyver.tistory.com
Date Published: 11/7/2022
View: 5709
와이파이 모듈 ESP-01; 모듈연결하기; 보드레이트 변경하기 … VCC -> 아두이노 3.3V, RX -> 아두이노 TX (3번핀) … AT+CIPSEND : 데이터 전송
+ 여기에 보기
Source: infoinno.tistory.com
Date Published: 5/3/2022
View: 4096
본 문서는 아두이노 개발환경(IDE)를 이용해서 ESP8266 모듈을 다루는 예제들을 … 연결을 유지하게 해 줌으로써 양방향 데이터 전송도 지원합니다.
+ 여기에 더 보기
Source: www.hardcopyworld.com
Date Published: 10/7/2022
View: 2595
아두 이노 와이파이 통신 와 관련된 백과사전 검색 결과입니다. 와이파이 · Wi-Fi는 wireless felity(무선 데이터 전송 시스템)의 …
+ 더 읽기
Source: eon.grommash.net
Date Published: 12/4/2021
View: 2077
아두이노 와이파이및 서버php 데이터전송 질문. 디릭 | 2018-10-24 … #define SSID “와이파이아이디” // #define PASS “와이파이 비밀번호” //
+ 더 읽기
Source: kocoafab.cc
Date Published: 3/29/2022
View: 1951
이번에는 웹에서 아두이노를 제어하기위해 HTTP 통신으로 ESP 모듈과 통신해 … 약자로 웹브라우저상에서 HTML 문서를 전송하는 프로토콜을 말합니다.
+ 여기에 자세히 보기
Source: www.robotstory.co.kr
Date Published: 10/30/2022
View: 5199
주제와 관련된 더 많은 사진을 참조하십시오 [ESP8266] 드디어!! ESP8266을 인터넷에 접속 시켜보자!. 댓글에서 더 많은 관련 이미지를 보거나 필요한 경우 더 많은 관련 기사를 볼 수 있습니다.
이번 글에서는 아두이노 와이파이(wifi) 모듈 ESP-01을 이용하여 wifi AP를 설정하고 스마트폰과 wifi AP 연결을 통한 데이터 전송과 와이파이로 수신된 데이터를 시리얼 통신을 통해 아두이노에서 받고 코드를 실행하는 원격제어를 할 수 있도록 코딩해 보자.
ESP-01 pin map
아두이노와 연결하기
TX -> 아두이노 RX
RX -> 아두이노 TX
VCC -> 아두이노 3.3V
CH_PD -> 아두이노 3.3V
GND -> 아두이노 GND
아두이노의 출력 핀 TTL 전압은 5V이고 ESP-01 모듈은 3.3V이다. 따라서 아두이노 TX핀에서 출력되는 신호 전압을 TTL 레벨 쉬프트를 통해 ESP-01 모듈의 RX 핀에 3.3V의 신호 전압으로 변경해주어야 하지만, 테스트상에서는 별 문제가 없어서 아래와 같이 TTL 레벨 쉬프트 없이 연결하였다. 이 연결 방식은 장시간 사용 시 ESP-01 모듈에 손상을 줄 가능성이 있다.
장시간 사용할 예정이라면 아두이노 TTL 레벨 쉬프트를 검색하여 적용하기 바란다.
연결을 하였다면 AT command를 통해 정상 작동 여부를 확인해 보자.
아래 파일을 아두이노에 업로드해준다.
#include #define rxPin 3 #define txPin 2 SoftwareSerial esp01(txPin, rxPin); // SoftwareSerial NAME(TX, RX); void setup() { Serial.begin(115200); //시리얼 모니터 esp01.begin(115200); //와이파이 시리얼 } void loop() { if (esp01.available()) { Serial.write(esp01.read()); //블루투스 측 내용을 시리얼 모니터에 출력 } if (Serial.available()) { esp01.write(Serial.read()); //시리얼 모니터 내용을 블루투스 측에 쓰기 } }
ESP-01의 기본 baud rate는 115200이다. 현재 상태의 작동 여부를 확인하기 위해 하드웨어와 소프트웨어 시리얼 baud rate를 둘 다 115200으로 맞추어 주었다. 115200으로 해놓아도 AT command의 사용에는 지장이 없다.
아두이노 시리얼 모니터의 전송 옵션을 Both NL & CR, 보드 레이트를 115200으로 맞추어 주고 아두이노 시리얼 모니터 입력창에 AT를 입력하고 엔터를 친다.
응답으로 OK가 들어온다면 기기의 정상작동과 연결이 잘 되었음을 확인할 수 있다. 아래 그림처럼 수신된 데이터에 읽을 수 없는 문자가 섞여 있을 수 있다. 하지만 OK만 확인된다면 문제는 없다.
아두이노에서 softwareSerial을 통해 안정적으로 사용하기 위해서는 baud rate를 9600으로 변경해야 한다.
ESP-01의 baud rate를 변경하는 방법으로는 기본 baud rate가 9600으로 설정된 펌웨어를 모듈에 업데이트하는 방법과 AT command를 사용하여 변경해주는 방법이 있는데 이 글에서는 AT command를 사용하여 진행하겠다. 펌웨어 업데이트에 관해서는 인터넷상에 관련 글들이 많이 있으므로 참조하길 바란다.
아두이노 시리얼 모니터 입력창에 AT+UART_DEF=9600,8,1,0,0 를 복사한 뒤 붙여 넣고 엔터를 쳐준다.
아래처럼 OK 응답이 표시된다면 ESP-01의 baud rate가 9600으로 변경된 것이다.
ESP-01의 baud rate가 9600으로 변경되었으니 위의 코드의 baud rate를 115200에서 9600으로 아래 그림과 같이 변경해주고 업로드한다. 그리고 시리얼 모니터의 보드 레이트도 9600으로 변경한 뒤 AT를 입력하여 정상 작동 여부를 확인하면 준비는 끝나게 된다.
확인이 되었으면 스케치 상 보드 레이트를 9600 상태에서 저장을 시켜놓자. 이제 보드 레이트 115200은 사용하지 않게 된다.
ESP-01 wifi 모듈을 이용한 아두이노 원격제어의 방법은 아래와 같다.
ESP-01 모듈을 soft AP로 설정(공유기 기능)하여 스마트폰의 wifi가 AP의 ip로 연결할 수 있게 하고 또한, server로 설정하여 soft AP 통해 연결된 스마트폰이 server로 웹페이지를 요청할 수 있도록 하게 된다. 이렇게 함으로써, 만약 서버의 ip가 192.168.4.1로 설정되었을 경우, 스마트폰 웹브라우저 주소창에 http://192.168.4.1/on 입력하여 서버에 on 페이지에 대한 요청을 할 수 있게 된다. 이때 ESP-01 모듈은 들어온 웹페이지 요청 값을 시리얼 통신을 통해 아두이노에 전송하게 되고 아두이노는 수신된 웹페이지 요청 값을 코드에 따라서 원격제어에 필요한 on 만을 분리해내고 그 값에 해당하는 코드를 실행시켜 아두이노 원격제어를 구현하게 된다. 만약 on에 대한 응답 코드가 아두이노에 설정되어 있다면 아두이노는 시리얼 통신을 통해 ESP-01 모듈에 웹페이지 요청에 대한 응답을 보내라고 명령하게 되고 ESP-01 모듈은 그 명령에 따라 스마트폰에 응답을 보내게 된다. 이러한 과정을 통하여 스마트폰과 아두이노 간의 원격제어용 데이터 송신 및 수신이 이루어지게 된다.
상기의 작업을 수행할 수 있도록 ESP-01를 설정하는데 필요한 AT command에 대해 살펴보자.
AT+RST // ESP-01 리셋 AT+CWMODE=2 // 1 = Station mode (client), 2 = AP mode (host), 3 = AP + Station mode AT+CWSAP=”esp01″,”1234test”,5,3 // AT+CWSAP= softAP SSID, Password, channel id, ecn ecn(보안설정) : 0 = OPEN, 2 = WPA_PSK, 3 = WPA2_PSK, 4 = WPA_WPA2_PSK AT+CIFSR // AP IP 주소 AT+CIPMUX=1 // 0: Single connection, 1: Multiple connections (0 ~ 4), 서버 설정 시 “1” 강제 사항 AT+CIPSERVER=1,80 // AT+CIPSERVER= mode, port mode: 0: Delete server, 1: Create server, port number
상기의 AT command를 앞서 보드 레이트 변경 시와 같이 주석 앞부분을 복사하여 차례대로 아두이노 시리얼 모니터 입력창에 붙여 넣기 한 뒤 엔터를 치면 아래와 같이 ESP-01 모듈이 설정되는 것을 볼 수 있다.
ESP-01 모듈의 soft AP의 기본 설정 ip 주소는 192.168.4.1이다. 현재 soft AP의 주소가 기본 설정값인 192.168.4.1 임을 확인할 수 있다.
스마트폰에서 wifi 장치를 켜게 되면 상기에서 설정한 대로 SSID “esp01″이 검색될 것이다. 클릭하고 설정해 놓은 비밀번호를 입력하고 연결해 보자. 연결 후 네트워크 설정 관리에 들어가 보면 스마트폰이 할당받은 ip 주소를 확인할 수 있다. 아두이노 원격제어에서 우리가 할당받은 ip주소를 사용할 일은 거의 없다. 단지, soft AP의 주소와 비슷하여 혼동을 방지하기 위해 확인이 필요한 것뿐이다.
스마트폰이 soft AP에 접속이 되면 아래와 같이 시리얼 모니터상에 connection id: 0이 연결됐다는 표시와 +IPD,0,459:GET /hi HTTP/1.1 수신 데이터가 표시되고, 접속장비와 soft AP의 ip 주소를 확인할 수 있고 데이터 수신 후에 id 0번의 연결을 끊은걸 확인할 수 있다.
데이터의 수신
+IPD,0,158:GET / HTTP/1.1 // +IPD,id,len:GET /data HTTP/1.1 // id: id no. of connection, len: data length, data: data received
“+IPD,0,158:GET /” 이하가 수신된 데이터이다. 수신 시에는 AT+CIPMUX=1 옵션 설정에 따라 멀티 커넥션 id 0부터 4까지 자동으로 할당되어 사용하게 되며 수신이 완료되면 자동으로 연결을 닫게 되는데 연결을 닫기 전에 수신되는 데이터는 다른 커넥션 id로 자동 할당되어 수신되는 걸 테스트를 통해 확인할 수 있었다.
데이터의 전송
AT+CIPSEND=0,30 AT+CIPSEND=length // normal send (single connection). AT+CIPSEND=id,length // normal send (multiple connection), id: ID no. of connection, length: data length, MAX 048 bytes AT+CIPCLOSE=0 // id: ID no. of connection to close, Close TCP or UDP connection.For multiply connection mode
ESP-01을 통해 데이터 송신 시에는 아두이노에서 시리얼 통신을 통해 상기의 데이터 전송 AT command를 사용하여 전송 데이터와 함께 보내야만 데이터가 스마트폰으로 전송된다. 시리얼 통신으로 연결된다는 것 자체가 데이터의 전송 속도에 제한을 걸게 되는데, 이 상황에 더불어 모듈이 AT command를 수신하고 작동하는 시간이 소요되게 되어 아두이노에서 어떤 작동의 응답으로 ESP-01 모듈의 wifi를 통해 데이터 전송할 경우 약 1초 에서 2초의 시간이 걸리게 된다. 이 얘기는 짧은 시간 동안 연속되는 데이터의 전송하는 데 있어서 문제를 야기하게 된다고 할 수 있다. 필자는 ESP-01의 이러한 데이터 전송 특성 때문에 발생하는 사용의 불편함(긴 응답 시간)에 따라 이 기능의 효용성이 낮다고 보아 아두이노에서 스마트폰으로 데이터를 전송하는 기능을 아예 사용하지 않기로 하였다.
상기와 같이 아두이노 시리얼 모니터를 통해 ESP-01을 일일이 설정하는 것은 많이 불편하다. 코드상에서 아두이노 실행 시 자동으로 설정되도록 하는 코드를 인터넷에서 쉽게 찾아볼 수 있었고 이를 이용하기로 한다.
주요 코드를 아래와 같이 코딩해 주었다.
String sendData(String command, const int timeout, boolean debug) { // 스트링 타입 AT command 전송 함수 String response = “”; // 스트링 타입 지역변수 선언 및 초기화 esp01.print(command); // ESP-01 모듈에 스트링 타입의 AT command 전송 long int time = millis(); while( (time+timeout) > millis()) { // ESP-01 모듈의 명령 실행 후 응답에 필요한 시간이 경과되면 while(esp01.available()) { // 시리얼 버퍼에 ESP-01 모듈의 응답을 있을 경우 char c = esp01.read(); // 1byte 데이터를 char타입 변수 c에 저장 response+=c; // c에 저장된 문자를 문자열로 변경 } } if(debug) Serial.print(response); // debug가 참이면 시리얼 모니터에 출력 return response; }
전송 실행 함수: sendData(문자열 명령, 응답에 필요한 시간, 시리얼 모니터 출력 플래그);
sendData(“AT+RST\r
“,2000,DEBUG); //리셋 sendData(“AT+CWMODE=2\r
“,1000,DEBUG); // configure as access point (working mode: AP+STA) sendData(“AT+CWSAP=\”ESP-01\”,\”1234test\”,11,3\r
“,1000,DEBUG); // join the access point sendData(“AT+CIFSR\r
“,1000,DEBUG); // get ip address sendData(“AT+CIPMUX=1\r
“,1000,DEBUG); // configure for multiple connections sendData(“AT+CIPSERVER=1,80\r
“,1000,DEBUG); // turn on server on port 80
상기 코드 중 wifi 연결 시 비밀번호 연결을 비활성화하고자 한다면 아래처럼 3을 0으로 변경해주면 된다.
sendData(“AT+CWSAP=\”ESP-01\”,\”1234test\”,11,0\r
“,1000,DEBUG);
이제 수신 데이터를 필요한 값만 추출해내는 parsing에 대해 살펴보겠다.
parsing을 하기 위해서는 String class를 활용해야만 한다.
상기 AT command 설정 테스트에서 데이터 수신이 +IPD,0,158:GET / HTTP/1.1 형식으로 들어온 걸 확인했었다.
만약 웹브라우저에서 http://192.168.4.1/hi라고 입력하면 +IPD,0,459:GET /hi HTTP/1.1 데이터가 수신될 것이다. 즉, 모든 데이터 수신에는 +IPD,0,158:GET / 형식의 코드가 선행된다. 데이터 수신의 확인을 위해 “+IPD,”를 이용하여 하기로 하자.
if (esp01.find(“+IPD,”)) { // 만약 시리얼 버퍼에 “+IPD, “가 있으면, “+IPD,”가 확인될 경우 “+IPD,”는 삭제된다.
수신 데이터를 스트링 타입 income_wifi 변수에 저장해 주면 “0,158:GET / HTTP/1.1″라는 스트링이 저장된다.
income_wifi = esp01.readStringUntil(‘\r’); // 스트링 타입 income_wifi 변수에 ‘\r’ 문자까지 저장 웹브라우저 주소 끝에는 자동으로 ‘\r’ 문자가 붙는다.
필요한 data는 “GET /” 이후에 들어오고 종료 문자 역할을 하는 “HTTP/1.1″의 앞 공백 문자에서 끝나게 된다.
String class에서는 스트링 중의 일부를 떼어내어 저장할 수 있는 string.substring(start index, end index); 함수를 제공하고 있으며, 저장할 스트링의 시작 인덱스 번호와 종료 인덱스 번호를 필요로 한다. 이 함수를 이용하기 위해 “GET /”와 “HTTP/1.1″의 인덱스 번호를 알아내 보자.
income_wifi 스트링에서 “GET /”의 시작 인덱스 위치를 확인하는 코드는 income_wifi.indexOf(“GET /”)가 되고 “HTTP/1.1″의 시작 인덱스 위치를 확인하는 코드는 income_wifi.indexOf(“HTTP/1.1”)가 된다.
인덱스 번호를 사용하여 스트링에서 특정 위치의 스트링을 추출해내는 코드는 아래와 같게 된다.
income_wifi.substring(income_wifi.indexOf(“GET /”)+5, income_wifi.indexOf(“HTTP/1.1”)-1);
income_wifi.indexOf(“GET /”)는 “GET /”의 시작 인덱스 번호를 반환한다. 그러므로 필요한 위치의 인덱스 번호는 “GET /”의 글자 수 5를(공백 문자 포함) 더한 위치 값이 되게 된다.
income_wifi.indexOf(“HTTP/1.1”)는 “HTTP/1.1″의 시작 인덱스 번호를 반환한다. 하지만 앞에 공백 문자(space)가 있으므로 -1을 해준 위치 값이 필요로 하는 위치 값이 되고, 상기의 코드에서는 data가 없으므로 두 위치 값은 같은 값일 것이다.
아래 코드를 아두이노에 업로드하고 스마트폰에서 soft AP에 접속해 보자.
#include #define DEBUG true String income_wifi = “”; SoftwareSerial esp01(2,3); void setup() { Serial.begin(9600); esp01.begin(9600); // your esp’s baud rate might be different sendData(“AT+RST\r
“,2000,DEBUG); // reset module sendData(“AT+CWMODE=2\r
“,1000,DEBUG); // configure as access point (working mode: AP+STA) sendData(“AT+CWSAP=\”ESP-01\”,\”1234test\”,11,0\r
“,1000,DEBUG); // join the access point sendData(“AT+CIFSR\r
“,1000,DEBUG); // get ip address sendData(“AT+CIPMUX=1\r
“,1000,DEBUG); // configure for multiple connections sendData(“AT+CIPSERVER=1,80\r
“,1000,DEBUG); // turn on server on port 80 } void loop() { if (esp01.available()) { if (esp01.find(“+IPD,”)) { income_wifi = esp01.readStringUntil(‘\r’); String wifi_temp = income_wifi.substring(income_wifi.indexOf(“GET /”)+5, income_wifi.indexOf(“HTTP/1.1”)-1); Serial.println(wifi_temp); } } } String sendData(String command, const int timeout, boolean debug) { String response = “”; esp01.print(command); // send the read character to the esp01 long int time = millis(); while( (time+timeout) > millis()) { while(esp01.available()) { // The esp has data so display its output to the serial window char c = esp01.read(); // read the next character. response+=c; } } if(debug) Serial.print(response); return response; }
스마트폰 웹브라우저 주소창에서 192.168.4.1/hi를 입력하고 연결을 클릭하면 아래와 같이 시리얼 모니터에 hi가 표시된 것을 볼 수 있다.
앞에서 살펴본 AT command 설정 시에는 스마트폰 접속 시 관련 정보들이 시리얼 모니터에 출력되었었지만 지금은 data를 제외한 모든 값은 출력이 안되게 된다.
이렇게 추출된 스트링 데이터를 이용하여 LED의 제어를 할 수 있게 된다.
아래와 같이 아두이노 기본 LED를 웹브라우저를 통해 제어할 수 있도록 스트링 LED 제어 코드를 추가해 주었다.
업로드하고 스마트폰 웹브라우저에 http://192.168.4.1/on을 입력하면 LED가 켜지는 것을 볼 수 있고 http://192.168.4.1/off를 입력하면 LED가 꺼지는 것을 볼 수 있다. “on” 또는 “off”가 아닌 텍스트를 입력한다면 시리얼 모니터에 출력된다.
#include #define DEBUG true #define ledPin 13 String income_wifi = “”; SoftwareSerial esp01(2,3); void setup() { Serial.begin(9600); esp01.begin(9600); // your esp’s baud rate might be different pinMode(ledPin, OUTPUT); sendData(“AT+RST\r
“,2000,DEBUG); // reset module sendData(“AT+CWMODE=2\r
“,1000,DEBUG); // configure as access point (working mode: AP+STA) sendData(“AT+CWSAP=\”ESP-01\”,\”1234test\”,11,0\r
“,1000,DEBUG); // join the access point sendData(“AT+CIFSR\r
“,1000,DEBUG); // get ip address sendData(“AT+CIPMUX=1\r
“,1000,DEBUG); // configure for multiple connections sendData(“AT+CIPSERVER=1,80\r
“,1000,DEBUG); // turn on server on port 80 } void loop() { if (esp01.available()) { if (esp01.find(“+IPD,”)) { income_wifi = esp01.readStringUntil(‘\r’); String wifi_temp = income_wifi.substring(income_wifi.indexOf(“GET /”)+5, income_wifi.indexOf(“HTTP/1.1”)-1); if(wifi_temp == “on”){ // wifi_temp는 지역변수로서 “if (esp01.find(“+IPD,”)){} 함수를 나가면 초기화됨. digitalWrite(ledPin, HIGH); } else if(wifi_temp == “off”){ digitalWrite(ledPin, LOW); } else { Serial.println(wifi_temp); } } } } String sendData(String command, const int timeout, boolean debug) { String response = “”; esp01.print(command); // send the read character to the esp01 long int time = millis(); while( (time+timeout) > millis()) { while(esp01.available()) { // The esp has data so display its output to the serial window char c = esp01.read(); // read the next character. response+=c; } } if(debug) Serial.print(response); return response; }
이제 웹브라우저를 이용하는 대신 안드로이드 앱을 이용하여 원격제어를 해보자.
arduino bluetooth controller PWM 안드로이드 앱의 wifi를 이용한 원격제어용 데이터 전송 프로토콜은 다음과 같이 코딩해 주면 된다.
디지털 버튼 제어 프로토콜: “%%F0” + 스트링 값 + “%%F1” 스트링 값 = “10” 버튼1 off, 스트링 값 = “11” 버튼1 on, “20” 버튼2 off, “21” 버튼2 on, …… PWM 값 프로토콜: 1번 슬라이드 “%%F31” + 스트링 값 + “%%F1” 2번 슬라이드 “%%F32” + 스트링 값 + “%%F1” 3번 슬라이드 “%%F33” + 스트링 값 + “%%F1”
상기 예제 코드에서는 스트링을 parsing 할 때 시작 문자열로서 “GET /” 종료 문자열로서 “HTTP/1.1″를 사용했다. 이들을 상기 프로토콜에 적용하여 코드를 바꾸어 주었다. 또한 스트링으로 데이터를 한 번에 받기 때문에 “%%F1″와 “%%F0″가 스트링에 있다면 그 데이터의 검증이 완료된 것으로 볼 수 있다. 앞선 블루투스 원격제어에서는 검증 시 여러 단계가 필요했으나 스트링으로 데이터를 한꺼번에 받을 경우 코드가 간단해진다.
if (income_wifi.indexOf(“%%F1”) != -1) { // 만약 스트링 중에 “%%F1” 있고 if (income_wifi.indexOf(“%%F0”) != -1) { // “%%F0” 있으면 디지털 버튼 상태 값 검증이 되어 String wifi_temp = income_wifi.substring(income_wifi.indexOf(“%%F0”)+4, income_wifi.indexOf(“%%F1”)); // 값 저장 if (income_wifi.indexOf(“%%F31”) != -1) { // 만약 스트링 중에 “%%F31” 있고 if (income_wifi.indexOf(“%%F0”) != -1) { // “%%F0” 있으면 슬라이드 1 PWM 값 검증이 되어 String wifi_temp = income_wifi.substring(income_wifi.indexOf(“%%F31”)+5, income_wifi.indexOf(“%%F1”)); // 값 저장
기타 프로토콜에 해당되지 않는 텍스트는 앞선 parsing 방법을 사용한다.
String wifi_temp = income_wifi.substring(income_wifi.indexOf(“GET /”)+5, income_wifi.indexOf(“HTTP/1.1”)-1);
앞선 설명중 데이터 수신에서 멀티 커넥션 id에 관해 언급했었다. ESP-01 모듈은 데이터 수신 시 5개의 id를 사용하여 연결을 하게 되는데 그 id 번호는 0부터 4까지이다. 상기에 링크를 걸었던 ESP-01 모듈 AT command 참조 사이트에 의하면 만약 0 ~ 4까지 모두 사용하고 있는 상태에서 추가 연결이 있을 경우(id 값이 5가 될 경우) 모든 연결은 끊긴다고 한다. 필자가 확인해 본 결과 모두 끊기면서 더 이상 연결이 되지 않는다. 이런 상황이 되었을 경우 데이터의 송 수신이 안되게 되어 닫힌 멀티커넥션 기능을 열기 위해서는 리셋을 해주어야만 했다.
추가로 설명하자면, 데이터 수신 시 id 0번부터 받게 되고 수신이 완료되면 id 0번의 연결을 끊는 것을 앞선 예제에서 확인했었다. id 0번의 연결이 끊기게 되면 이때 id 0번이 다시 데이터를 받을 수 있는 상태로 초기화 되게 된다. 만약 id 0번의 연결이 끊기 전에 데이터가 들어오게 된다면, 다음 id인 1번으로 넘어가게 되고 다시 id 0번이 끊겨 초기화가 되면 다시 id 0번으로 데이터를 수신하게 된다. 즉 연속된 데이터를 id 순서대로 받다가 앞선 번호에서 초기화가 되면 그 id를 우선 사용하게 된다. 수신되는 데이터 간격이 길어 id 0번이 수신 완료하고 초기화되었다면 계속에서 id 0번을 사용하게 된다. 문제는 id의 연결을 끊고 초기화시키는데 시간이 걸린다는 것이다. 데이터가 빠르게 연속으로 들어올 경우 id가 초기화되기 전에 id 0부터 id 4까지 모두 연결된 상태가 되어 모든 연결을 끊고 더 이상 데이터를 수신하지 못하는 현상이 발생하게 되었다.
이를 해결하기 위해서 데이터를 읽는 시간 간격을 강제하고 활성화된 id를 AT command를 통해 강제로 끊는 코드를 아래와 같이 추가해 보았으나 그것 만으로는 충분하지 않았다.
connectionId = income_wifi.charAt(0); unsigned long int one_millis = 0; void wifi_delay() { // 50 millis 마다 연결된 id 가 있으면 그 아이디를 종료시키고 데이터 수신확인 if (millis() – one_millis > 50) { one_millis = millis(); if (connectionId == ‘0’) esp01.write(“AT+CIPCLOSE=0\r
“); else if (connectionId == ‘1’) esp01.write(“AT+CIPCLOSE=1\r
“); else if (connectionId == ‘2’) esp01.write(“AT+CIPCLOSE=2\r
“); else if (connectionId == ‘3’) esp01.write(“AT+CIPCLOSE=3\r
“); else if (connectionId == ‘4’) esp01.write(“AT+CIPCLOSE=4\r
“); wifi_read(); } }
또 다른 문제로는 수신된 데이터 각각의 id로 분산되어 받게 될 경우 그 순서가 뒤바뀔 수 있다는 것이다. 한 개의 아이디로 연속된 데이터를 받는다면 순서는 뒤바뀌지 않는다. 모듈에서 멀티 커넥션 id 연결 시 데이터 수신 시점의 시간 값에 대한 검증은 하지 않는 것 같으며 마지막에 출력되어야 할 값이 그전 값보다 먼저 출력되는 현상을 여러 번 확인했다.
사실 wifi 연결에 대한 응답 server의 구동에 있어 멀티 커넥션 자체가 다중 접속을 고려한 것이지 한 사용자의 연속된 데이터를 전송받기 위한 구성은 아닐 것이라 생각되며 웹페이지 요청 순서는 중요하지 않을 것이다.
어찌 되었든지 간에 원격제어를 하기 위해서는 신뢰할 수 있는 값의 순서가 필요하고 이런 문제를 해결하기 위해서는 한 개의 id만을 사용하여 받을 수 있도록 스마트폰에서 데이터를 전송하는 간격을 늘려주는 방법 외에는 찾을 수가 없었다.
ESP-01 wifi 모듈로 원격제어를 하는것은 블루투스 모듈의 사용에 비해 적당한 방법은 아니라고 생각이 되나 연결거리가 블루투스 보다 길어 또한 필요하게 된다.
ESP-01 wifi 모듈의 특징을 이해하고 모듈의 성능에 맞게 필요 기능이 적용되도록 코딩해야 한다.
1. 데이터 전송 시 시리얼 통신을 통하여 AT command를 매번 실행시켜주어야 한다. 2. 서버로서 데이터 수신 시 연결 옵션으로 멀티 커넥션 사용이 강제되어 있고 수신에 사용된 id가 사용 중이거나 종료되지 않은 경우에 추가되는 요청은 다음 id가 요청받게 된다. 3. 연결용 id 5개가 모두 연결된 상태에서 추가 요청이 올 경우 모두 닫힌다. -> 리셋해야만 다시 사용 가능해진다. 4. 3번의 경우를 방지하기 위해 데이터 수신이 완료되면 반드시 id연결을 끊고 대기 상태로 하여야 한다. 5. 연속되는 데이터를 받을 경우 id가 바뀌면서 데이터를 수신하게 되는데 그때 데이터 값의 순서가 바뀔 수 있다.
다음 편에 살펴볼 NODE MCU 1.0(ESP-12E, esp8266 칩셋)이나 ESP32 Dev Module의 경우 상기 ESP-01의 특징 중 2, 3, 5번은 동일한 거 같으나 모듈 자체에 wifi가 내장되어있어 ESP-01의 경우처럼 모듈과 wifi간 시리얼 통신을 사용하지 않을 뿐만 아니라 AT command도 사용하지 않게 되어 사용 id의 종료가 상대적으로 빠르다고 할 수 있다. 하지만 이 두 모델도 연속되는 빠른 데이터 수신 시 5번의 현상이 발견되었고 이를 해결하기 위해서 스마트 폰에서 데이터 전송 간격을 조정해주어야만 했다.
스마트폰에서 이 두 모듈의 데이터 전송 간격은 ESP-01 모듈보다는 짧고 블루투스 모듈보다는 길게 된다.
위의 코드를 아두이노에 업로드한 뒤 스마트폰에서 ESP-01의 soft AP에 접속한다.
arduino bluetooth controller PWM 안드로이드 앱을 실행한 뒤 wifi 아이콘을 클릭하고 ESP-01의 soft AP 192.168.4.1을 입력하고 esp01 체크 박스에 체크를 해준다. 앱에는 기본적으로 100 밀리 초마다 soft AP ip 주소로 응답 요청을 하도록 프로그램되어있다. 하지만 현재 ESP-01을 활용한 아두이노 스케치 코드에는 응답에 대한 어떠한 코드도 없으므로 스마트폰은 요청에 대한 응답을 받지 못하고 오류를 발생하게 된다. esp01 체크 박스에 체크를 해주면 100 밀리 초마다 soft AP ip 주소에 응답 요청을 하지 않게 되어 사용 가능하게 된다.
arduino bluetooth controller PWM – 아두이노 원격제어 안드로이드 앱 버전 3.5 다운로드
arduino bluetooth controller PWM 매뉴얼
(*** 앱에서 와이파이 연결은 안드로이드8 [갤럭시S7]이하 버전에서만 작동합니다 ***)
Confirm을 클릭한 뒤 버튼 1번을 클릭하면 아두이노 기본 LED가 켜지는 것을 볼 수 있고 버튼 2번 부터는 시리얼 모니터에 작동 상태가 표시된다. PWM 제어용 슬라이드는 천천히 움직일 경우 연속되는 데이터가 전송되고 빠르게 움직이면 최종 정지했을 때의 값만 전송된다.
ESP-01 모듈 연결 시는 안드로이드 앱에서 wifi를 통해 연결되었다는 어떠한 표시도 볼 수 없다. 아두이노에서 스마트폰으로 응답을 주는 코드가 없기 때문이다.
NODE MCU 1.0(ESP-12E, esp8266 칩셋)이나 ESP32 Dev Module의 경우 체크박스에 체크를 한 상태에서 Confirm을 클릭하게 되면 응답 요청을 하지 않게 되어 아두이노 측에서 입력된 값을 스마트폰에 출력을 하지 못하게 만든다. 아두이노 시리얼 모니터에 hello를 입력하면 스마트폰에 hello가 표시되어야 하나 표시가 되지 않는다. 이는 서버의 특징으로 스마트폰(클라이언트 또는 마스터)의 요청 시에만 서버(슬레이브)는 연결된 id를 통해 응답을 할 수 있기 때문에 요청이 없는 상태에서는 아두이노에서 스마트폰으로 데이터를 전송하지 못하게 된다. 또한 현재 연결되어 응답을 수신하고 있다는 표시도 할 수 없게 되어, 와이파이가 중간에 끊어져도 알 수 없게 된다. 하지만 ESP-01 모듈처럼 스마트폰에서 모듈의 제어를 하는 기능은 문제없이 사용 가능하다.
NODE MCU 1.0(ESP-12E, esp8266 칩셋)이나 ESP32 Dev Module의 경우에는 esp01 체크 박스에 체크하지 않고 Confirm을 클릭해야만 wifi를 통해 연결되었을 때 응답을 수신하고 현재 연결된 상태라는 것을 표시하게 되고 만약, 가변저항이 연결되어 있다면 가변저항의 조정 상태를 슬라이드 바로 표시할 수 있게 된다.
2019.11.22 추가
이제까지 ESP01의 soft AP에 연결하여 아두이노를 제어했다.
ESP01을 station모드로 공유기에 연결하고 내부 네트워크를 통한 아두이노 원격 제어해보자.
ESP01을 staion 모드로 공유기에 연결하면 공유기는 ESP01에 ip주소를 할당해 준다.
이 주소를 통해 내부 네트워크용 안에서 원격제어를 할 수 있게 되는데 이를 위해서는 반드시 시리얼 모니터에 표시되는 할당받은 ip주소를 확인한 뒤에 연결해야만 한다. (공유기에서 ESP01에 지정 ip를 할당하는 설정을 할 수 없는 경우) 또는 한번 받은 ip 주소를 메모해 두었다가 다시 연결 시 그 주소를 입력하여 사용할 수도 있다.
하지만 시리얼 모니터에서 ip주소를 확인하거나 ip주소가 변경되어 메모해둔 ip주소로 연결할 수 없는 경우도 발생할 수 있어 불편하다.
상기 이유로 내부 네트워크 이용 원격제어가 불필요하다고 생각하여 설명하지 않았었는데, 공유기에 스마트폰이 연결된 상태에서는 soft AP를 이용한 원격제어처럼 와이파이를 따로 연결하지 않아도 되는 편리한 점 때문에 설명을 추가하게 되었다.
ESP01을 station 모드로 공유기에 연결하기 위해서 아래와 같이 setup() 함수 코드를 변경해 주었다.
void setup() { Serial.begin(9600); esp01.begin(9600); // your esp’s baud rate might be different pinMode(ledPin, OUTPUT); sendData(“AT+RST\r
“,2000,DEBUG); // reset module sendData(“AT+CWMODE=1\r
“,1000,DEBUG); // configure as access point (working mode: AP+STA) sendData(“AT+CWDHCP=1,1\r
“,1000,DEBUG); sendData(“AT+CWJAP=\””+ ssid +”\”,\””+pass+”\”\r
“,8000,DEBUG); sendData(“AT+CIFSR\r
“,1000,DEBUG); // get ip address sendData(“AT+CIPMUX=1\r
“,1000,DEBUG); // configure for multiple connections sendData(“AT+CIPSERVER=1,80\r
“,1000,DEBUG); // turn on server on port 80 }
아래 코드를 업로드하고 시리얼 모니터를 통해 공유기에서 할당받은 ip를 확인하고 ip 주소 192.168.4.1 대신 공유기에서 할당받은 ip를 입력하고 연결해 주면 된다.
2021.03.06 추가
일정 시간 경과 후 와이파이 연결 및 데이터 전송에 관한 테스트
공유기를 통해 테스트하였습니다.
공유기 아이디: skynet
공유기 비번: skynet00
스마트폰의 와이파이가 공유기 skynet에 연결된 상태에서 arduino bluetooth controller PWM 앱을 이용해 테스트했습니다.
아두이노 코드
#include #define rxPin 3 #define txPin 2 SoftwareSerial esp01(txPin, rxPin); // SoftwareSerial NAME(TX, RX); const String ssid = “skynet”; // your network SSID (name) const String pass = “skynet00”; // your network password const String ssid_AP = “ESP-01”; // your network SSID (name) const String pass_AP = “1234test”; // your network password String ip = “”; bool ipCheck = false; #define DEBUG true #define ledPin 13 uint8_t pin_val = 0; // 디지털 버튼 제어용 변수 uint16_t pwm1 = 0; // pwm 제어용 변수 uint16_t pwm2 = 0; uint16_t pwm3 = 0; String text = “”; char connectionId; // 연결 id 저장 변수 String income_wifi = “”; void setup() { Serial.begin(9600); esp01.begin(9600); // your esp’s baud rate might be different pinMode(ledPin, OUTPUT); sendData(“AT+RST\r
“,2000,DEBUG); // reset module sendData(“AT+CWMODE=3\r
“,1000,DEBUG); // configure as access point (working mode: AP+STA) sendData(“AT+CWDHCP=1,1\r
“,1000,DEBUG); sendData(“AT+CWSAP=\””+ ssid_AP +”\”,\””+pass_AP+”\”,11,0\r
“,1000,DEBUG); // join the access point sendData(“AT+CWJAP=\””+ ssid +”\”,\””+pass+”\”\r
“,8000,DEBUG); sendData(“AT+CIFSR\r
“,1000,DEBUG); // get ip address sendData(“AT+CIPMUX=1\r
“,1000,DEBUG); // configure for multiple connections sendData(“AT+CIPSERVER=1,80\r
“,1000,DEBUG); // turn on server on port 80 } void loop() { wifi_delay(); if(Serial.available() > 0){ // 아두이노 모듈 작동 확인 String temp = Serial.readStringUntil(‘
‘); Serial.println(temp); } } unsigned long int one_millis = 0; void wifi_delay() { // 100 millis if (millis() – one_millis > 50) { one_millis = millis(); if (connectionId == ‘0’) esp01.write(“AT+CIPCLOSE=0\r
“); else if (connectionId == ‘1’) esp01.write(“AT+CIPCLOSE=1\r
“); else if (connectionId == ‘2’) esp01.write(“AT+CIPCLOSE=2\r
“); else if (connectionId == ‘3’) esp01.write(“AT+CIPCLOSE=3\r
“); else if (connectionId == ‘4’) esp01.write(“AT+CIPCLOSE=4\r
“); wifi_read(); } } void wifi_read() { if (esp01.available()) { // check if the esp is sending a message if (esp01.find(“+IPD,”)) { income_wifi = esp01.readStringUntil(‘\r’); Serial.println(income_wifi); connectionId = income_wifi.charAt(0); if (income_wifi.indexOf(“%%F1”) != -1) { if (income_wifi.indexOf(“%%F0”) != -1) { String wifi_temp = income_wifi.substring(income_wifi.indexOf(“%%F0”)+4, income_wifi.indexOf(“%%F1”)); pin_val = wifi_temp.toInt(); Serial.println(pin_val); pin_control(); } else if (income_wifi.indexOf(“%%F31”) != -1) { String wifi_temp = income_wifi.substring(income_wifi.indexOf(“%%F31”)+5, income_wifi.indexOf(“%%F1”)); pwm1 = wifi_temp.toInt(); Serial.print(“pwm1: “); Serial.println(pwm1); } else if (income_wifi.indexOf(“%%F32”) != -1) { String wifi_temp = income_wifi.substring(income_wifi.indexOf(“%%F32”)+5, income_wifi.indexOf(“%%F1”)); pwm2 = wifi_temp.toInt(); Serial.print(“pwm2: “); Serial.println(pwm2); } else if (income_wifi.indexOf(“%%F33”) != -1) { String wifi_temp = income_wifi.substring(income_wifi.indexOf(“%%F33”)+5, income_wifi.indexOf(“%%F1”)); pwm3 = wifi_temp.toInt(); Serial.print(“pwm3: “); Serial.println(pwm3); } } else { // 텍스트 출력 코드 String wifi_temp = income_wifi.substring(income_wifi.indexOf(“GET /”)+5, income_wifi.indexOf(“HTTP/1.1”)); Serial.println(wifi_temp); } income_wifi = “”; } } } String sendData(String command, const int timeout, boolean debug) { String response = “”; if (command.indexOf(“CIFSR”) != -1) ipCheck = true; else ipCheck = false; esp01.print(command); // send the read character to the esp01 long int time = millis(); while( (time+timeout) > millis()) { while(esp01.available()) { // The esp has data so display its output to the serial window char c = esp01.read(); // read the next character. response+=c; } } if (ipCheck) { ip = response.substring(response.indexOf(“STAIP,”)+7,response.indexOf(“+CIFSR:STAMAC”)-3); } if(debug) Serial.print(response); return response; } void pin_control() { if (pin_val != 0) { switch (pin_val) { case 11: digitalWrite(ledPin, true); // button 1 : on break; case 10: digitalWrite(ledPin, false); // button 1 : off break; case 21: Serial.println(“button 2 : on”); break; case 20: Serial.println(“button 2 : off”); break; case 31: Serial.println(“button 3 : on”); break; case 30: Serial.println(“button 3 : off”); break; case 41: Serial.println(“button 4 : on”); break; case 40: Serial.println(“button 4 : off”); break; case 51: Serial.println(“button 5 : on”); break; case 50: Serial.println(“button 5 : off”); break; case 61: Serial.println(“button 6 : on”); break; case 60: Serial.println(“button 6 : off”); break; case 71: Serial.println(“button 7 : on”); break; case 70: Serial.println(“button 7 : off”); break; case 81: Serial.println(“button 8 : on”); break; case 80: Serial.println(“button 8 : off”); break; case 91: Serial.println(“button 9 : on”); break; case 90: Serial.println(“button 9 : off”); break; case 101: Serial.println(“button 10 : on”); break; case 100: Serial.println(“button 10 : off”); break; case 111: Serial.println(“button 11 : on”); break; case 110: Serial.println(“button 11 : off”); break; case 121: Serial.println(“button 12 : on”); break; case 120: Serial.println(“button 12 : off”); break; } pin_val = 0; } }
상기 코드 업로드 후 시리얼 모니터에서 공유기에서 할당해준 ip 주소 192.168.1.9 확인
스마트폰 와이파이 공유기 연결
arduino bluetooth controller PWM 앱에서 esp01 ip 주소 설정
앱에서 텍스트 hi 전송 및 1번 버튼 온/오프 메시지
데이터 수신 및 동작 확인 후 일정 시간 지난 뒤 다시 제어할 경우 가끔씩 esp01 모듈이 sleep 상태로 전환되어 있는 것처럼 첫 번째 데이터를 수신하지 못하는 경우를 확인하였습니다.
모듈의 특성인지는 모르겠지만 앱에서 와이파이를 제어한다는 것이 인터넷 브라우저에서 제어하는 것과는 약간의 차이가 있게 됩니다. 웹브라우저는 서버에서 보내주는 “OK 200″확인 메시지를 받지 못하면 일정기간 또는 일정 횟수 동안 같은 메시지를 반복해서 보내게 되는데 앱에서는 한 번만 보내도록 되어 있어 발생하는 것으로 생각됩니다. 블루투스로 연결해서 사용할 경우에는 이러한 문제가 발생하지 않을 것입니다. 왜냐하면 블루투스는 상시 연결(BLE 제외)을 기준으로 하기 때문 일 것입니다.
일정 시간 뒤 버튼을 눌러 제어를 하고자 했는데 esp01 모듈이 데이트를 받지 못하는 상황을 방지하기 위해서는 텍스트 입력창에 어떤 텍스트라도 입력하여 전 송한 뒤 esp01이 데이터를 확실하게 수신할 수 있도록 깨워주는(?) 선행 작업이 필요할 것으로 생각됩니다.
2022년 5월 31일 업데이트
1. AT command의 딜레이 시간을 제거하고 회신 값에 따라 다음 코드가 실행되게 하여 오류 방지 및 setup 완료 시간 최적화
2. 공유기에 접속할 수 있도록 AT+CWJAP 추가
3. 공유기 연결 실패 시 재시도하도록 코드 추가
위 사진의 ip 주소처럼 정상적으로 wifi 공유기에 연결되고 ip 주소를 할당받은 경우에는 컴퓨터의 웹브라우저 주소창에 해당 아이피와 테스트 문구 “192.168.1.12/hi”를 입력하여 테스트할 수 있다.
#include #define rxPin 3 #define txPin 2 SoftwareSerial esp01(txPin, rxPin); // SoftwareSerial NAME(TX, RX); const String ssid_AP = “ESP01”; // your network SSID (name) const String pass_AP = “12345678”; //”1234test”; // your network password char ssid[33] = “skynet”; // “SK_WiFiGIGA40F7” your network SSID (name) char pass[21] = “skynet00”; // “1712037218” your network password String ip = “”; void ipCheck(String response) { int st, ed; if (response.indexOf(F(“PIP”)) != -1) { st = response.indexOf(F(“PIP”))+5; ed = response.indexOf(‘”‘, st+1); ip = response.substring(st, ed); response.remove(0, ed+1); Serial.print(F(“ap: “)); Serial.println(ip); } if (response.indexOf(F(“AIP”)) != -1) { st = response.indexOf(F(“AIP”))+5; ed = response.indexOf(‘”‘, st+1); ip = response.substring(st, ed); Serial.print(F(“ip: “)); Serial.println(ip); } } uint8_t retry = 1; String sendData(String order) { String command = F(“AT+”); command += order; command += F(“\r
“); esp01.print(command); // send the read character to the esp01 unsigned long int time = millis(); String response = “”; while( (time+20000) > millis()) { while(esp01.available()) { // The esp has data so display its output to the serial window char c = esp01.read(); // read the next character. response+=c; } if (response.indexOf(F(“OK”)) != -1) { retry = 0; Serial.println(F(“OK”)); break; } else if (response.indexOf(F(“FAIL”)) != -1 || response.indexOf(F(“ERROR”)) != -1) { if (response.indexOf(F(“FAIL”)) != -1) retry++; else if (response.indexOf(F(“ERROR”)) != -1) { Serial.println(F(“ERROR”)); break; } Serial.print(command); Serial.println(F(“Failed”)); break; } } return response; } String addID(String order, String ssid_AP, String pass_AP) { String temp = order+'”‘+ssid_AP+'”‘+’,’+'”‘+pass_AP+'”‘; return temp; } void setup() { Serial.begin(9600); esp01.begin(9600); // your esp’s baud rate might be different sendData(F(“RST”)); // disconnect AP if connected unsigned long int time = millis(); String temp = “”; while (time+20000 > millis()) { temp = esp01.readStringUntil(‘
‘); if (temp.indexOf(F(“ready”)) != -1) { Serial.println(F(“out”)); break; } } sendData(F(“CWMODE=3”)); // configure as access point (working mode: AP+STA) sendData(F(“CWDHCP=1,1”)); sendData(addID(F(“CWSAP=”),ssid_AP,pass_AP)+’,’+String(10)+’,’+String(3)); retry = 1; while(retry) { sendData(addID(F(“CWJAP=”),ssid,pass)); if (retry > 1) { Serial.print(F(“Retrying to connect: “)); Serial.println(retry-1); } if (retry > 4) { Serial.println(F(“connection failed”)); retry = 0; } } sendData(F(“CIPMUX=1”)); // configure for multiple connections sendData(F(“CIPSERVER=1,80”)); // turn on server on port 80 ipCheck(sendData(F(“CIFSR”))); // // get ip address } String income_wifi = “”; void loop() { while (esp01.available()) { income_wifi = esp01.readStringUntil(‘
‘); if (income_wifi.startsWith(F(“+IPD,”))) { String wifi_temp = income_wifi.substring(income_wifi.indexOf(F(“GET /”))+5, income_wifi.indexOf(F(“HTTP/1.1”))-1); Serial.println(wifi_temp); } } }
웹페이지를 통한 요청에 대해 응답을 하도록 코드를 작성해 주었다.
void disconnectID() { if (connectionId < 255) { String command = F("AT+CIPCLOSE="); command += connectionId-48; command += F("\r "); esp01.print(command); connectionId = 255; } } void http_response() { String cip = F("AT+CIPSEND="); cip += connectionId-48; cip += ','; cip += Data.length()+19; cip += F("\r "); Serial.println(cip); esp01.print(cip); unsigned long int time = millis(); while (time+2000 > millis()) { cip = esp01.readStringUntil(‘
‘); if (cip.indexOf(F(“OK”)) != -1) { Serial.println(F(“out”)); break; } } esp01.print(F(“HTTP/1.1 200 OK\r
\r
“)); // +19 esp01.print(Data); while (time+2000 > millis()) { cip = esp01.readStringUntil(‘
‘); if (cip.indexOf(F(“OK”)) != -1) { Serial.println(F(“out”)); break; } } Data = “”; disconnectID(); }
웹페이지 주소창에서 할당받은 아이피 주소에 on/off/message를 입력해 보자.
주소창에 192.168.1.12/on 입력후 회신받은 메세지
주소창에 192.168.1.12/off 입력후 회신받은 메세지
주소창에 192.168.1.12/Hello World! 입력후 회신받은 메세지
#include #define rxPin 3 #define txPin 2 SoftwareSerial esp01(txPin, rxPin); // SoftwareSerial NAME(TX, RX); const String ssid_AP = “ESP01”; // your network SSID (name) const String pass_AP = “12345678”; //”1234test”; // your network password char ssid[33] = “skynet”; // “SK_WiFiGIGA40F7” your network SSID (name) char pass[21] = “skynet00”; // “1712037218” your network password String ip = “”; void ipCheck(String response) { int st, ed; if (response.indexOf(F(“PIP”)) != -1) { st = response.indexOf(F(“PIP”))+5; ed = response.indexOf(‘”‘, st+1); ip = response.substring(st, ed); response.remove(0, ed+1); Serial.print(F(“ap: “)); Serial.println(ip); } if (response.indexOf(F(“AIP”)) != -1) { st = response.indexOf(F(“AIP”))+5; ed = response.indexOf(‘”‘, st+1); ip = response.substring(st, ed); Serial.print(F(“ip: “)); Serial.println(ip); } } uint8_t retry = 1; String sendData(String order) { String command = F(“AT+”); command += order; command += F(“\r
“); esp01.print(command); // send the read character to the esp01 unsigned long int time = millis(); String response = “”; while( (time+20000) > millis()) { while(esp01.available()) { // The esp has data so display its output to the serial window char c = esp01.read(); // read the next character. response+=c; } if (response.indexOf(F(“OK”)) != -1) { retry = 0; Serial.println(F(“OK”)); break; } else if (response.indexOf(F(“FAIL”)) != -1 || response.indexOf(F(“ERROR”)) != -1) { if (response.indexOf(F(“FAIL”)) != -1) retry++; else if (response.indexOf(F(“ERROR”)) != -1) { Serial.println(F(“ERROR”)); break; } Serial.print(command); Serial.println(F(“Failed”)); break; } } return response; } String addID(String order, String ssid_AP, String pass_AP) { String temp = order+'”‘+ssid_AP+'”‘+’,’+'”‘+pass_AP+'”‘; return temp; } #define ledPin 13 void setup() { Serial.begin(9600); esp01.begin(9600); // your esp’s baud rate might be different sendData(F(“RST”)); // disconnect AP if connected unsigned long int time = millis(); String temp = “”; while (time+20000 > millis()) { temp = esp01.readStringUntil(‘
‘); if (temp.indexOf(F(“ready”)) != -1) { Serial.println(F(“out”)); break; } } sendData(F(“CWMODE=3”)); // configure as access point (working mode: AP+STA) sendData(F(“CWDHCP=1,1”)); sendData(addID(F(“CWSAP=”),ssid_AP,pass_AP)+’,’+String(10)+’,’+String(3)); retry = 1; while(retry) { sendData(addID(F(“CWJAP=”),ssid,pass)); if (retry > 1) { Serial.print(F(“Retrying to connect: “)); Serial.println(retry-1); } if (retry > 4) { Serial.println(F(“connection failed”)); retry = 0; } } sendData(F(“CIPMUX=1”)); // configure for multiple connections sendData(F(“CIPSERVER=1,80”)); // turn on server on port 80 ipCheck(sendData(F(“CIFSR”))); // // get ip address } uint8_t connectionId = 255; // 연결 id 저장 변수 String Data = “”; void disconnectID() { if (connectionId < 255) { String command = F("AT+CIPCLOSE="); command += connectionId-48; command += F("\r "); esp01.print(command); connectionId = 255; } } void http_response() { String cip = F("AT+CIPSEND="); cip += connectionId-48; cip += ','; cip += Data.length()+19; cip += F("\r "); Serial.println(cip); esp01.print(cip); unsigned long int time = millis(); while (time+2000 > millis()) { cip = esp01.readStringUntil(‘
‘); if (cip.indexOf(F(“OK”)) != -1) { Serial.println(F(“out”)); break; } } esp01.print(F(“HTTP/1.1 200 OK\r
\r
“)); // +19 esp01.print(Data); time = millis(); while (time+2000 > millis()) { cip = esp01.readStringUntil(‘
‘); if (cip.indexOf(F(“OK”)) != -1) { Serial.println(F(“out”)); break; } } Data = “”; disconnectID(); } String income_wifi = “”; void loop() { while (esp01.available()) { income_wifi = esp01.readStringUntil(‘
‘); if (income_wifi.startsWith(F(“+IPD,”))) { income_wifi.remove(0,5); connectionId = income_wifi.charAt(0); int ed = income_wifi.lastIndexOf(F(“HTTP/1.1”))-1; income_wifi.remove(ed); int st = income_wifi.indexOf(F(“GET /”))+5; income_wifi.remove(0,st); Serial.println(income_wifi); if(income_wifi == F(“on”)){ digitalWrite(ledPin, HIGH); Data += F(“
LED ON
“); } else if(income_wifi == F(“off”)){ digitalWrite(ledPin, LOW); Data += F(“
LED OFF
“); } else { income_wifi.replace(“%20″, ” “); // URL Decoding 공백문자 변경 Serial.println(income_wifi); Data += F(“
“); Data += income_wifi; Data += F(“
“); } http_response(); } income_wifi = “”; } }
웹페이지를 이용하여 아두이노 우노의 기본 LED를 제어해 보자
웹페이지 코드
const char HEADER[] PROGMEM = // HTML HEADER “
“; const char FOOTER[] PROGMEM = “
\r
“; // HTML FOOTER const char BACK[] PROGMEM = “
Back
“; void ipPage() { Data = (const __FlashStringHelper *)HEADER; // 아두이노 PROGMEM 읽는 코드 Data += F(“
SSID: “); Data += ssid; Data += F(“
“); Data += F(“
IP Address: “); Data += ip; // 와이파이 공유기에서 할당받은 아이피 주소 Data += F(“
“); Data += F(“
Button
“); Data += (const __FlashStringHelper *)FOOTER; } void buttonPage() { Data = (const __FlashStringHelper *)HEADER; Data += F(“
Pin Control
“); Data += F(“
ON “); Data += F(“ OFF
“); Data += F(“
“); // 데이터 폼 시작 Data += F(“ “); Data += F(“ Button 1 “); // 데이터 폼의 값 전송 Data += F(“
“); // 데이터 폼 종료 Data += (const __FlashStringHelper *)BACK; Data += (const __FlashStringHelper *)FOOTER; }
주소창에 192.168.1.12 입력
Button을 클릭했을때 들어가는 페이지
버튼 1을 클릭하면 아두이노 우노의 기본 LED가 켜지고 버튼 1이 ON색상으로 변경된 웹페이지를 받게 된다.
ㅓ
상기 시리얼 모니터에 표시된 AT+CIPSEND=1,912중 “912”가 웹페이지 전체 문자열 길이이고 이 중 Data 스트링 변수의 전체 길이는 912 – 19 = 893이다.
스케치는 프로그램 저장 공간 12138 바이트(37%)를 사용. 최대 32256 바이트.
전역 변수는 동적 메모리 427바이트(20%)를 사용, 1621바이트의 지역변수가 남음. 최대는 2048 바이트.
상기 코드를 업로드한 후에 아두이노 IDE에 현재 가용 메모리가 1621바이트 남아있다고 한다. 실제로는 아두이노 부팅 후 사용되는 함수 안의 스트링 지역 변수 등은 돌려받게 되지만 남은 메모리 1621바이트 전체를 사용할 수 없는 게 일반적이다. 변수에 공간을 할당하고 회수하는 데에 있어서 흔적들 또는 유실되는 영역들이 발생하므로 실제 가용 메모리에 대해서는 추정적이나 실험적으로 결정해야 한다. 버튼 웹페이지의 Data 문자열 길이가 현재보다 길어진다면 메모리 부족으로 인해 데이터가 일부만 전송될 수 있다. PROGMEM을 이용한 추가적인 페이지는 더 만들 수 있으나 상기 코드에서는 웹페이지의 Data 문자열 변수의 길이를 대략 900 이하로 맞추어 주어야 한다.
#include #define rxPin 3 #define txPin 2 SoftwareSerial esp01(txPin, rxPin); // SoftwareSerial NAME(TX, RX); const String ssid_AP = “ESP01”; // your network SSID (name) const String pass_AP = “12345678”; //”1234test”; // your network password char ssid[33] = “skynet”; // “SK_WiFiGIGA40F7” your network SSID (name) char pass[21] = “skynet00”; // “1712037218” your network password String ip = “”; void ipCheck(String response) { int st, ed; if (response.indexOf(F(“PIP”)) != -1) { st = response.indexOf(F(“PIP”))+5; ed = response.indexOf(‘”‘, st+1); ip = response.substring(st, ed); response.remove(0, ed+1); Serial.print(F(“ap: “)); Serial.println(ip); } if (response.indexOf(F(“AIP”)) != -1) { st = response.indexOf(F(“AIP”))+5; ed = response.indexOf(‘”‘, st+1); ip = response.substring(st, ed); Serial.print(F(“ip: “)); Serial.println(ip); } } uint8_t retry = 1; String sendData(String order) { String command = F(“AT+”); command += order; command += F(“\r
“); esp01.print(command); // send the read character to the esp01 unsigned long int time = millis(); String response = “”; while( (time+20000) > millis()) { while(esp01.available()) { // The esp has data so display its output to the serial window char c = esp01.read(); // read the next character. response+=c; } if (response.indexOf(F(“OK”)) != -1) { retry = 0; Serial.println(F(“OK”)); break; } else if (response.indexOf(F(“FAIL”)) != -1 || response.indexOf(F(“ERROR”)) != -1) { if (response.indexOf(F(“FAIL”)) != -1) retry++; else if (response.indexOf(F(“ERROR”)) != -1) { Serial.println(F(“ERROR”)); break; } Serial.print(command); Serial.println(F(“Failed”)); break; } } return response; } String addID(String order, String ssid_AP, String pass_AP) { String temp = order+'”‘+ssid_AP+'”‘+’,’+'”‘+pass_AP+'”‘; return temp; } #define ledPin 13 void setup() { pinMode(ledPin, OUTPUT); digitalWrite(ledPin, LOW); Serial.begin(9600); esp01.begin(9600); // your esp’s baud rate might be different sendData(F(“RST”)); // disconnect AP if connected unsigned long int time = millis(); String temp = “”; while (time+20000 > millis()) { temp = esp01.readStringUntil(‘
‘); if (temp.indexOf(F(“ready”)) != -1) { Serial.println(F(“out”)); break; } } sendData(F(“CWMODE=3”)); // configure as access point (working mode: AP+STA) sendData(F(“CWDHCP=1,1”)); sendData(addID(F(“CWSAP=”),ssid_AP,pass_AP)+’,’+String(10)+’,’+String(3)); retry = 1; while(retry) { sendData(addID(F(“CWJAP=”),ssid,pass)); if (retry > 1) { Serial.print(F(“Retrying to connect: “)); Serial.println(retry-1); } if (retry > 4) { Serial.println(F(“connection failed”)); retry = 0; } } sendData(F(“CIPMUX=1”)); // configure for multiple connections sendData(F(“CIPSERVER=1,80”)); // turn on server on port 80 ipCheck(sendData(F(“CIFSR”))); // // get ip address } uint8_t connectionId = 255; // 연결 id 저장 변수 String Data = “”; void disconnectID() { if (connectionId < 255) { String command = F("AT+CIPCLOSE="); command += connectionId-48; command += F("\r "); esp01.print(command); connectionId = 255; } } void http_response() { String cip = F("AT+CIPSEND="); cip += connectionId-48; cip += ','; cip += Data.length()+19; cip += F("\r "); Serial.println(cip); esp01.print(cip); unsigned long int time = millis(); while (time+2000 > millis()) { cip = esp01.readStringUntil(‘
‘); if (cip.indexOf(F(“OK”)) != -1) { Serial.println(F(“out”)); break; } } esp01.print(F(“HTTP/1.1 200 OK\r
\r
“)); // +19 esp01.print(Data); time = millis(); while (time+2000 > millis()) { cip = esp01.readStringUntil(‘
‘); if (cip.indexOf(F(“OK”)) != -1) { Serial.println(F(“out”)); break; } } Data = “”; disconnectID(); } #include “webPage.h” String income_wifi = “”; void loop() { while (esp01.available()) { income_wifi = esp01.readStringUntil(‘
‘); if (income_wifi.startsWith(F(“+IPD,”))) { income_wifi.remove(0,5); connectionId = income_wifi.charAt(0); int ed = income_wifi.lastIndexOf(F(“HTTP/1.1”))-1; income_wifi.remove(ed); int st = income_wifi.indexOf(F(“GET /”))+5; income_wifi.remove(0,st); Serial.println(income_wifi); if(income_wifi == F(“on”)){ digitalWrite(ledPin, HIGH); Data += F(“
LED ON
“); } else if(income_wifi == F(“off”)){ digitalWrite(ledPin, LOW); Data += F(“
LED OFF
“); } else { if (income_wifi.indexOf(F(“ip”)) != -1) ipPage(); else if (income_wifi.indexOf(F(“Button”)) != -1) buttonPage(); else if (income_wifi.indexOf(F(“button”)) != -1) { String temp = income_wifi.substring(income_wifi.indexOf(‘?’)+4); uint8_t val = temp.toInt(); if (val == 10) digitalWrite(ledPin, LOW); else digitalWrite(ledPin, HIGH); buttonPage(); } else { Serial.println(F(“enter”)); if (income_wifi == “”) ipPage(); else { income_wifi.replace(“%20″, ” “); // URL Decoding 공백문자 변경 Serial.println(income_wifi); Data += F(“
“); Data += income_wifi; Data += F(“
“); } } } http_response(); } income_wifi = “”; } if(Serial.available() > 0){ // 아두이노 모듈 작동 확인 String temp = Serial.readStringUntil(‘
‘); Serial.println(temp); if (temp.startsWith(F(“AT”))) { temp.remove(0,3); Serial.println(temp); sendData(temp); } else if (temp == F(“1”)) { } } }
상기의 Data 문자열 변수의 길이를 줄여 메모리 문제를 해결하기 위해 boolean 변수 page를 설정하고 page 변수에 따라 웹페이지의 html header와 footer를 Data 문자열 변수에 저장하지 않고 PROGMEM에서 바로 읽어서 전송할 수 있도록 코드를 수정해 주었다.
void http_response(bool page) { String cip = F(“AT+CIPSEND=”); cip += connectionId-48; cip += ‘,’; if (page) cip += Data.length()+19+sizeofHeader+sizeofFooter; else cip += Data.length()+19; cip += F(“\r
“); Serial.println(cip); esp01.print(cip); unsigned long int time = millis(); while (time+2000 > millis()) { cip = esp01.readStringUntil(‘
‘); if (cip.indexOf(F(“OK”)) != -1) { Serial.println(F(“out”)); break; } } esp01.print(F(“HTTP/1.1 200 OK\r
\r
“)); // +19 if (page) { esp01.print((const __FlashStringHelper *)HEADER); esp01.print(Data); esp01.print((const __FlashStringHelper *)FOOTER); } else esp01.print(Data); time = millis(); while (time+2000 > millis()) { cip = esp01.readStringUntil(‘
‘); if (cip.indexOf(F(“OK”)) != -1) { Serial.println(F(“out”)); break; } } Data = “”; page = false; disconnectID(); }
#include #define rxPin 3 #define txPin 2 SoftwareSerial esp01(txPin, rxPin); // SoftwareSerial NAME(TX, RX); const String ssid_AP = “ESP01”; // your network SSID (name) const String pass_AP = “12345678”; //”1234test”; // your network password char ssid[33] = “skynet”; // “SK_WiFiGIGA40F7” your network SSID (name) char pass[21] = “skynet00”; // “1712037218” your network password String ip = “”; void ipCheck(String response) { int st, ed; if (response.indexOf(F(“PIP”)) != -1) { st = response.indexOf(F(“PIP”))+5; ed = response.indexOf(‘”‘, st+1); ip = response.substring(st, ed); response.remove(0, ed+1); Serial.print(F(“ap: “)); Serial.println(ip); } if (response.indexOf(F(“AIP”)) != -1) { st = response.indexOf(F(“AIP”))+5; ed = response.indexOf(‘”‘, st+1); ip = response.substring(st, ed); Serial.print(F(“ip: “)); Serial.println(ip); } } uint8_t retry = 1; String sendData(String order) { String command = F(“AT+”); command += order; command += F(“\r
“); esp01.print(command); // send the read character to the esp01 unsigned long int time = millis(); String response = “”; while( (time+20000) > millis()) { while(esp01.available()) { // The esp has data so display its output to the serial window char c = esp01.read(); // read the next character. response+=c; } if (response.indexOf(F(“OK”)) != -1) { retry = 0; Serial.println(F(“OK”)); break; } else if (response.indexOf(F(“FAIL”)) != -1 || response.indexOf(F(“ERROR”)) != -1) { if (response.indexOf(F(“FAIL”)) != -1) retry++; else if (response.indexOf(F(“ERROR”)) != -1) { Serial.println(F(“ERROR”)); break; } Serial.print(command); Serial.println(F(“Failed”)); break; } } return response; } String addID(String order, String ssid_AP, String pass_AP) { String temp = order+'”‘+ssid_AP+'”‘+’,’+'”‘+pass_AP+'”‘; return temp; } #define ledPin 13 uint16_t sizeofHeader = 0; uint16_t sizeofFooter = 0; bool page = false; String Data = “”; #include “webPage.h” void setup() { pinMode(ledPin, OUTPUT); digitalWrite(ledPin, LOW); Serial.begin(9600); esp01.begin(9600); // your esp’s baud rate might be different sendData(F(“RST”)); // disconnect AP if connected unsigned long int time = millis(); String temp = “”; while (time+20000 > millis()) { temp = esp01.readStringUntil(‘
‘); if (temp.indexOf(F(“ready”)) != -1) { Serial.println(F(“out”)); break; } } sendData(F(“CWMODE=3”)); // configure as access point (working mode: AP+STA) sendData(F(“CWDHCP=1,1”)); sendData(addID(F(“CWSAP=”),ssid_AP,pass_AP)+’,’+String(10)+’,’+String(3)); retry = 1; while(retry) { sendData(addID(F(“CWJAP=”),ssid,pass)); if (retry > 1) { Serial.print(F(“Retrying to connect: “)); Serial.println(retry-1); } if (retry > 4) { Serial.println(F(“connection failed”)); retry = 0; } } sendData(F(“CIPMUX=1”)); // configure for multiple connections sendData(F(“CIPSERVER=1,80”)); // turn on server on port 80 ipCheck(sendData(F(“CIFSR”))); // // get ip address sizeofHeader = sizeof(HEADER)-1; // -1: ‘\0’ sizeofFooter = sizeof(FOOTER)-1; // -1: ‘\0’ } uint8_t connectionId = 255; // 연결 id 저장 변수 void disconnectID() { if (connectionId < 255) { String command = F("AT+CIPCLOSE="); command += connectionId-48; command += F("\r "); esp01.print(command); connectionId = 255; } } void http_response() { String cip = F("AT+CIPSEND="); cip += connectionId-48; cip += ','; if (page) cip += Data.length()+19+sizeofHeader+sizeofFooter; else cip += Data.length()+19; cip += F("\r "); Serial.println(cip); esp01.print(cip); unsigned long int time = millis(); while (time+2000 > millis()) { cip = esp01.readStringUntil(‘
‘); if (cip.indexOf(F(“OK”)) != -1) { Serial.println(F(“out”)); break; } } esp01.print(F(“HTTP/1.1 200 OK\r
\r
“)); // +19 if (page) { esp01.print((const __FlashStringHelper *)HEADER); esp01.print(Data); esp01.print((const __FlashStringHelper *)FOOTER); } else esp01.print(Data); time = millis(); while (time+2000 > millis()) { cip = esp01.readStringUntil(‘
‘); if (cip.indexOf(F(“OK”)) != -1) { Serial.println(F(“out”)); break; } } Data = “”; page = false; disconnectID(); } String income_wifi = “”; void loop() { while (esp01.available()) { income_wifi = esp01.readStringUntil(‘
‘); if (income_wifi.startsWith(F(“+IPD,”))) { income_wifi.remove(0,5); connectionId = income_wifi.charAt(0); int ed = income_wifi.lastIndexOf(F(“HTTP/1.1”))-1; income_wifi.remove(ed); int st = income_wifi.indexOf(F(“GET /”))+5; income_wifi.remove(0,st); Serial.println(income_wifi); if (!income_wifi.startsWith(F(“fav”))) { // favicon.ico 는 통과 if(income_wifi == F(“on”)){ digitalWrite(ledPin, HIGH); Data += F(“
LED ON
“); } else if(income_wifi == F(“off”)){ digitalWrite(ledPin, LOW); Data += F(“
LED OFF
“); } else { if (income_wifi.indexOf(F(“ip”)) != -1) ipPage(); else if (income_wifi.indexOf(F(“Button”)) != -1) buttonPage(); else if (income_wifi.indexOf(F(“button”)) != -1) { String temp = income_wifi.substring(income_wifi.indexOf(‘?’)+4); uint8_t val = temp.toInt(); if (val == 10) digitalWrite(ledPin, LOW); else digitalWrite(ledPin, HIGH); buttonPage(); } else { Serial.println(F(“enter”)); if (income_wifi == “”) ipPage(); else { income_wifi.replace(“%20″, ” “); // URL Decoding 공백문자 변경 Serial.println(income_wifi); Data += F(“
“); Data += income_wifi; Data += F(“
“); } } } http_response(); } } income_wifi = “”; } if(Serial.available() > 0){ // 아두이노 모듈 작동 확인 String temp = Serial.readStringUntil(‘
‘); Serial.println(temp); if (temp.startsWith(F(“AT”))) { temp.remove(0,3); Serial.println(temp); sendData(temp); } else if (temp == F(“1”)) { } } }
와이파이 매니저
게시글 [arduino] – 아두이노 – ESP01 와이파이 매니저, soft AP이용 공유기 연결용 아이디와 비밀번호 설정하기, wifimanager에서 구현한 와이파이 매니저를 WiFiEsp.h 라이브러리를 사용하지 않고 AT commnad를 사용하여 구현하였다.
* 아두이노 IDE에서 와이파이 설정값 변경한 경우 EEPROM에 값 반영하는 방법
리부팅시 변경된 와이파이 설정값을 반영해주기 위해서는 시리얼 모니터에서 “1”을 입력하고 엔터를 쳐준 뒤에 아두이노를 리부팅 해준다.
설정에 따라 공유기에 연결이 안된 경우
Wifi 설정 페이지 – 와이파이 연결유무, 아이디, 패스워드 설정
공유기 연결 설정
설정 저장 및 공유기 연결중 메세지
공유기 연결 후 할당받은 아이피 표시
웹페이지 코드
//web page String const char HEADER[] PROGMEM = “
“; const char FOOTER[] PROGMEM = “
\r
“; const char BACK[] PROGMEM = “
Back
“; void ipPage() { Data += F(“
SSID: “); Data += ssid; Data += F(“
“); Data += F(“
IP Address: “); Data += ip; Data += F(“
“); Data += F(“
Button Page
“); Data += F(“
Wifi Config
“); page = true; } void buttonPage() { Data += F(“
Pin Control
“); Data += F(“
ON “); Data += F(“ OFF
“); Data += F(“
“); Data += F(“ “); Data += F(“ Button 1 “); Data += F(“
“); Data += (const __FlashStringHelper *)BACK; page = true; } void wifiPage() { Data += (const __FlashStringHelper *)BACK; Data += F(“
“); Data += F(“ connect To wifi Router “); Data += F(“
“); Data += F(“
“); Data += F(“
save
“); page = true; } void messagePage() { if (wifiRouter) { Data += F(“
SSID: “); Data += ssid; Data += F(“
“); Data += F(“
PASS: “); Data += pass; Data += F(“
“); Data += F(“
Credentials Saved.
“); Data += F(“
Trying to connect ESP01 to Router.
“); } else Data += F(“
disconnect from Router.
“); Data += (const __FlashStringHelper *)BACK; page = true; }
#include #include #define rxPin 3 #define txPin 2 SoftwareSerial esp01(txPin, rxPin); // SoftwareSerial NAME(TX, RX); const String ssid_AP = “ESP01”; // your network SSID (name) const String pass_AP = “12345678”; //”1234test”; // your network password bool wifiRouter = true; // 공유기 연결 유무 char ssid[21] = “skynet”; // “SK_WiFiGIGA40F7” your network SSID (name) char pass[21] = “skynet00”; // “1712037218” your network password String ip = “”; void ipCheck(String response) { int st, ed; if (response.indexOf(F(“PIP”)) != -1) { st = response.indexOf(F(“PIP”))+5; ed = response.indexOf(‘”‘, st+1); ip = response.substring(st, ed); response.remove(0, ed+1); Serial.print(F(“ap: “)); Serial.println(ip); } if (response.indexOf(F(“AIP”)) != -1) { st = response.indexOf(F(“AIP”))+5; ed = response.indexOf(‘”‘, st+1); ip = response.substring(st, ed); Serial.print(F(“ip: “)); Serial.println(ip); } } uint8_t retry = 1; String sendData(String order) { String command = F(“AT+”); command += order; command += F(“\r
“); esp01.print(command); // send the read character to the esp01 unsigned long int time = millis(); String response = “”; while( (time+20000) > millis()) { while(esp01.available()) { // The esp has data so display its output to the serial window char c = esp01.read(); // read the next character. response+=c; } if (response.indexOf(F(“OK”)) != -1) { retry = 0; Serial.println(F(“OK”)); break; } else if (response.indexOf(F(“FAIL”)) != -1 || response.indexOf(F(“ERROR”)) != -1) { if (response.indexOf(F(“FAIL”)) != -1) retry++; else if (response.indexOf(F(“ERROR”)) != -1) { Serial.println(F(“ERROR”)); break; } Serial.print(command); Serial.println(F(“Failed”)); break; } } return response; } String addID(String order, String ssid_AP, String pass_AP) { String temp = order+'”‘+ssid_AP+'”‘+’,’+'”‘+pass_AP+'”‘; return temp; } #define ledPin 13 uint16_t sizeofHeader = 0; uint16_t sizeofFooter = 0; String Data = “”; bool page = false; #include “webPage.h” void setWifi() { sendData(F(“RST”)); // disconnect AP if connected unsigned long int time = millis(); String temp = “”; while (time+20000 > millis()) { temp = esp01.readStringUntil(‘
‘); if (temp.indexOf(F(“ready”)) != -1) { Serial.println(F(“Set”)); break; } } if (wifiRouter) sendData(F(“CWMODE=3”)); // configure as access point (working mode: AP+STA) else sendData(F(“CWMODE=2”)); if (wifiRouter) sendData(F(“CWDHCP=1,1”)); sendData(addID(F(“CWSAP=”),ssid_AP,pass_AP)+’,’+String(10)+’,’+String(3)); sendData(F(“CIPMUX=1”)); // configure for multiple connections sendData(F(“CIPSERVER=1,80”)); // turn on server on port 80 if (wifiRouter) { retry = 1; while(retry) { sendData(addID(F(“CWJAP=”),ssid,pass)); if (retry > 1) { Serial.print(F(“Retrying to connect: “)); Serial.println(retry-1); } if (retry > 4) { Serial.println(F(“connection failed”)); retry = 0; } } } ipCheck(sendData(F(“CIFSR”))); // get ip address } void wifi_eeprom_read() { // 아이디 / 비밀번호 읽기 for (int i = 0; i < 20; i++) ssid[i] = EEPROM.read(981 + i); // sizeof(ssid)-1 for (int i = 0; i < 20; i++) pass[i] = EEPROM.read(1001 + i); // sizeof(pass)-1 } void wifi_eeprom_write() { // 아이디 / 비밀번호 쓰기 for (int i = 0; i < 20; i++) EEPROM.write(981 + i, ssid[i]); // sizeof(ssid)-1 for (int i = 0; i < 20; i++) EEPROM.write(1001 + i, pass[i]); // sizeof(pass)-1 } void setup() { pinMode(ledPin, OUTPUT); digitalWrite(ledPin, LOW); if(EEPROM.read(1023) != 1) { for (int i = 0 ; i < EEPROM.length() ; i++) EEPROM.write(i, 0); // EEPROM Clear EEPROM.write(1023, 1); // eeprom 저장 플래그 EEPROM.write(980, wifiRouter); wifi_eeprom_write(); // 최초 초기화시 아이디 / 비밀번호 쓰기 } else { wifiRouter = EEPROM.read(980); wifi_eeprom_read(); // 아두이노 리셋시 저장된 아이디 / 비밀번호 읽기 } Serial.begin(9600); esp01.begin(9600); // your esp's baud rate might be different setWifi(); sizeofHeader = sizeof(HEADER)-1; // -1: '\0' sizeofFooter = sizeof(FOOTER)-1; // -1: '\0' } uint8_t connectionId = 255; // 연결 id 저장 변수 void disconnectID() { if (connectionId < 255) { String command = F("AT+CIPCLOSE="); command += connectionId-48; command += F("\r "); esp01.print(command); connectionId = 255; } } void http_response() { String cip = F("AT+CIPSEND="); cip += connectionId-48; cip += ','; if (page) cip += Data.length()+19+sizeofHeader+sizeofFooter; else cip += Data.length()+19; cip += F("\r "); Serial.println(cip); esp01.print(cip); unsigned long int time = millis(); while (time+2000 > millis()) { cip = esp01.readStringUntil(‘
‘); if (cip.indexOf(F(“OK”)) != -1) { Serial.println(F(“out”)); break; } } esp01.print(F(“HTTP/1.1 200 OK\r
\r
“)); // +19 if (page) { esp01.print((const __FlashStringHelper *)HEADER); esp01.print(Data); esp01.print((const __FlashStringHelper *)FOOTER); } else esp01.print(Data); time = millis(); while (time+2000 > millis()) { cip = esp01.readStringUntil(‘
‘); if (cip.indexOf(F(“OK”)) != -1) { Serial.println(F(“out”)); break; } } Data = “”; page = false; disconnectID(); } String income_wifi = “”; void loop() { while (esp01.available()) { income_wifi = esp01.readStringUntil(‘
‘); if (income_wifi.startsWith(F(“+IPD,”))) { income_wifi.remove(0,5); connectionId = income_wifi.charAt(0); int ed = income_wifi.lastIndexOf(F(“HTTP/1.1”))-1; income_wifi.remove(ed); int st = income_wifi.indexOf(F(“GET /”))+5; income_wifi.remove(0,st); Serial.println(income_wifi); if (!income_wifi.startsWith(F(“fav”))) { // favicon.ico 는 통과 bool wifiChanged = false; if(income_wifi == F(“on”)){ digitalWrite(ledPin, HIGH); Data += F(“
LED ON
“); } else if(income_wifi == F(“off”)){ digitalWrite(ledPin, LOW); Data += F(“
LED OFF
“); } else { if (income_wifi.indexOf(F(“ip”)) != -1) ipPage(); else if (income_wifi.indexOf(F(“Button”)) != -1) buttonPage(); else if (income_wifi.indexOf(F(“button”)) != -1) { String temp = income_wifi.substring(income_wifi.indexOf(‘?’)+4); uint8_t val = temp.toInt(); if (val == 10) digitalWrite(ledPin, LOW); else digitalWrite(ledPin, HIGH); buttonPage(); } else if (income_wifi.indexOf(F(“Wifi”)) != -1) wifiPage(); else if (income_wifi.indexOf(F(“wifi”)) != -1) { // ed = income_wifi.lastIndexOf(‘&’); String temp = income_wifi.substring(ed+3); String check = “”; if (temp.length() > 7) { // 비밀번호 길이가 8 이상인경우 check = pass; if (temp != check) { wifiChanged = true; for (int i = 0; i < temp.length(); i++) pass[i] = temp[i]; pass[temp.length()] = '\0'; } } income_wifi.remove(ed); ed = income_wifi.lastIndexOf(F("s=")); temp = income_wifi.substring(ed+2); Serial.println(temp); check = ssid; if (temp != check) { wifiChanged = true; for (int i = 0; i < temp.length(); i++) ssid[i] = temp[i]; ssid[temp.length()] = '\0'; } st = income_wifi.indexOf('?'); temp = income_wifi.substring(st+1, st+4); bool oldWifiRouter = wifiRouter; if (temp == F("use")) wifiRouter = true; else wifiRouter = false; if (oldWifiRouter != wifiRouter) { EEPROM.write(980, wifiRouter); wifiChanged = true; } if (wifiChanged) { wifi_eeprom_write(); messagePage(); } else wifiPage(); } else { if (income_wifi == "") ipPage(); else { income_wifi.replace("%20", " "); // URL Decoding 공백문자 변경 Serial.println(income_wifi); Data += F(" “); Data += income_wifi; Data += F(“ “); } } } http_response(); if (wifiChanged) setWifi(); } } income_wifi = “”; } if(Serial.available() > 0){ // 아두이노 모듈 작동 확인 String temp = Serial.readStringUntil(‘
‘); Serial.println(temp); if (temp.startsWith(F(“AT”))) { temp.remove(0,3); Serial.println(temp); sendData(temp); } else if (temp == F(“1”)) { EEPROM.write(1023, 0); } else if (temp == F(“2”)) { Serial.println(ssid); Serial.println(pass); } } }
웹페이지 로그인
와이파이를 통해 아두이노를 원격 제어할 때 Soft AP(192.168.4.1)를 사용할 경우에는 Soft AP의 비밀번호를 설정함으로써 보안이 설정되는데 (휴대폰의 와이파이 연결에서 AP연결 시 비밀번호 입력 필요), 아두이노가 와이파이 공유기에 연결되고 IP를 할당받은 경우에는 공유기 네트워크 내에 연결된 누구라도 아두이노가 연결된 IP주소만 알면 연결 및 제어가 가능하게 된다. 이를 방지하기 위해 Cookie를 사용하여 웹 로그인 기능을 구현하였다. 원격제어는 한 명만 제어가 가능해야 하며, 따라서 멀티 로그인은 배제한다.
1. 웹 로그인 사용 유무 설정
2. Soft AP(102.168.4.1)에 비밀번호가 설정되어 있는 경우에만 웹 로그인 활성화
* 비밀번호는 8 문자 이상 입력해야 설정됨
3. 웹 로그인 사용 시 Soft AP(102.168.4.1)를 통한 연결은 AP연결 시 비밀번호를 입력하므로 로그인 확인 안 함.
4. 공유기 네트워크에 로그인되어있더라도 Soft AP(102.168.4.1) 및 다른 브라우저 로그인을 통한 연결 시 밀어내기 기능 – Soft AP 접속 우선 제어 권한
5. 웹 로그인 비밀번호는 Soft AP 비밀번호를 사용한다.
웹로그인 페이지
웹로그인 비밀번호 입력
웹로그인 확인 후 페이지 표시
웹로그인 설정화면
웹로그인 시 시리얼모니터 표시
로그인 웹페이지 및 쿠기 생성 코드, 비밀번호 검증 코드
void loginPage() { if (connectedAP) { Data += F(“
occupied connection by AP
“); } else { Data += F(“
“); Data += F(“
“); Data += F(“ “); Data += F(“ Login
“); } page = true; } // login code String cooValue = “u7Dv0”; uint8_t cooLength = 5; bool newCoo = true; String makeCooValue() { cooValue = “”; uint8_t temp = 0; for (int i = 0; i < cooLength; i++) { temp = random(39, 123); //random(39, 123); // 39 ~ 122 pick if (temp == 47 || temp == 59 || temp == 60 || temp == 62 || temp == 92 || temp == 94 || temp == 96) temp = 41; cooValue += char(temp); } Serial.print(F("send coo: ")); Serial.println(cooValue); return cooValue; } bool checkLogin() { bool confirm = false; String tempId = ""; tempId = esp01.readStringUntil(' '); while(1) { tempId = esp01.readStringUntil(' '); if (tempId.startsWith(F("\r"))) { tempId = esp01.readStringUntil(' '); break; } } int index = tempId.lastIndexOf('&'); String tempPass = tempId.substring(index+3); tempId.remove(index); index = tempId.lastIndexOf('?'); tempId = tempId.substring(index+3); Serial.print("tempPass: "); Serial.println(tempPass); Serial.print("tempId: "); Serial.println(tempId); if (tempId == ssid_AP && tempPass == pass_AP) { confirm = true; login = true; newCoo = true;} return confirm; } #include #include #define rxPin 3 #define txPin 2 SoftwareSerial esp01(txPin, rxPin); // SoftwareSerial NAME(TX, RX); const String ssid_AP = “ESP01”; // your network SSID (name) const String pass_AP = “12345678”; //”1234test”; // your network password bool wifiRouter = true; // 공유기 연결 유무 char ssid[21] = “skynet”; // “SK_WiFiGIGA40F7” your network SSID (name) char pass[21] = “skynet00”; // “1712037218” your network password String ip = “”; bool useLogin = true; bool connectedAP = false; void ipCheck(String response) { int st, ed; if (response.indexOf(F(“PIP”)) != -1) { st = response.indexOf(F(“PIP”))+5; ed = response.indexOf(‘”‘, st+1); ip = response.substring(st, ed); response.remove(0, ed+1); Serial.print(F(“ap: “)); Serial.println(ip); } if (response.indexOf(F(“AIP”)) != -1) { st = response.indexOf(F(“AIP”))+5; ed = response.indexOf(‘”‘, st+1); ip = response.substring(st, ed); Serial.print(F(“ip: “)); Serial.println(ip); } } uint8_t retry = 1; String sendData(String order) { String command = F(“AT+”); command += order; command += F(“\r “); esp01.print(command); // send the read character to the esp01 long int time = millis(); String response = “”; while( (time+20000) > millis()) { while(esp01.available()) { // The esp has data so display its output to the serial window char c = esp01.read(); // read the next character. response+=c; } if (response.indexOf(F(“OK”)) != -1) { retry = 0; Serial.println(F(“OK”)); break; } else if (response.indexOf(F(“FAIL”)) != -1 || response.indexOf(F(“ERROR”)) != -1) { if (response.indexOf(F(“FAIL”)) != -1) retry++; else if (response.indexOf(F(“ERROR”)) != -1) { Serial.println(F(“ERROR”)); break; } Serial.print(command); Serial.println(F(“Failed”)); break; } } return response; } String addID(String order, String ssid_AP, String pass_AP) { String temp = order+'”‘+ssid_AP+'”‘+’,’+'”‘+pass_AP+'”‘; return temp; } #define ledPin 13 uint16_t sizeofHeader = 0; uint16_t sizeofFooter = 0; bool page = false; bool login = false; String Data = “”; #include “webPage.h” void setWifi() { sendData(F(“RST”)); // disconnect AP if connected unsigned long int time = millis(); String temp = “”; while (time+20000 > millis()) { temp = esp01.readStringUntil(‘
‘); if (temp.indexOf(F(“ready”)) != -1) { Serial.println(F(“Set”)); break; } } if (wifiRouter) sendData(F(“CWMODE=3”)); // configure as access point (working mode: AP+STA) else sendData(F(“CWMODE=2”)); if (wifiRouter) sendData(F(“CWDHCP=1,1”)); sendData(addID(F(“CWSAP=”),ssid_AP,pass_AP)+’,’+String(10)+’,’+String(3)); sendData(F(“CIPMUX=1”)); // configure for multiple connections sendData(F(“CIPSERVER=1,80”)); // turn on server on port 80 if (wifiRouter) { retry = 1; while(retry) { sendData(addID(F(“CWJAP=”),ssid,pass)); if (retry > 1) { Serial.print(F(“Retrying to connect: “)); Serial.println(retry-1); } if (retry > 4) { Serial.println(F(“connection failed”)); retry = 0; } } } ipCheck(sendData(F(“CIFSR”))); // get ip address } void wifi_eeprom_read() { // 아이디 / 비밀번호 읽기 for (int i = 0; i < 20; i++) ssid[i] = EEPROM.read(981 + i); // sizeof(ssid)-1 for (int i = 0; i < 20; i++) pass[i] = EEPROM.read(1001 + i); // sizeof(pass)-1 } void wifi_eeprom_write() { // 아이디 / 비밀번호 쓰기 for (int i = 0; i < 20; i++) EEPROM.write(981 + i, ssid[i]); // sizeof(ssid)-1 for (int i = 0; i < 20; i++) EEPROM.write(1001 + i, pass[i]); // sizeof(pass)-1 } void setup() { pinMode(ledPin, OUTPUT); digitalWrite(ledPin, LOW); if(EEPROM.read(1023) != 1) { for (int i = 0 ; i < EEPROM.length() ; i++) EEPROM.write(i, 0); // EEPROM Clear EEPROM.write(1023, 1); // eeprom 저장 플래그 EEPROM.write(980, wifiRouter); EEPROM.write(979, useLogin); wifi_eeprom_write(); // 최초 초기화시 아이디 / 비밀번호 쓰기 } else { useLogin = EEPROM.read(979); wifiRouter = EEPROM.read(980); wifi_eeprom_read(); // 아두이노 리셋시 저장된 아이디 / 비밀번호 읽기 } if (pass_AP == "" || pass_AP.length() < 8) useLogin = false; // Soft AP의 비밀번호가 활성화되지않은 경우 Serial.begin(9600); esp01.begin(9600); // your esp's baud rate might be different setWifi(); sizeofHeader = sizeof(HEADER)-1; // -1: '\0' sizeofFooter = sizeof(FOOTER)-1; // -1: '\0' } uint8_t connectionId = 255; // 연결 id 저장 변수 void disconnectID() { if (connectionId < 255) { String command = F("AT+CIPCLOSE="); command += connectionId-48; command += F("\r "); esp01.print(command); connectionId = 255; } } void http_response() { String cip = F("AT+CIPSEND="); cip += connectionId-48; cip += ','; if (page) { uint8_t len = 50+4; if (!connectedAP && useLogin) { len += 4; if (login) { if (newCoo) len += cooLength; } } cip += Data.length()+len+sizeofHeader+sizeofFooter; } else cip += Data.length()+19; cip += F("\r "); esp01.print(cip); unsigned long int time = millis(); while (time+2000 > millis()) { cip = esp01.readStringUntil(‘
‘); if (cip.indexOf(F(“OK”)) != -1) { Serial.println(F(“out”)); break; } } if (page) { esp01.print(F(“HTTP/1.1 200 OK
Content-type:text/html
Set-Cookie:”)); // +52 -2 = 50 if (!connectedAP && useLogin) { esp01.print(F(“%%F5”)); // +4 if (login) { if (newCoo) esp01.print(makeCooValue()); // +cooLength } } esp01.print(F(“\r
\r
“)); // +8 -4 = 4 esp01.print((const __FlashStringHelper *)HEADER); esp01.print(Data); esp01.print((const __FlashStringHelper *)FOOTER); } else { esp01.print(F(“HTTP/1.1 200 OK\r
\r
“)); // 23 – 4 = +19 esp01.print(Data); } time = millis(); while (time+2000 > millis()) { cip = esp01.readStringUntil(‘
‘); if (cip.indexOf(F(“OK”)) != -1) { Serial.println(F(“out”)); break; } } Data = “”; page = false; disconnectID(); } String income_wifi = “”; void loop() { while (esp01.available()) { income_wifi = esp01.readStringUntil(‘
‘); bool parsing = false; if (income_wifi.startsWith(F(“+”))) { if (income_wifi.startsWith(F(“+IPD”))) parsing = true; else if (income_wifi.startsWith(F(“+STA_CON”))) { connectedAP = true; Serial.println(F(“connectedAP”)); } else if (income_wifi.startsWith(F(“+STA_DIS”))) { connectedAP = false; Serial.println(F(“disconnectedAP”)); } } if (parsing) { income_wifi.remove(0,5); connectionId = income_wifi.charAt(0); int ed = income_wifi.lastIndexOf(F(“HTTP/1.1”))-1; income_wifi.remove(ed); int st = income_wifi.indexOf(F(“GET /”))+5; income_wifi.remove(0,st); Serial.println(income_wifi); if (!income_wifi.startsWith(F(“fav”))) { // favicon.ico 는 통과 bool OK = false, rootPage = false; bool wifiChanged = false; if (useLogin) { if (connectedAP) { OK = true; if (login) { login = false; makeCooValue(); } // 로그인 밀어내기 old Cookie terminate } else { if (!login) { // 현재 로그인 상태가 아닌 경우 if (income_wifi.indexOf(F(“Logi”)) != -1) { Serial.println(“enter”); rootPage = checkLogin(); // 비밀번호 검증 start sending Cookie Serial.println(rootPage); } } else { newCoo = false; if (income_wifi.indexOf(F(“Logi”)) != -1) { // 밀어내기 로그인 rootPage = checkLogin(); } else { uint16_t len = 0; String temp = “”; while(1) { temp = esp01.readStringUntil(‘
‘); len = temp.length(); if (temp.startsWith(F(“Coo”)) || len < 3) break; } if (len > 2) { ed = temp.indexOf(F(“%%F5”))+4; if (ed != -1) { temp = temp.substring(ed, ed+cooLength); if (temp == cooValue) { OK = true; newCoo = true; } } } if (OK) { // 웹페이지 출력 if (income_wifi.indexOf(F(“Logo”)) != -1) { // Logout login = false; OK = false; makeCooValue(); // cookie 값 변경 } } } } } } else { OK = true; } if (OK) { if(income_wifi == F(“on”)){ digitalWrite(ledPin, HIGH); Data += F(“
LED ON
“); } else if(income_wifi == F(“off”)){ digitalWrite(ledPin, LOW); Data += F(“
LED OFF
“); } else { if (income_wifi.indexOf(F(“ip”)) != -1) ipPage(); else if (income_wifi.indexOf(F(“Button”)) != -1) buttonPage(); else if (income_wifi.indexOf(F(“button”)) != -1) { String temp = income_wifi.substring(income_wifi.indexOf(‘?’)+4); uint8_t val = temp.toInt(); if (val == 10) digitalWrite(ledPin, LOW); else digitalWrite(ledPin, HIGH); buttonPage(); } else if (income_wifi.indexOf(F(“Wifi”)) != -1) wifiPage(); else if (income_wifi.indexOf(F(“wifi”)) != -1) { // ed = income_wifi.lastIndexOf(‘&’); String temp = income_wifi.substring(ed+3); if (temp == F(“G=on”)) { useLogin = true; EEPROM.write(979, useLogin); income_wifi.remove(ed); ed = income_wifi.lastIndexOf(‘&’); temp = income_wifi.substring(ed+3); } else { useLogin = false; EEPROM.write(979, useLogin); } String check = “”; if (temp.length() > 7) { // 비밀번호 길이가 8 이상인경우 check = pass; if (temp != check) { wifiChanged = true; for (int i = 0; i < temp.length(); i++) pass[i] = temp[i]; pass[temp.length()] = '\0'; } } income_wifi.remove(ed); ed = income_wifi.lastIndexOf(F("s=")); temp = income_wifi.substring(ed+2); Serial.println(temp); check = ssid; if (temp != check) { wifiChanged = true; for (int i = 0; i < temp.length(); i++) ssid[i] = temp[i]; ssid[temp.length()] = '\0'; } st = income_wifi.indexOf('?'); temp = income_wifi.substring(st+1, st+4); bool oldWifiRouter = wifiRouter; if (temp == F("ROU")) wifiRouter = true; else wifiRouter = false; if (oldWifiRouter != wifiRouter) { EEPROM.write(980, wifiRouter); wifiChanged = true; } if (wifiChanged) { wifi_eeprom_write(); messagePage(); } else wifiPage(); } else { if (income_wifi == "") ipPage(); else { income_wifi.replace(F("%20"), F(" ")); // URL Decoding 공백문자 변경 Serial.println(income_wifi); Data += F(" “); Data += income_wifi; Data += F(“ “); } } } } else { if (useLogin) { if (rootPage) ipPage(); else loginPage(); } else { if (income_wifi == “”) ipPage(); else { income_wifi.replace(F(“%20″), F(” “)); // URL Decoding 공백문자 변경 Serial.println(income_wifi); Data += F(“ “); Data += income_wifi; Data += F(“ “); } } } http_response(); if (wifiChanged) setWifi(); } } income_wifi = “”; } if(Serial.available() > 0){ // 아두이노 모듈 작동 확인 String temp = Serial.readStringUntil(‘
‘); Serial.println(temp); if (temp.startsWith(F(“AT”))) { temp.remove(0,3); Serial.println(temp); sendData(temp); } else if (temp == F(“1”)) { EEPROM.write(1023, 0); } } }
ESP01 펌웨어 업로드하기
웹 로그인 구현 코드상에 Soft AP로 연결된 상태를 확인하는 코드는 아래와 같다.
if (income_wifi.startsWith(F(“+”))) { if (income_wifi.startsWith(F(“+IPD”))) parsing = true; else if (income_wifi.startsWith(F(“+STA_CON”))) { connectedAP = true; Serial.println(F(“connectedAP”)); } else if (income_wifi.startsWith(F(“+STA_DIS”))) { connectedAP = false; Serial.println(F(“disconnectedAP”)); } }
상기 코드는 ESP01 펌웨어에서 Soft AP에 연결/종료 이벤트가 발생하면 시리얼 통신을 통해 아두이노로 보내주는 메시지 “+STA_CONNECTED / +STA_DISCONNECTED”를 확인하고 현재 Soft AP에서 연결된 상태인지 아닌지를 결정하는 코드이다. 따라서 ESP01의 펌웨어 프로그램에서 해당 메시지를 정상적으로 보내주지 않는다면 웹로그인 기능은 작동할 수 없게된다. 일부 펌웨어 버전이 탑제된 ESP01은 Soft AP 연결/종료 이벤트 발생시 해당 메세지를 전송하지 않는 오류가 있다고 한다. 만약 Soft AP로 연결을 했는데 시리얼 모니터에 “connectedAP”라는 메시지가 표시되지 않는다면 최신 펌웨어를 ESP01에 업로드해야 한다.
1. 아두이노에 EMPTY CODE 업로드
2. ESP01과 아두이노의 연결을 펌웨어 업로드용으로 변경
ESP01 TX -> 아두이노 TX
ESP01 RX -> 아두이노 RX
ESP01 VCC -> 아두이노 3.3V
ESP01 CH_PD -> 아두이노 3.3V
ESP01 GND -> 아두이노 GND
ESP01 GPIO0 -> 아두이노 GND
ESP01 RST -> 아두이노 GND 연결 대기
ESP01 핀맵
3. ESP01 펌웨어 / 펌웨어 업로드 프로그램 다운로드 및 압축 풀기
펌웨어 업로드 프로그램
펌웨어 V1.7.5_1
https://www.espressif.com/en/products/sdks/esp-at/resource
파일 경로상에 한글이 있으면 정상 작동하지 않으므로 다운로드한 펌웨어 / 업로드 프로그램은 C드라이브 또는 D드라이브에 복사하고 압축을 풀어준다.
펌웨어 업로드 프로그램 경로
펌웨어 경로
4. ESP01 설치되어있는 펨웨어 지우기
4-1. flash_download_tools_v3.6.5.exe를 실행하고 ESP8266 DownloadTool을 선택한다.
4-2. DownloadTool에서 아두이노가 연결된 COM PORT를 설정해준다. 만약 아두이노 IDE의 시리얼 모니터가 열려있다면 닫아준다.
아두이노 IDE의 COM 포트 확인
4-3. ESP01을 업로드 모드로 전환하고 지우기
ESP01의 RST핀에 연결해놓은 선을 아두이노 GND에 1초 정도 연결한 뒤 떼면 ESP01에 내장되어 있는 파란색 LED가 켜졌다 꺼지면서 업로드 모드로 전환된다. 파란색 LED가 켜졌다 꺼지지 않으면 업로드할 수 없다. ESP01과 아두이노의 연결이 잘못되었거나 아두이노에 EMPTY CODE가 업로드되지 않았을 수 있다. ERASE 버튼을 클릭한다.
정상적으로 펌웨어가 지워지면 아래와 같은 메시지와 함께 FINISH라고 표시된다.
만약 아래 사진처럼 점선이 표시된다면 정상적으로 진행되지 않고 있다는 것이다. 이때는 STOP을 누르고 COM PORT를 확인하거나 “업로드 모드”로 전환하기를 다시 한 뒤 해본다. 펌웨어 지우기를 할 수 없다면, 펌웨어 업로드도 할 수 없게 된다.
5. 펌웨어 설정 경로 확인하고 설정하기
D:\ESP8266_NonOS_AT_Bin_V1.7.5_1\ESP8266_NonOS_AT_Bin_V1.7.5\bin\at 경로의 README.md 파일을 메모장으로 열어보면 아래와 같은 경로 설정을 확인할 수 있다.
### Flash size 8Mbit: 512KB+512KB
boot_v1.2+.bin 0x00000
user1.1024.new.2.bin 0x01000
esp_init_data_default.bin 0xfc000
blank.bin 0x7e000 & 0xfe000
설정 방법에 따라 아래와 같이 순서대로 경로 창에 입력해 준다.
1.D:\ESP8266_NonOS_AT_Bin_V1.7.5_1\ESP8266_NonOS_AT_Bin_V1.7.5\bin\boot_v1.7.bin을 선택하고 우측에 “0x00000″을 입력.
2.D:\ESP8266_NonOS_AT_Bin_V1.7.5_1\ESP8266_NonOS_AT_Bin_V1.7.5\bin\at\512+512\user1.1024.new.2.bin을 선택하고 우측에 “0x01000″을 입력.
3.D:\ESP8266_NonOS_AT_Bin_V1.7.5_1\ESP8266_NonOS_AT_Bin_V1.7.5\bin\esp_init_data_default_v08.bin을 선택하고 우측에 “0xfc000″을 입력.
4.D:\ESP8266_NonOS_AT_Bin_V1.7.5_1\ESP8266_NonOS_AT_Bin_V1.7.5\bin\blank.bin을 선택하고 우측에 “0x7e000″을 입력. 그 아래 같은 파일을 한번 더 선택하고 우측에 “0xfe000″을 입력
입력한 다섯 개 항목의 체크박스에 체크를 해준다.
6. 설정이 완료됐으면 SPI SPEED: 40MHz, SPI MODE: QIO, FLASH SIZE: 8Mbit를 추가로 설정해주고
4-1 업로드 모드로 전환하기를 다시 실행한 뒤 “START” 버튼을 클릭
업로드 모드는 펌웨어 지우기 또는 펌웨어 업로드의 시도가 있은 후에는 그 성공 여부에 상관없이 초기화되므로 매번 업로드 모드로 전환한 후에 실행해야함.
펌웨어 업로드가 완료되면 ESP01 모듈의 보드 레이트는 초기값인 115200으로 변경된다. 아두이노에서 사용할 수 있도록 보드 레이트를 9600으로 변경해주어야 한다.
현재 아두이노에는 EMPTY CODE가 업로드 되어 있다. 이 상태에서 아두이노 IDE의 시리얼 모니터를 열고 보드 레이트는 115200, 전송옵션은 “Both NL & CR”로 설정한 뒤에 현재 아두이노 GND에 연결되어 있는 GPIO0핀의 연결을 해제한다. GPIO0핀이 연결해제된 상태에서 RST핀을 아두이노의 GND핀에 연결했다 해제하면 시리얼 모니터에 아래와 같이 “ready”라는 메시지가 출력된다.
시리얼 모니터 입력창에 “AT+UART_DEF=9600,8,1,0,0″를 입력하고 엔터를 치면 “OK”라는 메세지가 출력되고 ESP01의 보드레이트는 9600으로 변경된다.
보드 레이트가 9600으로 변경되었으므로 시리얼 모니터의 보드 레이트를 9600으로 변경한 뒤 시리얼 모니터 입력창에 “AT”를 입력하고 엔터를 치면 “OK”라는 메시지를 확인 할 수 있다.
이제 펌웨어 업로드와 보드 레이트 변경까지 완료 하였다. 아두이노와 ESP01의 연결을 이전으로(제어용) 변경해 준다.
기상청 및 오픈 웨더 맵에서 날씨 정보 받기
기상청
스케치는 프로그램 저장 공간 13142 바이트(40%)를 사용. 최대 32256 바이트.
전역 변수는 동적 메모리 437바이트(21%)를 사용, 1611바이트의 지역변수가 남음. 최대는 2048 바이트.
#include #define rxPin 3 #define txPin 2 SoftwareSerial esp01(txPin, rxPin); // SoftwareSerial NAME(TX, RX); const String ssid_AP = “ESP01”; // your network SSID (name) const String pass_AP = “12345678”; //”1234test”; // your network password char ssid[21] = “skynet”; // “SK_WiFiGIGA40F7” your network SSID (name) char pass[21] = “skynet00”; // “1712037218” your network password String ip = “”; String ap = “”; void ipCheck(String response) { int st, ed; if (response.indexOf(F(“PIP”)) != -1) { st = response.indexOf(F(“PIP”))+5; ed = response.indexOf(‘”‘, st+1); ap = response.substring(st, ed); response.remove(0, ed+1); Serial.print(F(“ap: “)); Serial.println(ap); } if (response.indexOf(F(“AIP”)) != -1) { st = response.indexOf(F(“AIP”))+5; ed = response.indexOf(‘”‘, st+1); ip = response.substring(st, ed); Serial.print(F(“ip: “)); Serial.println(ip); } } uint8_t retry = 1; String sendData(String order) { String command = F(“AT+”); command += order; command += F(“\r
“); esp01.print(command); // send the read character to the esp01 unsigned long int time = millis(); String response = “”; while( (time+20000) > millis()) { while(esp01.available()) { // The esp has data so display its output to the serial window char c = esp01.read(); // read the next character. response+=c; } if (response.indexOf(F(“OK”)) != -1) { retry = 0; Serial.println(F(“OK”)); break; } else if (response.indexOf(F(“FAIL”)) != -1 || response.indexOf(F(“ERROR”)) != -1) { if (response.indexOf(F(“FAIL”)) != -1) retry++; else if (response.indexOf(F(“ERROR”)) != -1) { Serial.println(F(“ERROR”)); break; } Serial.print(command); Serial.println(F(“Failed”)); break; } } return response; } String addID(String order, String ssid_AP, String pass_AP) { String temp = order+'”‘+ssid_AP+'”‘+’,’+'”‘+pass_AP+'”‘; return temp; } void setup() { Serial.begin(9600); esp01.begin(9600); // your esp’s baud rate might be different sendData(F(“CWQIF”)); // disconnect AP if connected sendData(F(“CWQAP”)); // disconnect wifi if connected sendData(F(“CWMODE=3”)); // configure as access point (working mode: AP+STA) sendData(F(“CWDHCP=1,1”)); sendData(addID(F(“CWSAP=”),ssid_AP,pass_AP)+’,’+String(10)+’,’+String(3)); retry = 1; while(retry) { sendData(addID(F(“CWJAP=”),ssid,pass)); if (retry > 1) { Serial.print(F(“Retrying to connect: “)); Serial.println(retry-1); } if (retry > 4) { Serial.println(F(“connection failed”)); retry = 0; } } sendData(F(“CIPMUX=1”)); // configure for multiple connections sendData(F(“CIPSERVER=1,80”)); // turn on server on port 80 ipCheck(sendData(F(“CIFSR”))); // // get ip address } // http://www.kma.go.kr/wid/queryDFSRSS.jsp?zone=1159068000 const char host[] PROGMEM = “www.kma.go.kr”; const char url[] PROGMEM = “/wid/queryDFSRSS.jsp?zone=1159068000”; bool OK200 = false; bool sentREQ = false; bool gotWeather = false; void get_weather() { if (!sentREQ) { Serial.println(F(“Starting connection to server…”)); bool connectOK = false; String cip = F(“AT+CIPSTART=3,”); // connection ID 3 (ID: 0 ~ 4) cip += ‘”‘; cip += F(“TCP”); cip += ‘”‘; cip += ‘,’; cip += ‘”‘; cip += (const __FlashStringHelper *)host; cip += ‘”‘; cip += ‘,’; cip += F(“80”); // port number cip += F(“\r
“); esp01.print(cip); unsigned long int time = millis(); while (time+2000 > millis()) { cip = esp01.readStringUntil(‘
‘); if (cip.indexOf(F(“OK”)) != -1) { connectOK = true; Serial.println(F(“OK”)); break; } else if (cip.indexOf(F(“ERROR”)) != -1) { Serial.println(F(“ERROR”)); break; } } if (connectOK) { Serial.println(F(“Connected to server”)); String temp = F(“GET “); temp += (const __FlashStringHelper *)url; temp += F(” HTTP/1.1\r
Host: “); temp += (const __FlashStringHelper *)host; temp += F(“\r
Connection: close\r
\r
“); cip = F(“AT+CIPSEND=”); cip += 3; // connection ID 3 (ID: 0 ~ 4) cip += ‘,’; cip += temp.length(); cip += F(“\r
“); esp01.print(cip); time = millis(); while (time+2000 > millis()) { cip = esp01.readStringUntil(‘
‘); if (cip.indexOf(F(“OK”)) != -1) { Serial.println(F(“OK”)); break; } else if (cip.indexOf(F(“ERROR”)) != -1) { Serial.println(F(“ERROR”)); break; } } esp01.print(temp); sentREQ = true; gotWeather = true; } } } // RSS 날씨 정보 저장 변수 // RSS 날씨 정보 저장 변수 String line0 = “”; String line1 = “”; uint8_t count = 0; // RSS 날씨 정보 분류 카운터 uint8_t tryCount = 0; // 온도 저장 변수 float temp0; float temp1; void parsing() { String announce_time; int tm_start= line0.indexOf(F(“ “)); // “ “문자가 시작되는 인덱스 값(‘“)); announce_time = line0.substring(tm_start + 4, tm_end); // +4: “ “스트링의 크기 4바이트, 4칸 이동 Serial.print(F(“announce_time: “)); Serial.println(announce_time); String hour; int hour_start= line0.indexOf(F(“ “)); int hour_end= line0.indexOf(F(“ “)); hour = line0.substring(hour_start + 6, hour_end); Serial.print(F(“hour: “)); Serial.println(hour); String temp; int temp_start= line0.indexOf(F(“ “)); int temp_end= line0.indexOf(F(“ “)); temp = line0.substring(temp_start + 6, temp_end); Serial.print(F(“temp: “)); Serial.println(temp); temp0 = temp.toFloat(); // 자료형 변경 String -> float Serial.print(F(“temp0: “)); Serial.println(temp0); String wfEn; int wfEn_start= line0.indexOf(F(“ “)); int wfEn_end= line0.indexOf(F(“ “)); wfEn = line0.substring(wfEn_start + 6, wfEn_end); Serial.print(F(“weather: “)); Serial.println(wfEn); line0 = “”; // 스트링 변수 line0 데이터 추출 완료 Serial.println(); hour_start= line1.indexOf(F(“ “)); hour_end= line1.indexOf(F(“ “)); hour = line1.substring(hour_start + 6, hour_end); Serial.print(F(“hour: “)); Serial.println(hour); temp_start= line1.indexOf(F(“ “)); temp_end= line1.indexOf(F(“ “)); temp = line1.substring(temp_start + 6, temp_end); Serial.print(F(“temp: “)); Serial.println(temp); temp1 = temp.toFloat(); // 자료형 변경 String -> float Serial.print(F(“temp1: “)); Serial.println(temp1); wfEn_start= line1.indexOf(F(“ “)); wfEn_end= line1.indexOf(F(“ “)); wfEn = line1.substring(wfEn_start + 6, wfEn_end); Serial.print(F(“weather: “)); Serial.println(wfEn); line1 = “”; // 스트링 변수 line1 데이터 추출 완료 } bool header = false; void loop() { if (!ip.startsWith(F(“0”))) { // 공유기로부터 IP주소를 할당받은 경우 if (!gotWeather) { if (tryCount < 3) { get_weather(); tryCount++; } } } if (sentREQ) { // 날씨 정보가 들어오는 동안 if (!OK200) { if (esp01.find('+')) { line0 = esp01.readStringUntil(' '); if (line0.indexOf(F("200")) != -1) OK200 = true; line0 = ""; } else { // gotWeather = true; -> 날씨 작업 종료 후 나머지 데이터 삭제 line0 = esp01.readStringUntil(‘
‘); if (line0.endsWith(F(“D”))) { if (line0.endsWith(F(“CLOSED”))) sentREQ = false; // HTTP connection closed } } } else { if (!header) { line0 = esp01.readStringUntil(‘
‘); if (line0.indexOf(F(“
아두이노와 ESP8266을 활용하여 센싱한 데이터의 데이터베이스 저장과 리트리빙
728x90
반응형
출처: https://jandh.tistory.com/16
아두이노와 ESP8266을 활용하여 센싱한 데이터의 데이터베이스 저장과 리트리빙
1. 사전 작업
WAMP 기반 웹서버를 Bitnami wordpress를 이용하여 구축한다. 물론 취향에 맞게 다른 AMP 스택을 설치할 수도 있다. 본 문서는 위의 Bitnami WordPress를 기준으로 하여 설명한다.
WordPress 설치 시에는 관리자id을 통상 admin으로 설정하는데, 해킹의 대상이 될 수 있으므로 가급적이면 다른 id로 설정하는 것을 권장한다.
Bitnami WordPress를 설치한 후의 폴더 경로 및 구조는 아래와 같다.
<그림 1> Bitnami WordPress 설치 폴더 구조
WordPress는 아래와 같이 apps\wordpress 폴더에 설치가 되며, document root 는 htdocs이다.
<그림 2> WordPress 설치 폴더
2. 센싱할 데이터 및 데이터베이스 테이블 정의
센싱하여 저장할 데이터는 센싱 시각, 온도 및 습도이며, mySql 기준으로 다음 [표.1]의 데이터 속성을 갖는다. DHT11 센서의 경우 온도, 습도를 정수형(TINYINT, SMALINT 등)으로도 선언 가능하겠으나, 확장성 등을 고려하여 FLOAT로 선언하였다.
여기서 sensDate는 편의상 실제로 측정한 시각이 아닌, 데이터베이스에 기록된 시각을 사용한다.
[표. 1] 데이터베이스 테이블 구조Field Data Type Null 비고 sensDate DATETIME Not null temperature FLOAT Not Null humidity FLOAT Not null
3. 데이터베이스 생성
더 진행하기 전에 몇 가지 명칭을 아래와 같이 정의한다(실제 구현 시에는 다른 이름으로 설정하여 사용하여야 하며, 그렇지 않음으로 발생하는 손해는 사용자 개인 책임이다).
- 센싱한 데이터를 저장하기 위한 데이터베이스 이름 : abc_sens
- 데이터베이스의 테이블 이름 : sens_table
- 데이터베이스 사용자 : abc_user
- 데이터베이스 사용자 비번 : abc_1234
명령 프롬프트(cmd창)를 열고 <그림 1>의 mysql\bin 폴더로 이동하여 다음과 같이 root 권한으로 mysql을 실행한다. 이 때의 비번은 WordPress 관리자 비번과 동일하다.
C:\Bit…\mysql\bin>mysql –u root -p
위에서 정의한 사용자 abc_user, 비번 abc_1234를 다음과 같이 생성한다.
mysql> create user ‘abc_user’@’localhost’ identified by ‘abc_1234’;
사용자를 생성하였으면 이번에는 데이터베이스를 생성한다.
mysql> create database abc_sens;
생성한 데이터베이스에 사용자가 액세스할 수 있는 권한을 아래와 같이 부여한다.
mysql> grant usage on *.* to 'abc_user'@'localhost';
아울러 사용할 데이터베이스인 abc_sens에 대한 모든 권한을 부여한다.
mysql> grant all on abc_sens.* to 'abc_user'@'localhost';
여기까지는 root 권한으로 mysql에서 작업을 한 것이다. exit 하고, 위에서 새로 생성한 사용자인 id는 abc_user, 비번은 abc_1234 로 mysql에 다시 접속한다.
>mysql –u abc_user –p (비번 입력 프롬프트가 나오면 비번인 abc_1234를 입력)
이 상태에서 mysql> show databases; 명령을 입력하면 위에서 생성한 abc_sens가 나타난다. 이 데이터베이스를 사용한다는 선언을 mysql> use abc_sens; 입력으로 해준다.
이제 abc_sens 데이터베이스에 앞에서 정의한 테이블을 생성한다.
mysql> create table sens_table (sensDate DATETIME , temperature float, humidity float);
이상의 과정을 통하여 아래와 같이 테이블이 생성된 것을 확인할 수 있다.
mysql> describe sens_table;
이상을 확인하면 mysql을 빠져나온다.
4. 데이터 쓰기
4-1. 아두이노 ESP8266에서 웹서버로 데이터 보내기
아두이노에서 ESP8266의 AP 접속은 다음의 AT 커멘드를 순서대로 실행하여 완료한다. 여기서 AP_SSID와 AP_PWD는 ESP8266이 접속하고자 하는 AP의 SSID, password 이다. 각 AT 커멘드는 ESP8266 AT Instruction Set를 참조한다.
- “AT+GMR\r
”
- “AT+CWMODE=1\r
”
- "AT+CWJAP=\"AP_SSID",\"AP_PWD\"\r
"
위와 같이 AP에 접속한 후에는 다음의 명령을 실행한다.
- "AT+CIPMUX=0\r
"
데이터 센싱을 한 이후에, 그 센싱한 데이터를 웹서버로 전송하기 위하여 아두이노 프로그램에서 다음을 실행한다. 아래는 웹서버 IP주소가 192.168.5.4 이고, 웹서비스 포트가 80인 예이다.
- "AT+CIPSTART=\"TCP\",\"192.168.5.4\",80\r
"
이제 ESP8266의 AT커멘드로 웹서버로 전송할 데이터를 구성해본다. 앞에서 센싱한 온도가 20도, 습도가 30%라고 가정하면, AT+CIPSEND 명령으로 보낼 데이터는 다음과 같이 GET 방식을 이용하여 구성한다.
- “GET /wordpress/abc-write.php?temprature=20&humidity=30\r
”
여기서 /wordpress는 <그림. 2>의 htdocs가 위치한 경로명이고, abc-write.php는 htdocs에 위치한 데이터 저장을 위한 php 파일이다.
4-2. 데이터베이스에 저장하기
앞에서 웹서버가 수신한 데이터를 데이터베이스에 저장하기 위한 파일로 abc-write.php를 언급하였는데, 이 php 파일이 어떻게 코딩되는지 보기로 한다.
우선 데이터베이스를 액세스하기 위하여 다음의 각 변수를 지정한다. 각각의 변수에 해당하는 값들은 앞의 데이터베이스 생성에서 정의한 값들이다.
$servername = "localhost";
$username = "abc_user";
$password = "abc_1234";
$dbname = "abc_sens";
웹서버로 전송된 데이터는 parse_str() 함수로 파싱을 하고,
parse_str( html_entity_decode( $_SERVER['QUERY_STRING']) , $out);
temperature 인자가 있는 경우, mysqli() 함수를 이용하여 데이터베이스에 접속, insert into 명령으로 데이터를 기록하게 한다.
성공적으로 기록되면 리턴되는 값은 “Sensed data saved." 이고, 실패 시에는 "Error:”와 함께 에러 메시지를 리턴한다.
앞에서 설명했던 ESP8266을 통한 데이터 저장은 웹브라우저를 통해서도 확인이 되는데, 웹브라우저의 주소 창에 AT+CIPSEND로 전송될 데이터인 temprature=20&humidity=30 값을 이용하여, 다음과 같이 입력하면 그 결과를 확인할 수 있다.
- http://192.168.5.4/wordpress/abc-write.php?temperature=20&humidity=30
<그림 3> 웹브라우저를 통한 데이터 전송
다음은 abc-write.php의 전체 코드이다.
connect_error) { die("Connection failed: " . $conn->connect_error); } $datenow = $now->format("Y-m-d H:i:s"); $temp = $out['temperature']; $humid = $out['humidity']; $sql = "INSERT INTO sens_table (sensDate , temperature, humidity) VALUES ('$datenow' , $temp, $humid)"; if ($conn->query($sql) === TRUE) { echo "Sensed data saved."; } else { echo "Error: " . $sql . "
[Source Code] abc-write.php
" . $conn->error; } $conn->close(); } ?>4-3. 저장된 데이터 리트리빙하기
데이터베이스에 접근하기 이전에 wordpress 로그인 사용자를 확인하기 위하여
include_once("./wp-config.php");
$current_user = wp_get_current_user();
함수를 실행한다. 여기서는 로그인 하지 않은 경우에는 서비스를 거부하는 예로 코딩하였다. 즉, 현재 로그인 ID를 체크하여 로그인 사용자가 아니면 실행을 중단하도록 한다.
if( 0 == $current_user->ID )
로그인 사용자임이 확인되면, mysqli_connect() 함수를 이용하여 데이터베이스를 열고, mysqli_query() 함수를 이용하여 테이블의 데이터를 읽어 온다. 다음은 그 전체 소스코드이다.
Sensed Data ID ) { echo ' My Sensor Data
'; // echo 'Login name is: ' . $current_user->display_name . ' '; exit(); } echo "
'; echo 'Login required...
'; echo '"; echo "[" . $current_user->display_name . "(으)로 로그인]"; echo " "; $con = mysqli_connect('localhost','abc_user','abc_1234','abc_sens'); // Check connection if ($conn->connect_error) { die("Connection failed: " . $conn->connect_error); } //Selecting the data from table but with limit $query = "SELECT * FROM sens_table order by sensDate desc LIMIT 0, 20"; $result = mysqli_query ($con, $query); ?>
Send Date Temperature(°C) Humidity(%)
[Source Code] abc-read-text.php
다음의 그림은 위의 코드를 실행한 결과를 보여준다. 데이터가 많아서 페이지네이션이 필요한 경우에는 쿼리 문장에서 LIMIT 옵션을 이용하여 구현이 가능하다.
<그림 4> 데이터 리트리빙 결과
다음의 그림은 유사한 방법으로 Google Charts를 이용하여 그래픽으로 나타낸 것이다. 자세한 것을 아래의 소스코드 abc-read-chart.php를 참고한다.
<그림 5> Google Charts를 이용한 결과
ID ) { echo '
'; echo ' '; exit(); } // db initialization $servername = "localhost"; $username = "abc_user"; $password = "abc_1234"; $dbname = "abc_sens"; date_default_timezone_set('Asia/Seoul'); // Check connection $con = new mysqli($servername, $username, $password, $dbname); if ($con->connect_error) { die("Connection failed: " . $con->connect_error); } ?>My Sensor Data
'; echo '
Login required...
'; echo '
[Source Code] abc-read-chart.php My Sensor Data
5. 결어
본 문서에서는 아두이노 보드와 ESP8266 WiFi모듈, 그리고 DHT11 온습도센서를 이용, 센싱한 온도와 습도를 네트워크로 전송하면 Bitnami WordPress가 설치된 웹서버 데이터베이스에 데이터를 저장하고, 텍스트 모드로 출력하는 방법을 설명하였다. 아울러 구글 차트를 이용, 그래픽 모드로 리트리빙하는 방법도 설명하였다.
보안문제는 별도로 언급을 하지 않았으므로 본 문서를 참고로 하여 시스템을 시험 구축하고자 하는 사람은 보안에 대한 별도의 대책을 마련하여야 함에 유념하여야 한다.
[References] [1] Bitnami WordPress, https://bitnami.com/stack/wordpress [2] ESP8266 AT Instruction Set Version 1.5.4, http://www.espressif.com/sites/default/files/4a-esp8266_at_instruction_set_en_v1.5.4_0.pdf [3] WordPress Code Reference, https://developer.wordpress.org/reference/ [4] PHP MySQL Improved Extension, http://php.net/manual/kr/book.mysqli.php [5] Google Charts, https://developers.google.com/chart/출처: https://jandh.tistory.com/16 [Inspiration]
반응형
키워드에 대한 정보 아두 이노 esp8266 데이터 전송
다음은 Bing에서 아두 이노 esp8266 데이터 전송 주제에 대한 검색 결과입니다. 필요한 경우 더 읽을 수 있습니다.
이 기사는 인터넷의 다양한 출처에서 편집되었습니다. 이 기사가 유용했기를 바랍니다. 이 기사가 유용하다고 생각되면 공유하십시오. 매우 감사합니다!
사람들이 주제에 대해 자주 검색하는 키워드 Arduino esp8266 adapter - 아두이노 esp8266 전용 어댑터 사용하여 wifi 연결 후 공공 데이터 가져오기 - 날씨,교통,질병등 통계데이터
- #아두이노
- #코딩
- #arduino
- #diy
- #DIY
- #코딩교육
- #smart home
- #스마트홈
- #esp8266
- #wifi
- #와이파이
- #공공데이터
- #미세먼지
- #코로나
- #교통
- #날씨
Arduino #esp8266 #adapter #- #아두이노 #esp8266 #전용 #어댑터 #사용하여 #wifi #연결 #후 #공공 #데이터 #가져오기 #- #날씨,교통,질병등 #통계데이터
YouTube에서 아두 이노 esp8266 데이터 전송 주제의 다른 동영상 보기
주제에 대한 기사를 시청해 주셔서 감사합니다 Arduino esp8266 adapter - 아두이노 esp8266 전용 어댑터 사용하여 wifi 연결 후 공공 데이터 가져오기 - 날씨,교통,질병등 통계데이터 | 아두 이노 esp8266 데이터 전송, 이 기사가 유용하다고 생각되면 공유하십시오, 매우 감사합니다.