당신은 주제를 찾고 있습니까 “아두 이노 lcd 예제 – 아두이노 예제 12 LCD에 글자 표시하기“? 다음 카테고리의 웹사이트 https://kk.taphoamini.com 에서 귀하의 모든 질문에 답변해 드립니다: https://kk.taphoamini.com/wiki/. 바로 아래에서 답을 찾을 수 있습니다. 작성자 코딩런 IT [Codingrun IT] 이(가) 작성한 기사에는 조회수 33,639회 및 좋아요 139개 개의 좋아요가 있습니다.
Table of Contents
아두 이노 lcd 예제 주제에 대한 동영상 보기
여기에서 이 주제에 대한 비디오를 시청하십시오. 주의 깊게 살펴보고 읽고 있는 내용에 대한 피드백을 제공하세요!
d여기에서 아두이노 예제 12 LCD에 글자 표시하기 – 아두 이노 lcd 예제 주제에 대한 세부정보를 참조하세요
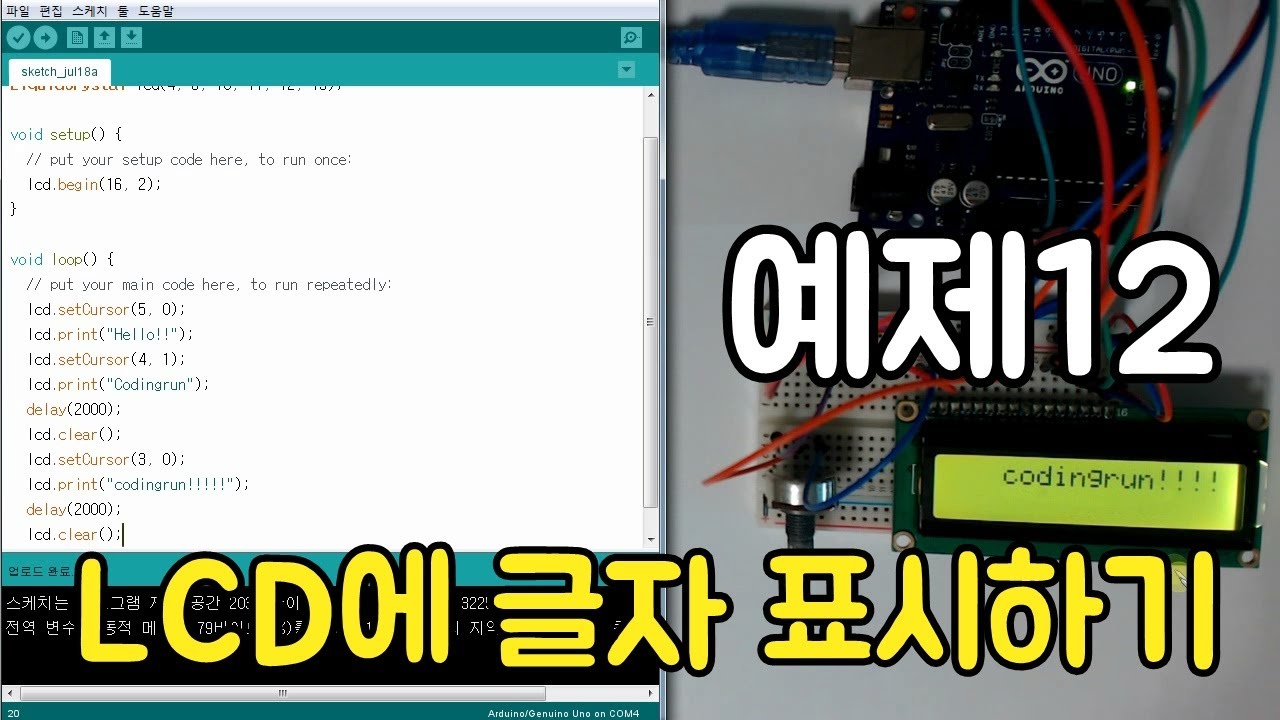
아두이노를 이용하여 LCD에 글자를 표시해 봅시다!
본 강의 : http://codingrun.com/112
아두 이노 lcd 예제 주제에 대한 자세한 내용은 여기를 참조하세요.
[Arduino] 아두이노 LCD 16×2 다양한 예제 응용하기 – 코딩아트
설정이 다 끝나면 다시 아두이노 창으로 돌아와서 예제 – LiquCrystal I2C – HelloWorld 를 들어간다. 예제실습 – LCD 작동확인.
Source: artsung410.tistory.com
Date Published: 2/4/2022
View: 430
Liquid Crystal Displays (LCD) with Arduino
For example, on a MKR WiFi 1010, the SPI bus is attached to pin 8 & 11. Before wiring the LCD screen to your Arduino board we suggest to …
Source: www.arduino.cc
Date Published: 8/20/2022
View: 8772
I2C LCD로 문자 출력하기 – 코코아팹
이 예제에서 16개의 문자를 2줄로, 총 32개 문자를 표현할 수 있는 LCD를 … 아두이노 프로젝트 제작에 있어 가장 보편적으로 사용되는 LCD는 16*2 …
Source: kocoafab.cc
Date Published: 5/2/2022
View: 4907
[아두이노 기초] LCD 글자 출력하기
연결과정 영상을 보시면 LCD(I2C) 연결과정을 파악하는데 도움이 됩니다. … [Arduino] 아두이노 LCD 16×2 다양한 예제 응용하기 (tistory.com) …
Source: infoinno.tistory.com
Date Published: 6/14/2022
View: 2031
아두이노 강좌 #18 I2C Character LCD 기본 함수 사용 방법 …
I2C CLCD x 1EA (본 예제에서는 16×2 CLCD 사용, 다른 사이즈 사용도 무관 합니다.) Jumper Wires. 회로도 및 연결. 아두이노 I2C 캐릭터 LCD (좌) 회로도, (우) 연결 …
Source: juahnpop.tistory.com
Date Published: 3/5/2021
View: 1229
[아두이노] I2C LCD 사용법
아두이노 키트를 사면 대부분 I2C LCD 모듈이 포함되어 있습니다. 이번 포스팅에서는 2줄 16 … 라이브러리 자체에서 예제코드를 제공하고 있습니다.
Source: popcorn16.tistory.com
Date Published: 2/19/2022
View: 7833
[아두이노 LCD 타이머] 아두이노 LCD 화면 제어 _ EP5
아두이노 LCD 제어하기 아두이노를 사용하다보면 LCD를 자주 사용하게 되는데, LCD 관련 예제입니다~! 1. LCD 사용하기 ○ 사용 부품 1) 아두이노 UNO …
Source: kgu0724.tistory.com
Date Published: 4/15/2021
View: 6329
주제와 관련된 이미지 아두 이노 lcd 예제
주제와 관련된 더 많은 사진을 참조하십시오 아두이노 예제 12 LCD에 글자 표시하기. 댓글에서 더 많은 관련 이미지를 보거나 필요한 경우 더 많은 관련 기사를 볼 수 있습니다.
주제에 대한 기사 평가 아두 이노 lcd 예제
- Author: 코딩런 IT [Codingrun IT]
- Views: 조회수 33,639회
- Likes: 좋아요 139개
- Date Published: 2017. 7. 18.
- Video Url link: https://www.youtube.com/watch?v=-kJ3C5tfkXc
[Arduino] 아두이노 LCD 16×2 다양한 예제 응용하기
LCD의 개요
LCD의 앞면과 뒷면사진
위의 LCD(16×2)는 특이하게 아두이노 쉴드처럼 남땝처리가 되어있는데, 핀 구성이 기존의 LCD의 회로방식과는 다르게 되어있다. 이 방식은 I2C통신방식이다. SPI통신은 핀 연결만 10번을 진행하게 되는데, 기존 SPI통신과는 다르게 I2C LCD는 회로가 간결하게 구성되어있는게 특징이다.
LCD 라이브러리 설치
이 LCD를 이용하려면 특정 라이브러리를 추가해 주어야한다.
LCD와 여러모듈을 이용하기 위해서는 “liquidcrystal I2C”라는 라이브러리가 필요하다, 그래서 특정 LCD에 맞는 라이브러리를 설치해 줄 필요가 있다.
아두이노를 실행하고 스케치 탭 – 라이브러리 포함하기 – 라이브러리 관리 를 들어간다.
라이브러리 관리를 들어가게되면 라이브러리 매니저라는 창이 뜨게된다.
검색창에 liquidcrystal I2C를 입력한다.
라이브러리 추가를 끝내고 설치가 완료되면 버전 옆에 INSTALLED 라는 글씨가 뜨게된다.
설정이 다 끝나면 다시 아두이노 창으로 돌아와서 예제 – LiquidCrystal I2C – HelloWorld 를 들어간다.
예제실습 – LCD 작동확인
이제 모든준비가 끝났다.
#include
#include LiquidCrystal_I2C lcd(0x27,16,2); void setup() { lcd.init(); // LCD초기 설정 lcd.backlight(); // LCD초기 설정 lcd.setCursor(0,0); //텍스트가 LCD에 나타날 위치 lcd.print(“Hellow, world!”); lcd.setCursor(3,1); lcd.print(“How are you?”); } 추가하면 이런식으로 Wire.h와 LiquidCrystal_I2C.h 라는 라이브러리가 추가된것을 확인할 수 있다.
위 코드는 조금 변경시켰는데, 3번째 줄을 (0X27, 16, 2) 로 수정을 했고, 아래 예제의 텍스트를 조금 수정했다.
16×2 lcd는 위사진과 같이 총 두줄로 구성이 되어있고, setCursor는 이 LCD에 텍스트가 나오게 되는 좌표라고 생각하면 편하다. 예를들어서 setCursor(3,1)이라고 하면 두번째 행, 3번째열에 위치하게된다.
Sensor Arduino UNO GND(검정색) GND VCC(빨간색) 5V SDA(노란색) A4 SCL(초록색) A5
회로구성은 위와같다. 오른쪽 사진에서 표시된 핀들이 정확하고, 회로를 편집하는 과정에서 위 회로의 순서와는 조금 차이가 있다는점을 주의해야한다. 포트 구성은 위의 표와 같다.
코드를 입력하고 컴파일 까지 모두 다 끝내게 되면 위 사진과 같이 텍스트가 뜨는것을 확인할 수 있다.
예제실습 – LCD에 움직이는 텍스트 넣기
아까 기본예제를 이용해서 이번에는 움직이는 텍스트를 만들어 낼 수도있다.
#include
#include LiquidCrystal_I2C lcd(0x27, 16, 2); void setup() { lcd.init(); lcd.backlight(); lcd.setCursor(0, 0); lcd.print(“Hellow, world!”); } void loop() { for (int position = 0; position < 16; position++) { lcd.scrollDisplayLeft(); delay(150); } for (int position = 0; position < 35; position++) { lcd.scrollDisplayLeft(); delay(150); } } 위의 예제를 살짝 변형시켰는데, 차이점이 있다면 void loop안의 내용추가이다. 여기서 for문을 이용해서 정수가 늘어날때마다 텍스트가 한번씩 움직이는 scrollDisplay 함수를 이용해보았다. 좌로 1열씩 움직일때는 scrollDisplayLeft(), 우로 1열씩 움직일때는 scrollDisplayRight()를 쓰면된다. 위의 예제를 컴파일 하게되면 위와같이 움직이는 LCD를 만들어 낼 수있다. 이제 다음 여러가지 예제를 통해서 LCD를 응용해볼 수 있다. 가변저항(Potentiometer) 을 이용해서 LED의 색상을 LCD에 표현해보기 Sensor Arduino UNO GND(공통 - 검정색(회색)) GND VCC(가변저항 - 빨간색) Vin SDA(LCD - 노란색) A4 SCL (LCD - 초록색) A5 VCC(가변저항 - 갈색) 5V A0(가변저항 - 갈색) A0 LED(blue) D2 LED(green) D3 LED(red) D4 #include #include LiquidCrystal_I2C lcd(0x27,16,2); int val=0; void setup() { lcd.init(); pinMode(2, OUTPUT); pinMode(3, OUTPUT); pinMode(4, OUTPUT); lcd.backlight(); } void loop() { val = analogRead(A0); if (val <= 250) { digitalWrite(2, HIGH); digitalWrite(3, LOW); digitalWrite(4, LOW);; lcd.setCursor(5,0); lcd.print("Color"); lcd.setCursor(5,1); lcd.print("“); } else if(val > 250 && val <= 500){ digitalWrite(2, LOW); digitalWrite(3, HIGH); digitalWrite(4, LOW); lcd.setCursor(5,0); lcd.print("Color"); lcd.setCursor(5,1); lcd.print(" “); } else{ digitalWrite(2, LOW); digitalWrite(3, LOW); digitalWrite(4, HIGH); lcd.setCursor(5,0); lcd.print(“Color”); lcd.setCursor(5,1); lcd.print(“ “); } } 회로구성은 위와같다. 가변저항값에 따라서 전구의 색이 변하는 조건문을 이용해서 LCD에 나타낸다.
위와같이 가변저항기를 돌리게되면 LCD의 텍스트가 바뀌는것을 확인할 수 있다.
온도센서(LM35) 를 이용해서 현재온도를 LCD에 표현해보기
Sensor Arduino UNO GND (공통 – 검정색) GND VCC(LCD – 빨간색) Vin SDA(LCD – 노란색) A4 SCL (LCD – 초록색) A5 VCC(온도센서 – 빨간색) 5V A0(온도센서 – 주황색) A0
회로구성은 위와같다, 주의해야 할점이 있는데 온도센서는 과부하가 걸리게 되면 온도가 급격하게 올라가기 때문에 오른쪽 사진과 같이 극성을 잘 확인해줄 필요가있다. 그 기준점을 잡는방법은 온도센서에 넙적한부분이 있는데 그부분을 앞으로 방향을 잡았을때 왼쪽이 5V 오른쪽이 GND, 가운데가 Output이 된다.
#include
#include float temp; // 실수형 타입의 변수 설정 LiquidCrystal_I2C lcd(0x27,16,2); void setup() { Serial.begin(9600); } void loop() { lcd.init(); int val = analogRead(A0); // 온도센서의 output에서 들어온 신호를 받아줄 변수지정 temp = val*0.48828125; // 화씨->섭씨로 변환한 값을 변수로 지정 lcd.backlight(); lcd.setCursor(3,0); lcd.print(“Temperature”); lcd.setCursor(6,1); lcd.print(temp, 1); lcd.setCursor(12,1); lcd.print(“C”); delay(1000); } 위의 사진처럼 손을 갖다 대면 온도가 올라가는게 LCD에 표시가 된다.
온습도센서(DHT11)를 이용해서 온도,습도,불쾌지수를 LCD에 표현해보기
실생활에서 우리가 온도센서(LM35)를 사용하기도 하지만, 더 다양한 기능이 들어있는 온습도 센서(DHT11)를 더 선호하는 편이다. 이 온습도 센서를 이용하면 습도를 측정해서 습도에 따라 작동하는 제습기를 만들 수 있고, 창문에 래크,피니언,서브모터를 이용해서 비내릴대 창문을 열고 닫는기능을 설정할 수 있다.
DHT11 온습도센서는 총 4개의 핀으로 구성되어있다. 이런 타입의 센서가 있는반면에 모듈형으로 되어있는 온습도센서가 있는데, 모듈형은 3개의 핀으로 구성되어있다. 이번시간에는 4개의핀으로 구성된 기본형 온습도센서를 사용해볼것이다. 핀이 4개지만 사용하는 핀은3가지다. 아래 표에 맞게 회로를 연결시켜주도록 한다.
Sensor Arduino UNO GND (공통 – 검정색) GND VCC(LCD – 빨간색) Vin SDA(LCD – 노란색) A4 SCL (LCD – 초록색) A5 VCC(온습도센서1번핀 – 빨간색) 5V DATA(온습도센서 2번핀 – 주황색) D2
#include
#include #include LiquidCrystal_I2C lcd(0x27,16,2); // for DHT11, // VCC: 5V or 3V // GND: GND // DATA: 2 int pinDHT11 = 2; SimpleDHT11 dht11; void setup() { Serial.begin(9600); } void loop() { lcd.init(); byte temperature = 0; byte humidity = 0; int err = SimpleDHTErrSuccess; if ((err = dht11.read(pinDHT11, &temperature, &humidity, NULL)) != SimpleDHTErrSuccess) { Serial.print(“Read DHT11 failed, err=”); lcd.setCursor(0,0); lcd.print(err); delay(1000); return; } int tem = (int)temperature; int hum = (int)humidity; int index = 1.8*tem – 0.55*(1-hum / 100)*(1.8*tem – 26) + 32; lcd.backlight(); lcd.setCursor(0,0); lcd.print(“TEM : “); lcd.print((int)temperature); lcd.print(“`C, “); lcd.print((int)humidity); lcd.print(“H”); lcd.setCursor(0,1); lcd.print(“DI : “); lcd.print(index); } 코드는 위와같다. 온습도센서를 사용하기위해서는 simpleDHT라는 라이브러리를 설치해야된다. 필자는 simpleDHT라이브러리 안에있는 예제를 활용해보았다. 온습도센서 라이브러리에 관한 설명은 아래링크를 통해 확인가능하다.
그리고 위 코드에는 온도값을 나타낼 정수형변수 tem을 설정해주었고, 습도값을 나타내는 hum변수를 설정해 두었다. 이 변수는 불쾌지수를 구할때 중요한 변수이므로 초기에 정의를 잘 해둘필요가있다.
불쾌지수는 index라는 변수를 통해서 값을 읽어들일것이다. 위 코드대로 진행을 시키게되면 LCD첫줄엔는 온도값과 습도값이 나올것이고, 두번째줄에는 불쾌지수가 나올것이다.
컴파일을 모두 진행시키면 정상적으로 온도,습도,불쾌지수 값이 출력이 되는것을 확인 할 수 있다.
DS 1302 RTC모듈을 이용해서 LCD 전자시계 만들기
이번에는 DS1302 RTC모듈을 이용해서 전자시계를 만들어보는 시간을 가져볼것이다.
RTC모듈은 실시간으로 시간을 출력하는 장치이다. RealTimeClock을 줄여서 흔히 RTC라고 부르는데, 이 장치는 각종 전자기기의 시간이나 타이머기능이 있는 모든제품에 사용된다.
Sensor Arduino UNO GND (공통 – 검정색) GND VCC(LCD – 빨간색) Vin SDA(LCD – 노란색) A4 SCL (LCD – 초록색) A5 VCC(RTC – 빨간색) 5V RST(RTC – 노란색) D8 DAT(RTC – 노란색) D7 CLK(RTC – 노란색) D6
#include
#include #include virtuabotixRTC myRTC(6, 7, 8); LiquidCrystal_I2C lcd(0x27, 16, 2); void setup() { Serial.begin(9600); lcd.init(); lcd.backlight(); myRTC.setDS1302Time(00, 48, 8, 7, 25, 7, 2020); } void loop() { myRTC.updateTime(); lcd.setCursor(1,0); lcd.print(myRTC.year); lcd.print(“/”); lcd.print(myRTC.month); lcd.print(“/”); lcd.print(myRTC.dayofmonth); lcd.print(“/”); switch (myRTC.dayofweek) { case 1: lcd.print(“Sun”); break; case 2: Serial.print(“MON”); break; case 3: lcd.print(“TUE”); break; case 4: lcd.print(“WED”); break; case 5: lcd.print(“THU”); break; case 6: lcd.print(“FRI”); break; case 7: lcd.print(“SAT”); break; } lcd.setCursor(5,1); lcd.print(myRTC.hours); lcd.print(“:”); lcd.print(myRTC.minutes); lcd.print(“:”); lcd.print(myRTC.seconds); delay(1000); lcd.clear(); } RTC모듈을 사용하기위해서, virtuabotixRTC라이브러리를 사용해보았다. 이 라이브러리는 구글링을통해서 다운이 가능하며 필자가 올려놓은글에 설명과 자료가 나와있으니 아래 링크를 통해서 라이브러리를 다운 받아주도록하자.
컴파일을 진행시키면 첫번째줄에 년,월,날짜,요일이 출력되는것을 확인 할 수 있고, 두번째줄에는 시간이 표시되는것을 확인 할 수 있다.
초음파 센서(HC-SR04) 를 이용해서 거리값을 LCD에 표현해보기
Sensor Arduino UNO GND (공통 – 검정색) GND VCC(LCD – 빨간색) Vin SDA(LCD – 노란색) A4 SCL (LCD – 초록색) A5 VCC(초음파센서 – 빨간색) 5V Trig( 초음파센서 – 보라색) D12 Echo( 초음파센서 – 회색) D11
#include
#include #include #define TRIGGER_PIN 12 #define ECHO_PIN 11 #define MAX_DISTANCE 200 NewPing sonar(TRIGGER_PIN, ECHO_PIN, MAX_DISTANCE); LiquidCrystal_I2C lcd(0x27,16,2); void setup() { Serial.begin(9600); lcd.init(); lcd.backlight(); } void loop() { lcd.setCursor(4,0); lcd.print(“Distance”); lcd.setCursor(5,1); lcd.print(sonar.ping_cm()); lcd.setCursor(8,1); lcd.print(“cm”); delay(300); lcd.clear(); } 초음파 센서는 아까 LCD라이브러리 추가했을때와 비슷하게 이것또한 라이브러리를 추가해 주어야된다.
라이브러리 관리창에 NewPing을 입력해서 설치해주도록한다. 그리고 NewPingExamle예제를 실행시키면 위의 코드와 같이 Newping.h 라이브러리가 포함되는것을 확인할 수있다. 다음에는 LiquidCrystal_I2C를 추가해주고 위와같은 코드를 작성하면 된다.
컴파일을 모두 진행하면 위와같이 손을 초음파센서에 갖다대면 값이 줄어들면서 변하는것을 확인할 수있다.
초음파에 대한 설명은 아래 링크를 참조하도록 한다.
반응형
Liquid Crystal Displays (LCD) with Arduino | Arduino Documentation
Liquid Crystal Displays (LCD) with Arduino
Find out how to wire an LCD to an Arduino, and how to use the LiquidCrystal library through a set of useful examples.
LAST REVISION: 10/05/2022, 01:00 PM
This article was revised on 2021/11/18 by Karl Söderby.
The LiquidCrystal library allows you to control LCD displays that are compatible with the Hitachi HD44780 driver. There are many of them out there, and you can usually tell them by the 16-pin interface.
Output of the sketch on a 16×2 LCD
The LCDs have a parallel interface, meaning that the microcontroller has to manipulate several interface pins at once to control the display. The interface consists of the following pins:
A register select (RS) pin that controls where in the LCD’s memory you’re writing data to. You can select either the data register, which holds what goes on the screen, or an instruction register, which is where the LCD’s controller looks for instructions on what to do next.
that controls where in the LCD’s memory you’re writing data to. You can select either the data register, which holds what goes on the screen, or an instruction register, which is where the LCD’s controller looks for instructions on what to do next. A Read/Write (R/W) pin that selects reading mode or writing mode
that selects reading mode or writing mode An Enable pin that enables writing to the registers
that enables writing to the registers 8 data pins (D0 -D7). The states of these pins (high or low) are the bits that you’re writing to a register when you write, or the values you’re reading when you read.
There’s also a display contrast pin (Vo), power supply pins (+5V and GND) and LED Backlight (Bklt+ and BKlt-) pins that you can use to power the LCD, control the display contrast, and turn on and off the LED backlight, respectively.
The process of controlling the display involves putting the data that form the image of what you want to display into the data registers, then putting instructions in the instruction register. The LiquidCrystal Library simplifies this for you so you don’t need to know the low-level instructions.
The Hitachi-compatible LCDs can be controlled in two modes: 4-bit or 8-bit. The 4-bit mode requires seven I/O pins from the Arduino, while the 8-bit mode requires 11 pins. For displaying text on the screen, you can do most everything in 4-bit mode, so example shows how to control a 16×2 LCD in 4-bit mode.
Hardware Required
Arduino Board
LCD Screen (compatible with Hitachi HD44780 driver)
pin headers to solder to the LCD display pins
10k ohm potentiometer
220 ohm resistor
hook-up wires
breadboard
Circuit
Note that this circuit was originally designed for the Arduino UNO. As the Arduino is communicating with the display using SPI, pin 11 & 12 will change depending on what board you are using. For example, on a MKR WiFi 1010, the SPI bus is attached to pin 8 & 11.
Before wiring the LCD screen to your Arduino board we suggest to solder a pin header strip to the 14 (or 16) pin count connector of the LCD screen, as you can see in the image further up.
To wire your LCD screen to your board, connect the following pins:
LCD RS pin to digital pin 12
LCD Enable pin to digital pin 11
LCD D4 pin to digital pin 5
LCD D5 pin to digital pin 4
LCD D6 pin to digital pin 3
LCD D7 pin to digital pin 2
LCD R/W pin to GND
LCD VSS pin to GND
LCD VCC pin to 5V
LCD LED+ to 5V through a 220 ohm resistor
LCD LED- to GND
Additionally, wire a 10k potentiometer to +5V and GND, with it’s wiper (output) to LCD screens VO pin (pin3).
The circuit (made using Fritzing).
Schematic
The schematic (made using Fritzing).
Hello World Example
This example sketch prints
Hello World !
Copy 1 2 3 4 5 6 7 8 9 10 11 12 13 14 15 16 17 18 19 20 21 22 23 24 25 26 27 28 29 30 31 32 33 34 35 36 37 38 39 40 41 42 43 44 # include
45 46 47 48 const int rs = 12 , en = 11 , d4 = 5 , d5 = 4 , d6 = 3 , d7 = 2 ; 49 LiquidCrystal lcd ( rs , en , d4 , d5 , d6 , d7 ) ; 50 51 void setup ( ) { 52 53 lcd . begin ( 16 , 2 ) ; 54 55 lcd . print ( “hello, world!” ) ; 56 } 57 58 void loop ( ) { 59 60 61 lcd . setCursor ( 0 , 1 ) ; 62 63 lcd . print ( millis ( ) / 1000 ) ; 64 } Autoscroll Example
to the LCD and shows the time in seconds since the Arduino was reset.
This example sketch shows how to use the
autoscroll ( )
noAutoscroll ( )
autoscroll ( ) moves all the text one space to the left each time a letter is added
moves all the text one space to the left each time a letter is added noAutoscroll ( ) turns scrolling off
andmethods to move all the text on the display left or right.
This sketch prints the characters
9
Copy 1 2 3 4 5 6 7 8 9 10 11 12 13 14 15 16 17 18 19 20 21 22 23 24 25 26 27 28 29 30 31 32 33 34 35 36 37 38 39 40 41 42 43 44 45 46 47 48 49 50 51 52 53 54 55 56 57 58 59 60 61 62 63 64 65 66 # include
67 68 69 70 71 const int rs = 12 , en = 11 , d4 = 5 , d5 = 4 , d6 = 3 , d7 = 2 ; 72 73 LiquidCrystal lcd ( rs , en , d4 , d5 , d6 , d7 ) ; 74 75 void setup ( ) { 76 77 78 79 lcd . begin ( 16 , 2 ) ; 80 } 81 82 void loop ( ) { 83 84 85 86 lcd . setCursor ( 0 , 0 ) ; 87 88 89 90 for ( int thisChar = 0 ; thisChar < 10 ; thisChar ++ ) { 91 92 lcd . print ( thisChar ) ; 93 94 delay ( 500 ) ; 95 96 } 97 98 99 100 lcd . setCursor ( 16 , 1 ) ; 101 102 103 104 lcd . autoscroll ( ) ; 105 106 107 108 for ( int thisChar = 0 ; thisChar < 10 ; thisChar ++ ) { 109 110 lcd . print ( thisChar ) ; 111 112 delay ( 500 ) ; 113 114 } 115 116 117 118 lcd . noAutoscroll ( ) ; 119 120 121 122 lcd . clear ( ) ; 123 } Blink Example towith autoscroll off, then moves the cursor to the bottom right, turns autoscroll on, and prints them again. This example sketch shows how to use the blink ( ) noBlink ( ) Copy 1 2 3 4 5 6 7 8 9 10 11 12 13 14 15 16 17 18 19 20 21 22 23 24 25 26 27 28 29 30 31 32 33 34 35 36 37 38 39 40 41 42 43 44 45 46 47 48 49 50 51 52 53 54 55 56 57 58 59 60 61 62 63 64 65 66 # include 67 68 69 70 71 const int rs = 12 , en = 11 , d4 = 5 , d5 = 4 , d6 = 3 , d7 = 2 ; 72 73 LiquidCrystal lcd ( rs , en , d4 , d5 , d6 , d7 ) ; 74 75 void setup ( ) { 76 77 78 79 lcd . begin ( 16 , 2 ) ; 80 81 82 83 lcd . print ( “hello, world!” ) ; 84 } 85 86 void loop ( ) { 87 88 89 90 lcd . noBlink ( ) ; 91 92 delay ( 3000 ) ; 93 94 95 96 lcd . blink ( ) ; 97 98 delay ( 3000 ) ; 99 } Cursor
andmethods to blink a block-style cursor.
This example sketch shows how to use the
cursor ( )
noCursor ( )
Copy 1 2 3 4 5 6 7 8 9 10 11 12 13 14 15 16 17 18 19 20 21 22 23 24 25 26 27 28 29 30 31 32 33 34 35 36 37 38 39 40 41 42 43 44 45 46 47 48 49 50 51 52 53 54 55 56 57 58 59 60 61 62 63 64 65 66 67 68 # include
69 70 71 72 73 const int rs = 12 , en = 11 , d4 = 5 , d5 = 4 , d6 = 3 , d7 = 2 ; 74 75 LiquidCrystal lcd ( rs , en , d4 , d5 , d6 , d7 ) ; 76 77 void setup ( ) { 78 79 80 81 lcd . begin ( 16 , 2 ) ; 82 83 84 85 lcd . print ( “hello, world!” ) ; 86 } 87 88 void loop ( ) { 89 90 91 92 lcd . noCursor ( ) ; 93 94 delay ( 500 ) ; 95 96 97 98 lcd . cursor ( ) ; 99 100 delay ( 500 ) ; 101 } Display Example
andmethods to control an underscore-style cursor.
This example sketch shows how to use the
display ( )
noDisplay ( )
Copy 1 2 3 4 5 6 7 8 9 10 11 12 13 14 15 16 17 18 19 20 21 22 23 24 25 26 27 28 29 30 31 32 33 34 35 36 37 38 39 40 41 42 43 # include
44 45 46 47 const int rs = 12 , en = 11 , d4 = 5 , d5 = 4 , d6 = 3 , d7 = 2 ; 48 LiquidCrystal lcd ( rs , en , d4 , d5 , d6 , d7 ) ; 49 50 void setup ( ) { 51 52 lcd . begin ( 16 , 2 ) ; 53 54 lcd . print ( “hello, world!” ) ; 55 } 56 57 void loop ( ) { 58 59 lcd . noDisplay ( ) ; 60 delay ( 500 ) ; 61 62 lcd . display ( ) ; 63 delay ( 500 ) ; 64 } Scroll Example
andmethods to turn on and off the display. The text to be displayed will still be preserved when you use noDisplay() so it’s a quick way to blank the display without losing everything on it.
This example sketch shows how to use the
scrollDisplayLeft ( )
scrollDisplayRight ( )
Copy 1 2 3 4 5 6 7 8 9 10 11 12 13 14 15 16 17 18 19 20 21 22 23 24 25 26 27 28 29 30 31 32 33 34 35 36 37 38 39 40 41 42 43 # include
44 45 46 47 const int rs = 12 , en = 11 , d4 = 5 , d5 = 4 , d6 = 3 , d7 = 2 ; 48 LiquidCrystal lcd ( rs , en , d4 , d5 , d6 , d7 ) ; 49 50 void setup ( ) { 51 52 lcd . begin ( 16 , 2 ) ; 53 54 lcd . print ( “hello, world!” ) ; 55 delay ( 1000 ) ; 56 } 57 58 void loop ( ) { 59 60 61 for ( int positionCounter = 0 ; positionCounter < 13 ; positionCounter ++ ) { 62 63 lcd . scrollDisplayLeft ( ) ; 64 65 delay ( 150 ) ; 66 } 67 68 69 70 for ( int positionCounter = 0 ; positionCounter < 29 ; positionCounter ++ ) { 71 72 lcd . scrollDisplayRight ( ) ; 73 74 delay ( 150 ) ; 75 } 76 77 78 79 for ( int positionCounter = 0 ; positionCounter < 16 ; positionCounter ++ ) { 80 81 lcd . scrollDisplayLeft ( ) ; 82 83 delay ( 150 ) ; 84 } 85 86 87 delay ( 1000 ) ; 88 89 } Serial to Display Example andmethods to reverse the direction the text is flowing. It prints "Hello World!", scrolls it offscreen to the left, then offscreen to the right, then back to home. This example sketch accepts serial input from a host computer and displays it on the LCD. To use it, upload the sketch, then open the Serial Monitor and type some characters and click Send. The text will appear on your LCD. Copy 1 /* 2 LiquidCrystal Library - Serial Input 3 4 Demonstrates the use a 16x2 LCD display. The LiquidCrystal 5 library works with all LCD displays that are compatible with the 6 Hitachi HD44780 driver. There are many of them out there, and you 7 can usually tell them by the 16-pin interface. 8 9 This sketch displays text sent over the serial port 10 (e.g. from the Serial Monitor) on an attached LCD. 11 12 The circuit: 13 * LCD RS pin to digital pin 12 14 * LCD Enable pin to digital pin 11 15 * LCD D4 pin to digital pin 5 16 * LCD D5 pin to digital pin 4 17 * LCD D6 pin to digital pin 3 18 * LCD D7 pin to digital pin 2 19 * LCD R/W pin to ground 20 * 10K resistor: 21 * ends to +5V and ground 22 * wiper to LCD VO pin (pin 3) 23 24 Library originally added 18 Apr 2008 25 by David A. Mellis 26 library modified 5 Jul 2009 27 by Limor Fried (http://www.ladyada.net) 28 example added 9 Jul 2009 29 by Tom Igoe 30 modified 22 Nov 2010 31 by Tom Igoe 32 modified 7 Nov 2016 33 by Arturo Guadalupi 34 35 This example code is in the public domain. 36 37 http://www.arduino.cc/en/Tutorial/LiquidCrystalSerialDisplay 38 39 */ 40 41 // include the library code: 42 #include 43 44 // initialize the library by associating any needed LCD interface pin 45 // with the arduino pin number it is connected to 46 const int rs = 12, en = 11, d4 = 5, d5 = 4, d6 = 3, d7 = 2; 47 LiquidCrystal lcd(rs, en, d4, d5, d6, d7); 48 49 void setup() { 50 // set up the LCD’s number of columns and rows: 51 lcd.begin(16, 2); 52 // initialize the serial communications: 53 Serial.begin(9600); 54 } 55 56 void loop() { 57 // when characters arrive over the serial port… 58 if (Serial.available()) { 59 // wait a bit for the entire message to arrive 60 delay(100); 61 // clear the screen 62 lcd.clear(); 63 // read all the available characters 64 while (Serial.available() > 0) { 65 // display each character to the LCD 66 lcd.write(Serial.read()); 67 } 68 } 69 } Set Cursor Example
This example sketch shows how to use the
setCursor ( )
setCursor ( )
Copy 1 lcd . setCursor ( 0 , 0 ) ; 2 lcd . setCursor ( 15 , 0 ) ; 3 lcd . setCursor ( 0 , 1 ) ; 4 lcd . setCursor ( 15 , 1 ) ;
method to reposition the cursor. To move the cursor, just callwith a row and column position. For example, for a 2×16 display:
Here is the full example:
Copy 1 2 3 4 5 6 7 8 9 10 11 12 13 14 15 16 17 18 19 20 21 22 23 24 25 26 27 28 29 30 31 32 33 34 35 36 37 38 39 40 41 42 43 44 45 46 47 48 49 50 51 52 53 54 55 56 57 58 59 60 61 62 63 64 65 66 # include
67 68 69 70 71 const int rs = 12 , en = 11 , d4 = 5 , d5 = 4 , d6 = 3 , d7 = 2 ; 72 73 LiquidCrystal lcd ( rs , en , d4 , d5 , d6 , d7 ) ; 74 75 76 77 78 const int numRows = 2 ; 79 80 const int numCols = 16 ; 81 82 void setup ( ) { 83 84 85 86 lcd . begin ( numCols , numRows ) ; 87 } 88 89 void loop ( ) { 90 91 92 93 for ( int thisLetter = ‘a’ ; thisLetter <= 'z' ; thisLetter ++ ) { 94 95 96 97 for ( int thisRow = 0 ; thisRow < numRows ; thisRow ++ ) { 98 99 100 101 for ( int thisCol = 0 ; thisCol < numCols ; thisCol ++ ) { 102 103 104 105 lcd . setCursor ( thisCol , thisRow ) ; 106 107 108 109 lcd . write ( thisLetter ) ; 110 111 delay ( 200 ) ; 112 113 } 114 115 } 116 117 } 118 } Text Direction Example This example sketch shows how to use the leftToRight ( ) rightToLeft ( ) rightToLeft ( ) causes text to flow to the left from the cursor, as if the display is right-justified. causes text to flow to the left from the cursor, as if the display is right-justified. leftToRight ( ) causes text to flow to the right from the cursor, as if the display is left-justified. andmethods. These methods control which way text flows from the cursor. This sketch prints a l m r s z Copy 1 2 3 4 5 6 7 8 9 10 11 12 13 14 15 16 17 18 19 20 21 22 23 24 25 26 27 28 29 30 31 32 33 34 35 36 37 38 39 40 41 42 43 44 45 46 47 48 49 50 51 52 53 54 55 56 57 58 59 60 61 62 63 64 65 66 # include 67 68 69 70 71 const int rs = 12 , en = 11 , d4 = 5 , d5 = 4 , d6 = 3 , d7 = 2 ; 72 73 LiquidCrystal lcd ( rs , en , d4 , d5 , d6 , d7 ) ; 74 75 int thisChar = ‘a’ ; 76 77 void setup ( ) { 78 79 80 81 lcd . begin ( 16 , 2 ) ; 82 83 84 85 lcd . cursor ( ) ; 86 } 87 88 void loop ( ) { 89 90 91 92 if ( thisChar == ‘m’ ) { 93 94 95 96 lcd . rightToLeft ( ) ; 97 98 } 99 100 101 102 if ( thisChar == ‘s’ ) { 103 104 105 106 lcd . leftToRight ( ) ; 107 108 } 109 110 111 112 if ( thisChar > ‘z’ ) { 113 114 115 116 lcd . home ( ) ; 117 118 119 120 thisChar = ‘a’ ; 121 122 } 123 124 125 126 lcd . write ( thisChar ) ; 127 128 129 130 delay ( 1000 ) ; 131 132 133 134 thisChar ++ ; 135 } Custom Character
throughright to left, thenthroughleft to right, thenthroughright to left again.
This example demonstrates how to add custom characters on an LCD display.
Note that this example requires an additional potentiometer:
Outer pins connected to 5V and GND.
Inner pin (wiper) connected to A0.
This potentiometer controls the
delayTime
Copy 1 2 3 4 5 6 7 8 9 10 11 12 13 14 15 16 17 18 19 20 21 22 23 24 25 26 27 28 29 30 31 32 33 34 35 36 37 38 39 40 41 42 43 44 # include
45 46 47 48 const int rs = 12 , en = 11 , d4 = 5 , d5 = 4 , d6 = 3 , d7 = 2 ; 49 LiquidCrystal lcd ( rs , en , d4 , d5 , d6 , d7 ) ; 50 51 52 byte heart [ 8 ] = { 53 0b00000 , 54 0b01010 , 55 0b11111 , 56 0b11111 , 57 0b11111 , 58 0b01110 , 59 0b00100 , 60 0b00000 61 } ; 62 63 byte smiley [ 8 ] = { 64 0b00000 , 65 0b00000 , 66 0b01010 , 67 0b00000 , 68 0b00000 , 69 0b10001 , 70 0b01110 , 71 0b00000 72 } ; 73 74 byte frownie [ 8 ] = { 75 0b00000 , 76 0b00000 , 77 0b01010 , 78 0b00000 , 79 0b00000 , 80 0b00000 , 81 0b01110 , 82 0b10001 83 } ; 84 85 byte armsDown [ 8 ] = { 86 0b00100 , 87 0b01010 , 88 0b00100 , 89 0b00100 , 90 0b01110 , 91 0b10101 , 92 0b00100 , 93 0b01010 94 } ; 95 96 byte armsUp [ 8 ] = { 97 0b00100 , 98 0b01010 , 99 0b00100 , 100 0b10101 , 101 0b01110 , 102 0b00100 , 103 0b00100 , 104 0b01010 105 } ; 106 107 void setup ( ) { 108 109 lcd . begin ( 16 , 2 ) ; 110 111 112 lcd . createChar ( 0 , heart ) ; 113 114 lcd . createChar ( 1 , smiley ) ; 115 116 lcd . createChar ( 2 , frownie ) ; 117 118 lcd . createChar ( 3 , armsDown ) ; 119 120 lcd . createChar ( 4 , armsUp ) ; 121 122 123 lcd . setCursor ( 0 , 0 ) ; 124 125 126 lcd . print ( “I ” ) ; 127 lcd . write ( byte ( 0 ) ) ; 128 lcd . print ( ” Arduino! ” ) ; 129 lcd . write ( ( byte ) 1 ) ; 130 131 } 132 133 void loop ( ) { 134 135 int sensorReading = analogRead ( A0 ) ; 136 137 int delayTime = map ( sensorReading , 0 , 1023 , 200 , 1000 ) ; 138 139 lcd . setCursor ( 4 , 1 ) ; 140 141 lcd . write ( 3 ) ; 142 delay ( delayTime ) ; 143 lcd . setCursor ( 4 , 1 ) ; 144 145 lcd . write ( 4 ) ; 146 delay ( delayTime ) ; 147 } variable.
[아두이노 기초] LCD 글자 출력하기
목차
1) LCD 란?
2) LCD 문자 출력 준비(라이브러리 설치)
3) LCD로 문자 출력하기
4) LCD 주소가 잘못 입력되어있을 때
연결과정 영상을 보시면 LCD(I2C) 연결과정을 파악하는데 도움이 됩니다.
1) LCD 란?
문가와 기호를 표시할 수 있는 LCD로 보통은 16글자 2줄을 표시할 수 있는 LCD를 많이 사용합니다.
하지만 LCD는 치명적인 단점이 있습니다.
총 16개의 핀이 있다는 것 입니다.
이 16개의 핀이 모두 데이터 핀에 연결되지는 않지만, 상당히 많은 데이터 핀을 소모한다는 것이 단점입니다.
대충봐도 복잡하죠?
그래서 나온 것이 기존의 lcd를 바로 연결하는 것이 아닌 하나의 장치를 통해서 연결하는 방식입니다.
LCD용 12C 통신 모듈입니다
2)-1 LCD 문자 출력 준비(라이브러리 설치)
LCD를 이용하려면 특정 라이브러리를 추가해 주어야 합니다.
LCD와 여러 모듈을 이용하기 위해서는 “liquidcrystal I2C”라는 라이브러리가 필요하다, 그래서 특정 LCD에 맞는 라이브러리를 설치해 줄 필요가 있습니다.
아두이노를 실행하고 스케치 탭 – 라이브러리 포함하기 – 라이브러리 관리를 들어갑니다.
2)-2 LCD 문자 출력 준비(라이브러리 다운받아 설치)
[1] 파일을 다운받는다LiquidCrystal_I2C-1.1.2.zip 0.02MB
[2] 다운받은 파일을 압축해제하여 저장한다 [3] 압축을 푼 파일을 아두이노 라이브러리에 저장한다 (위치 중요!!) [C:\] -> [Program Files (x86)] -> [Arduino] -> [libraries]로 들어가서 저장합니다.3) LCD로 문자 출력하기
GND : 빨간색
VCC (5V) : 검은색
SDA-데이터핀(A4) : 초록색
SCL-클럭핀(A5) : 노란색
#include
#include LiquidCrystal_I2C lcd(0x27,20,4); //lcd(0x27,16열,2행) // 0x27 이 lcd의 고유주소라고 생각하면 됩니다. 보통 0x27이지만 다른 lcd도 있습니다. // 혹시 다른 고유주소라면, 예제프로그램에서 확인한후 똑같이 입력하여 코딩하시면 됩니다. // lcd(0x27,16열,2행) -> 고유주소=0x27 이고 총 16열 2행으로 구성되어 있다는 뜻 입니다. void setup() { lcd.init(); // LCD초기 설정 lcd.backlight(); // LCD초기 설정 lcd.setCursor(0,0); //처음 텍스트가 LCD에 나타날 위치 lcd.setCursor(열, 행) //밑에 사진을 통해 출력시작 위치를 확인할 수 있습니다. lcd.print(“Hello, world!”); lcd.setCursor(3,1); lcd.print(“How are you?”); } void loop() { } 4) LCD 주소가 잘못 입력되어있을 때
lcd가 연결되어있는 상태에서 밑에 코드를 입력한후 업로드합니다
그리고 시리얼 출력을 확인하면 LCD 주소를 알아낼 수 있습니다.
https://playground.arduino.cc/Main/I2cScanner/
// ————————————– // i2c_scanner // // Version 1 // This program (or code that looks like it) // can be found in many places. // For example on the Arduino.cc forum. // The original author is not know. // Version 2, Juni 2012, Using Arduino 1.0.1 // Adapted to be as simple as possible by Arduino.cc user Krodal // Version 3, Feb 26 2013 // V3 by louarnold // Version 4, March 3, 2013, Using Arduino 1.0.3 // by Arduino.cc user Krodal. // Changes by louarnold removed. // Scanning addresses changed from 0…127 to 1…119, // according to the i2c scanner by Nick Gammon // https://www.gammon.com.au/forum/?id=10896 // Version 5, March 28, 2013 // As version 4, but address scans now to 127. // A sensor seems to use address 120. // Version 6, November 27, 2015. // Added waiting for the Leonardo serial communication. // // // This sketch tests the standard 7-bit addresses // Devices with higher bit address might not be seen properly. // #include
void setup() { Wire.begin(); Serial.begin(9600); while (!Serial); // Leonardo: wait for serial monitor Serial.println(” I2C Scanner”); } void loop() { byte error, address; int nDevices; Serial.println(“Scanning…”); nDevices = 0; for(address = 1; address < 127; address++ ) { // The i2c_scanner uses the return value of // the Write.endTransmisstion to see if // a device did acknowledge to the address. Wire.beginTransmission(address); error = Wire.endTransmission(); if (error == 0) { Serial.print("I2C device found at address 0x"); if (address<16) Serial.print("0"); Serial.print(address,HEX); Serial.println(" !"); nDevices++; } else if (error==4) { Serial.print("Unknown error at address 0x"); if (address<16) Serial.print("0"); Serial.println(address,HEX); } } if (nDevices == 0) Serial.println("No I2C devices found "); else Serial.println("done "); delay(5000); // wait 5 seconds for next scan } 참조: I2C LCD로 문자 출력하기 (kocoafab.cc) [Arduino] 아두이노 LCD 16x2 다양한 예제 응용하기 (tistory.com) , [Arduino] [아두이노 중급] 30. I2C LCD 디스플레이(여러 개 사용하기) : 네이버 블로그 (naver.com)
아두이노 강좌 #18 I2C Character LCD 기본 함수 사용 방법 (JHD 162A LiquidCrystal_I2C)
아두이노 I2C CLCD 기초
Arduino Uno I2C 16×2 CLCD 기본 사용법
Character LCD(CLCD) 는 아두이노 텍스트 출력 장치로 사용 할 수 있는 표시 모듈 중 하나 입니다. 아두이노에서 CLCD를 사용하려면 최소 6개 이상의 포트을 사용해야 해서 핀의 소모가 큽니다. 하지만, I2C I/O 확장 모듈이 함께 내장된 캐릭터 LCD는 단 2개의 포트만 사용하여 쉬운 연결 구성이 가능합니다. 본 포스트에서는 I2C 캐릭터 LCD 를 소개하고, I2C CLCD용 라이브러리의 기본 사용법에 대해 설명 합니다.
Character LCD (캐릭터 LCD)
Character LCD 는 아래 왼쪽그림과 같이 텍스트를 출력 전용 LCD 입니다. CLCD는 8×2, 12×2, 16×1 20×2, 20×4, 24×2 등의 사이즈, 글자색, 배경색에 따라 다양한 종류가 있습니다. LCD를 제어하기 위해 우측 블록다이어그램과 같이 많은 핀들이 필요로 합니다.
(좌) Character LCD 사진, (우) CLCD 블록다이어그램
I2C Character LCD
I2C Character LCD 는 기존 Charcter LCD 에 I2C 확장 모듈이 결합된 모듈로 Arduino 의 2포트만 사용하여 LCD 에 텍스트 출력이 가능합니다. I2C 캐릭터 LCD 를 사용하기 위해 아두이노 라이브러리 매니저에서는 LiquidCrystal_I2C 라이브러리를 제공합니다. 이 라이브러리를 사용하면 I2C 통신 코드 없이, 라이브러리에서 정의된 LiquidCrystal 클래스를 사용하여 쉽게 LCD 동작 구현이 가능합니다.
LiquidCrystal_I2C 라이브러리 설치 방법
Arduino IDE 의 메뉴 > 툴 > 라이브러리 관리를 선택 후 라이브러리 매니저에서 LiquidCrystal_I2C 를 검색 후 라이브러리를 설치합니다. 라이브러리 설치 이후에는 아두이노 코드 선언부에 #include
코드를 작성해야 해당 라이브러리의 기능을 사용할 수 있습니다. 라이브러리 주요 지원 함수
LiquidCrystal_I2C 라이브러리에는 많은 기능의 함수를 제공하고 있습니다. 본 포스트에서는 필수적으로 필요한 함수만 다루었습니다. 제가 생각하는 기본적이고 주요한 함수의 리스트는 아래와 같습니다. 아래 2번째줄 이하의 함수들은 모두 LiquidCrystal_I2C 로 생성된 객체의 메서드 함수입니다.
LiquidCrystal_I2C : 클래스 객체 생성
: 클래스 객체 생성 name.begin() : 설정 초기화
: 설정 초기화 clear() : 화면 초기화
: 화면 초기화 backlight() : 백라이트 켜기
: 백라이트 켜기 nobacklight() : 백라이트 끄기
: 백라이트 끄기 cursor() : 커서 밑줄 깜빡임 켜기
: 커서 밑줄 깜빡임 켜기 noCursor() : 커서 밑줄 깜빡임 끄기
: 커서 밑줄 깜빡임 끄기 blink() : 커서 위치 깜빡임 켜기
: 커서 위치 깜빡임 켜기 noBlink() : 커서 위치 깜빡임 끄기
: 커서 위치 깜빡임 끄기 autoscroll() : 오토스크롤 켜기
: 오토스크롤 켜기 noAutoscroll() : 오토스크롤 끄기
: 오토스크롤 끄기 setCursor(column, row) : 커서 위치 이동
: 커서 위치 이동 print(“String”) : 텍스트 쓰기
LiquidCrystal_I2C 클래스 객체 생성 구문은 아래와 같습니다.
Syntax LiquidCrystal_I2C lcd(Addr, Columns, Rows) Parameters lcd : 객체명
: 객체명 Addr : I2C 장치의 주소를 입력
: I2C 장치의 주소를 입력 Columns : LCD 열의 길이
: LCD 열의 길이 Rows : LCD 행의 길이 Returns : 반환 값 없음 Example LiquidCrystal_I2C myLCD(0x27, 16, 2) : 0x27 주소의 케릭터 16×2 LCD 객체 myLCD 를 생성
Hardware
준비물
아래에 소개 할 예제의 구성품은 아래와 같습니다.
Arduino Uno x 1EA
I2C CLCD x 1EA (본 예제에서는 16×2 CLCD 사용, 다른 사이즈 사용도 무관 합니다.)
Jumper Wires
회로도 및 연결
(좌) 회로도, (우) 연결 예시
I2C 장치와 연결하기 위해 18, 19번 포트를 I2C 통신 포트로 사용하였습니다. I2C 통신은 Pull-up 저항으로 버스에 전압을 인가해 주어야 합니다. 해당 모듈에 있는 I2C I/O 확장 모듈의 내부 회로도를 찾지 못해 200% 확신은 못하지만, 동작 상태나 전HIGH 전압이 정상적으로 유지되는 것으로 보아 I2C I/O 확장 모듈에 풀업 저항이 있는 것으로 예상됩니다.
I2C I/O 확장 모듈
I2C 캐릭터 LCD 의 후면 부에는 아래 그림과 같이 검은색 I2C 모듈이 LCD 모듈과 연결 되어 있습니다. 이 모듈에는 아래와 가팅 사용자가 조절 할 수 있는 부분들이 있습니다.
가변저항 : LCD 백라이트의 밝기를 조정
A0, A1, A2 저항 : I2C Device의 주소를 지정
예제1 : I2C Address Scan
I2C 디바이스와 통신하기 위해 I2C 장치에 연결된 주소가 필요합니다. 이 모듈을 구매시 일반적으로 A0, A1, A2 가 Open 상태로 되어 있어 주소가 0x27 로 설정되어 있지만, 제조사에 따라 다른 주소를 사용하거나, 초기 상태가 다를 수 있어 확인 이 필요합니다.
코드
Arduino Uno 보드가 켜지면 I2C 장치 Scan 을 1회 실행 후 무한대기 상태( while(1); )로 진입합니다.
1 2 3 4 5 6 7 8 9 10 11 12 13 14 15 16 17 18 19 20 21 22 23 24 25 26 27 28 29 30 31 32 33 34 35 36 37 38 39 # include < Wire .h > void setup () { Wire . begin (); Serial . begin ( 115200 ); while ( ! Serial ){ ; } delay ( 3000 ); Serial . println ( “Program start…” ); delay ( 3000 ); } void loop () { int statusTransmission; int flag = 1 ; Serial . println ( “I2C Device Scanning….” ); delay ( 100 ); for ( int i = 0 ; i < 127 ; i + + ) { Wire .beginTransmission(i); /* Slave 로 부터 정상적으로 ACK 가 도착하면 Wire.endTransmission() 이 '0'를 반환*/ statusTransmission = Wire .endTransmission(); if (statusTransmission = = 0 ) { Serial . print ( "Connected I2C Device Address : 0x" ); if (i < 16 ) Serial . print ( "0" ); Serial . println (i,HEX); flag = 0 ; } } if (flag = = 1 ){ Serial . println ( "No I2C devices found" ); } Serial . println ( "Program End..." ); while ( 1 ); } Colored by Color Scripter cs I2C 주소 스캔 코드에 대해서는 이전 포스트에 소개 되어있으니 필요하시면 참고해주세요. 링크는 포스트 하단에 있습니다. 실행 결과 예제2 : 커서 깜빡임 켜기/끄기 코드 1초 간격으로 커서 깜빡임을 켜고 끄는 예제입니다. 1 2 3 4 5 6 7 8 9 10 11 12 13 14 15 16 17 18 19 20 21 22 23 24 # include < LiquidCrystal_I2C.h > const int lcdAddress = 0x27 ; // 자신의 Device 의 주소를 입력 const int lcdColumns = 16 ; // 가로 길이 (열) const int lcdRows = 2 ; // 세로 길이 (행) LiquidCrystal_I2C lcd(lcdAddress, lcdColumns, lcdRows); void setup () { lcd.init(); lcd. clear (); lcd.backlight(); lcd. print ( “Cursor On/OFF” ); } void loop () { // 커서 밑줄 끄기 lcd.noCursor(); delay ( 1000 ); // 커서 밑줄 켜기 lcd.cursor(); delay ( 1000 ); } Colored by Color Scripter cs
실행 결과
예제3 : 커서 지정 및 문자 출력
코드
커서를 하단 왼쪽으로 고정하여 숫자 카운트 출력하는 예제입니다.
1 2 3 4 5 6 7 8 9 10 11 12 13 14 15 16 17 18 19 20 21 22 # include < LiquidCrystal_I2C.h > const int lcdAddress = 0x27 ; // 자신의 Device 의 주소를 입력 const int lcdColumns = 16 ; // 가로 길이 (열) const int lcdRows = 2 ; // 세로 길이 (행) LiquidCrystal_I2C lcd(lcdAddress, lcdColumns, lcdRows); void setup () { lcd.init(); lcd. clear (); lcd.backlight(); lcd. print ( “Yongmini-Arduino” ); } void loop () { // 커서 위치를 1행의 첫번째 칸으로 이동 lcd.setCursor( 0 , 1 ); // 초단위 시간을 출력 lcd. print ( millis () / 1000 ); } Colored by Color Scripter cs
실행 결과
예제4 : 오토스크롤
코드
오토스크롤을 켜고 끄는 예제입니다. 오토스크롤을 On/Off 에 따라 오토스크롤에 대한 동작 이외에 setCursor() 함수의 동작이 어떻게 봐뀌는지 이해가 필요합니다.
1 2 3 4 5 6 7 8 9 10 11 12 13 14 15 16 17 18 19 20 21 22 23 24 25 26 27 28 29 30 31 32 33 34 # include < LiquidCrystal_I2C.h > const int lcdAddress = 0x27 ; // 자신의 Device 의 주소를 입력 const int lcdColumns = 16 ; // 가로 길이 (열) const int lcdRows = 2 ; // 세로 길이 (행) LiquidCrystal_I2C lcd(lcdAddress, lcdColumns, lcdRows); void setup () { lcd.init(); lcd. clear (); lcd.backlight(); } void loop () { //커서를 0,0로 이동 lcd.setCursor( 0 , 0 ); //0부터 for ( int thisChar = 0 ; thisChar < 13 ; thisChar + + ) { lcd. print (thisChar); delay ( 300 ); } //커서를 16,1로 이동 lcd.setCursor( 16 , 1 ); //오토스크롤 켜기 lcd.autoscroll(); for ( int thisChar = 0 ; thisChar < 13 ; thisChar + + ) { lcd. print (thisChar); delay ( 300 ); } lcd.noAutoscroll(); lcd. clear (); } Colored by Color Scripter cs 실행 결과
[아두이노] I2C LCD 사용법
I2C 1602 LCD
아두이노 키트를 사면 대부분 I2C LCD 모듈이 포함되어 있습니다. 이번 포스팅에서는 2줄 16글자를 한 화면에 출력할 수 있는 I2C 1602 LCD를 사용해 I2C LCD 사용법을 간단하게 정리해봤습니다.
1. 라이브러리 설치
먼저 LiquidCrystal I2C 라이브러리를 설치해야 합니다. 아래 깃헙 링크에서 ZIP 파일로 다운로드합니다.
Arduino-LiquidCrystal-I2C-library 링크
라이브러리 다운로드
아두이노 IDE를 실행한 뒤 스케치>라이브러리 포함하기>.ZIP 라이브러리 추가를 클릭합니다.
스케치>라이브러리 포함하기>.ZIP 라이브러리 추가
아까 다운로드 받은 Arduino-LiquidCrystal-I2C-library-master.zip 파일을 추가해주시면 됩니다.
라이브러리 추가하기
정상적으로 라이브러리가 추가되었다면, 스케치> 라이브러리 포함하기 아래의 Contributed 라이브러리 영역에서 추가한 라이브러리 이름이 뜹니다.
스케치>라이브러리 포함하기> Contributed 라이브러리
2. 보드 구성
I2C LCD 아두이노 GND GND VCC 5V SDA A4 SCL A5
I2C LCD와 아두이노 핀 연결을 표로 만들었습니다. 중요한 것은 SDA, SCL은 무조건 A4, A5에 연결해주셔야 하는 점입니다. 다른 핀에 연결하면 동작하지 않습니다.
아두이노 보드 구성
3. 코드
라이브러리 자체에서 예제코드를 제공하고 있습니다. 저는 HelloWorld.ino라는 예제 코드를 실행시켜봤습니다. 아래 코드를 복붙 한 뒤 IDE에서 실행합니다.
#include
#include // Set the LCD address to 0x27 for a 16 chars and 2 line display LiquidCrystal_I2C lcd(0x27, 16, 2); void setup() { // initialize the LCD lcd.begin(); // Turn on the blacklight and print a message. lcd.backlight(); lcd.print(“Hello, world!”); } void loop() { // Do nothing here… } 실행 사진
LCD에 잘 실행이 되었습니다 :>
4. 응용 1 – 줄마다 다른 문자 출력하기
첫 번째 줄과 두 번째 줄에 서로 다른 문자를 출력하는 예제입니다.
첫 번째 줄에는 Hello를, 두 번째 줄에는 Bye를 출력하게 만들었습니다.
#include
#include // Set the LCD address to 0x27 for a 16 chars and 2 line display LiquidCrystal_I2C lcd(0x27, 16, 2); void setup() { // initialize the LCD lcd.begin(); // Turn on the blacklight and print a message. lcd.backlight(); //lcd.print(“Hello, world!”); } void loop() { lcd.setCursor(0,0); //첫번째 줄의 0번째 부터 출력 lcd.print(“Hello”); lcd.setCursor(0,1); //두번째 줄의 0번째 부터 력출 lcd.print(“Bye”); } 실행 사진
문자를 0번째가 아니라 n번째부터 출력하고 싶다면 lcd.setCursor(n, 0)으로 변경하시면 됩니다. 아래 사진은 Hello를 lcd의 7번째 열에서 출력하게 만든 것입니다.
실행 사진
5. 응용 2 – 문자열이 오른쪽에서 왼쪽으로 흐르는(스크롤) 연출
간판에서 많이 볼 수 있는 효과 중에 하나가 오른쪽에서 왼쪽으로 글자가 흐르면서 더 많은 정보를 제공하는 것입니다. 라이브러리에서 제공하는 scrollDisplayLeft() 함수를 통해서 쉽게 구현할 수 있습니다.
#include
#include // Set the LCD address to 0x27 for a 16 chars and 2 line display LiquidCrystal_I2C lcd(0x27, 16, 2); void setup() { // initialize the LCD lcd.begin(); // Turn on the blacklight and print a message. lcd.backlight(); } void loop() { char str[] = “Hello, world! “; //26자 맞추기 //char str2[] = “Hello, world! My name is Hello Alpaca” lcd.setCursor(15, 0); // set the cursor to column 15, line 0 for (int pos = 0; pos < 26 ; pos++) { lcd.scrollDisplayLeft(); lcd.print(str[pos]); delay(1000); //wait for 1 seconds } lcd.clear(); } 실행 영상 문자가 26개보다 작다면, space를 통해서 26자리로 맞춰주셔야 합니다. 그리고 문자가 26자가 넘어가면 26자 이후의 글자가 아래와 같이 아랫줄에 출력이 됩니다. 26자리가 넘어가면 생기는 일 라이브러리를 깃헙이 아니라 블로그나 개인 홈페이지에서 받는 걸 싫어하는 편이라서 Arduino-LiquidCrystal-I2C-library를 찾고 세팅 방법을 정리했습니다. 자체적으로 제공하는 기능이 많아서 커스텀하기 편했습니다. 응용 2의 스크롤 기능은 Sunfounder라는 외국 홈페이지에서 참고했습니다. 추가적으로 응용하고 싶은데 자료가 없다면 영어로 검색하셔야 빠르게 자료를 찾으실 수 있을겁니다ㅠ_ㅜ 잘못된 내용이 있다면 언제든지 댓글이나 메일로 알려주시면 감사하겠습니다. 이 포스팅이 도움이 되었다면 공감 부탁드립니다. 궁금한 점은 언제든지 댓글 남겨주시면 답변해드리겠습니다:D
[아두이노 LCD 타이머] 아두이노 LCD 화면 제어 _ EP5
lcd.begin(); LCD를 사용을 시작
lcd.display(); LCD에 내용을 표시
lcd.noDisplay(); LCD에 내용을 숨김
lcd.setCursor(col,row); row, col의 좌표로 커서를 위치
lcd.cursor(); LCD에 커서를 표시
lcd.noCursor(); LCD에 커서를 숨김
lcd.home(); 커서의 위치를 0,0으로 이동
lcd.blink(); 커서를 깜빡임
lcd.noBlink(); 커서를 깜빡이지 않음
lcd.backlight(); LCD backlight을 킴
lcd.noBacklight(); LCD backlight를 끔
lcd.write(val); LCD 화면에 val 출력(아스키 코드 입력 시에는 아스키 코드에 해당하는 문자 출력)
lcd.print(val); LCD 화면에 val 출력
lcd.clear(); LCD 화면의 모든 내용 지움
lcd.scrollDisplayRight(); 내용을 우측으로 1칸 이동
lcd.scrollDisplayLeft(); 내용을 좌측으로 1칸 이동
키워드에 대한 정보 아두 이노 lcd 예제
다음은 Bing에서 아두 이노 lcd 예제 주제에 대한 검색 결과입니다. 필요한 경우 더 읽을 수 있습니다.
이 기사는 인터넷의 다양한 출처에서 편집되었습니다. 이 기사가 유용했기를 바랍니다. 이 기사가 유용하다고 생각되면 공유하십시오. 매우 감사합니다!
사람들이 주제에 대해 자주 검색하는 키워드 아두이노 예제 12 LCD에 글자 표시하기
- 아두이노
- 아두이노 무료 강의
- 아두이노 무료 강좌
- 아두이노 강좌
- 아두이노 강의
- 아두이노 LCD
- 코딩런
- 코에커플
아두이노 #예제 #12 #LCD에 #글자 #표시하기
YouTube에서 아두 이노 lcd 예제 주제의 다른 동영상 보기
주제에 대한 기사를 시청해 주셔서 감사합니다 아두이노 예제 12 LCD에 글자 표시하기 | 아두 이노 lcd 예제, 이 기사가 유용하다고 생각되면 공유하십시오, 매우 감사합니다.